DISASSEMBLY
Removal / installation · Vehicles built Sep 2011 – Dec 2011
| 1.
REMOVE STARTER DUST PROTECTOR |
 |
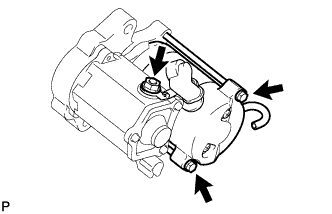
Remove the 2 dust protectors.
| 2.
REMOVE STARTER YOKE ASSEMBLY |
|
- Remove the nut and disconnect the lead wire from terminal C.
Remove the 2 through bolts.
Pull out the starter yoke with the armature from the magnet starter switch.
Remove the O-ring from the starter yoke.
| 3.
REMOVE STARTER CLUTCH SUB-ASSEMBLY |
|
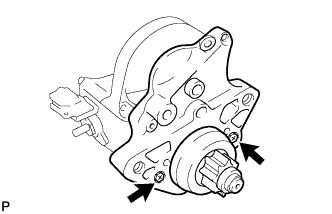
- Remove the 2 bolts.
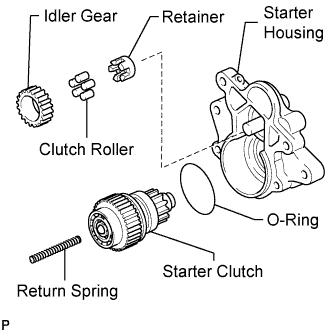
- Remove the return spring, idler gear, clutch roller, retainer, O-ring and starter clutch from the starter housing.
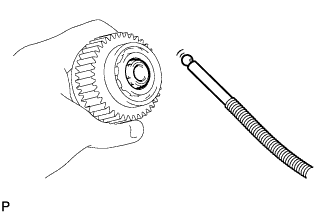
- Using a magnetic finger, remove the steel ball from the clutch shaft hole.
| 4.
REMOVE STARTER BRUSH HOLDER ASSEMBLY |
|
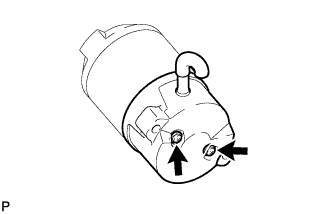
- Remove the 2 screws, 2 O-rings and starter commutator end frame from the starter yoke.
Remove the O-ring from the starter yoke.
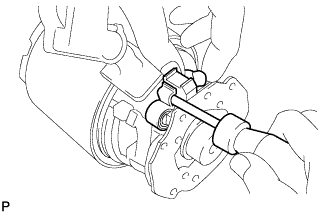
- Using a screwdriver, hold the spring back and disconnect the brush from the brush holder.
Disconnect the 4 brushes and remove the brush holder.
- NOTICE:
- Check that the positive (+) lead wires are not grounded.
| 5.
REMOVE STARTER ARMATURE ASSEMBLY |
|
Remove the starter armature from the starter yoke.