Home › Engine / Hybrid / EV System › 1GR-FE LUBRICATION › OIL PUMPREMOVAL
Removal / installation · Vehicles built Sep 2011 – Dec 2011
Versions by build date: Sep 2011 – Dec 2011 from Jan 2012
1.
REMOVE ENGINE ASSEMBLY
(Click here )
2.
REMOVE IGNITION COIL ASSEMBLY
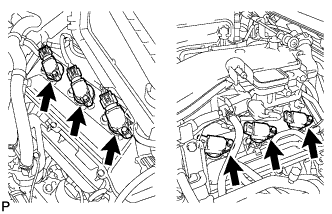
Disconnect the 6 ignition coil connectors.
Remove the 6 bolts and 6 ignition coils.
3.
REMOVE SPARK PLUG
Remove the 6 spark plugs.
4.
REMOVE VVT SENSOR (for Bank 1)
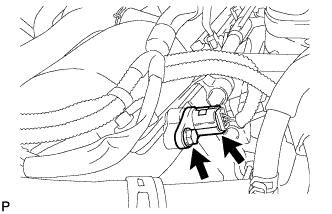
Disconnect the sensor connector. Remove the bolt and sensor.
5.
REMOVE VVT SENSOR (for Bank 2)
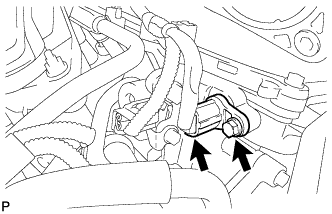
Disconnect the sensor connector. Remove the bolt and sensor.
6.
REMOVE CAMSHAFT TIMING OIL CONTROL VALVE ASSEMBLY LH
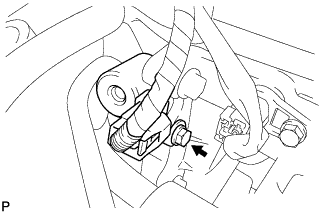
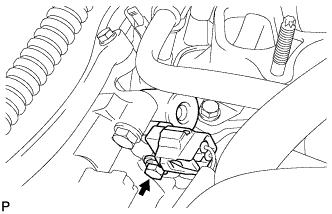
Disconnect the oil control valve connector.
Remove the bolt and oil control valve.
Remove the O-ring from the oil control valve.
7.
REMOVE CAMSHAFT TIMING OIL CONTROL VALVE ASSEMBLY RH
Disconnect the oil control valve connector.
Remove the bolt and oil control valve.
Remove the O-ring from the oil control valve.
8.
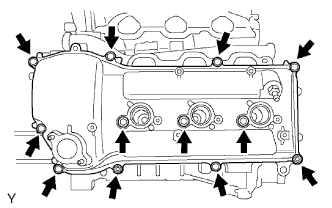
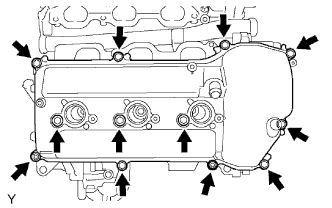
REMOVE CYLINDER HEAD COVER SUB-ASSEMBLY LH
Remove the 10 bolts, 3 seal washers, 2 nuts, cylinder head cover and gasket.
9.
REMOVE CYLINDER HEAD COVER SUB-ASSEMBLY
Remove the 10 bolts, 3 seal washers, 2 nuts, cylinder head cover and gasket.
10.
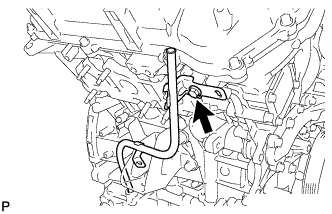
REMOVE ENGINE OIL LEVEL DIPSTICK GUIDE
Remove the bolt and dipstick guide. Remove the O-ring from the dipstick guide.
11.
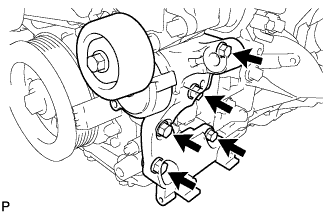
REMOVE V-RIBBED BELT TENSIONER ASSEMBLY
Remove the 5 bolts and V-ribbed belt tensioner.
12.
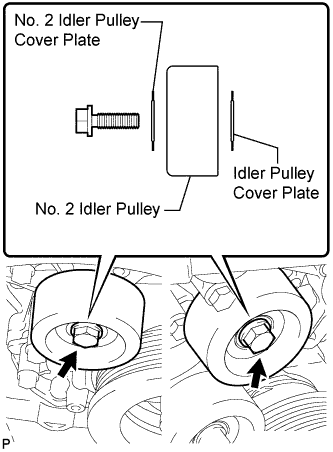
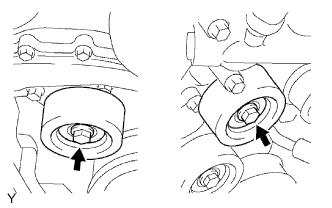
REMOVE NO. 2 IDLER PULLEY SUB-ASSEMBLY
w/ Pulley Cover Plate: Remove the 2 bolts, 2 No. 2 idler pulley cover plate, 2 idler pulley and 2 idler pulley cover plate.
w/o Pulley Cover Plate: Remove the 2 bolts and 2 No. 2 idler pulleys.
13.
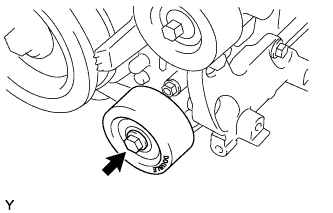
REMOVE NO. 1 IDLER PULLEY SUB-ASSEMBLY
Remove the bolt and No. 1 idler pulley.
14.
REMOVE CRANKSHAFT PULLEY
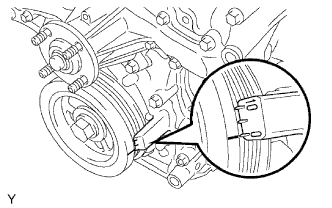
Turn the crankshaft pulley, and align the notch with the timing mark "0" of the timing chain cover.
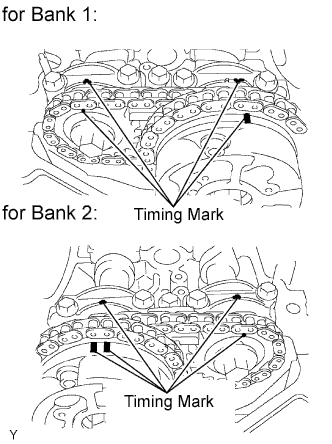
Check that the timing marks of the camshaft timing gears and sprockets are aligned with the timing marks of the bearing caps as shown in the illustration.
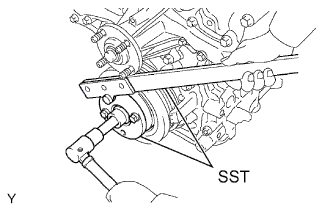
Using SST, hold the crankshaft pulley and loosen the pulley set bolt.
SST
09213-54015
(91651-60855)
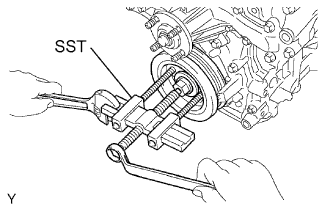
Using the pulley set bolt and SST, remove the crankshaft pulley.
SST
09950-50013
(09951-05010, 09952-05010, 09953-05020, 09954-05030)
15.
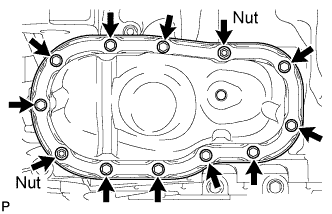
REMOVE NO. 2 OIL PAN SUB-ASSEMBLY
Remove the 10 bolts and 2 nuts.
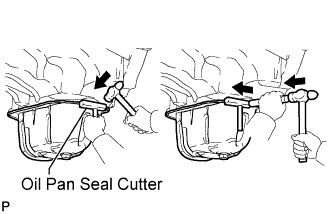
Insert the blade of an oil pan seal cutter between the oil pans. Cut through the applied sealer and remove the No. 2 oil pan.
16.
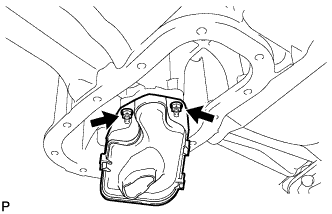
REMOVE OIL STRAINER SUB-ASSEMBLY
Remove the 2 nuts, oil strainer and gasket.
17.
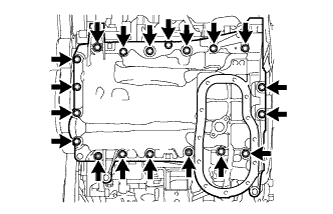
REMOVE OIL PAN SUB-ASSEMBLY
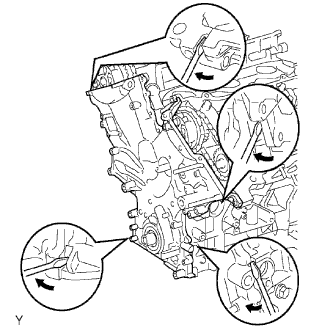
Remove the 17 bolts and 2 nuts.
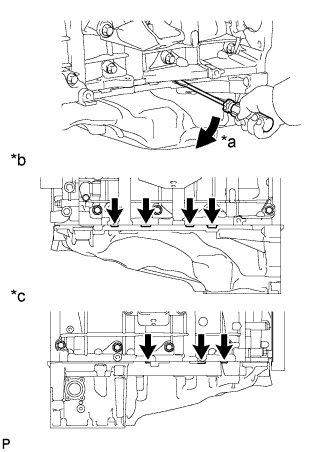
Using a screwdriver, remove the oil pan by prying between the oil pan and cylinder block as shown in the illustration.
Text in Illustration
*a
Pry
*b
LH Side
*c
RH Side
NOTICE:
Be careful not to damage the contact surfaces of the cylinder block and oil pan.
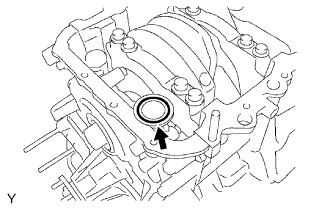
Remove the O-ring from the timing chain cover.
18.
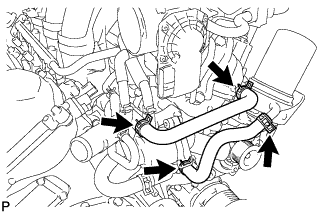
DISCONNECT NO. 2 OIL COOLER HOSE
Remove the oil cooler hose.
19.
DISCONNECT OIL COOLER HOSE
Remove the oil cooler hose.
20.
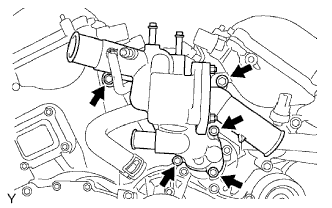
REMOVE WATER INLET HOUSING
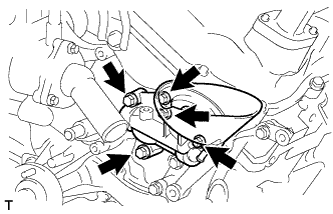
Remove the 5 bolts and water inlet housing. Remove the O-ring and gasket from the water outlet pipe and water pump.
21.
REMOVE OIL FILTER BRACKET SUB-ASSEMBLY
Remove the 3 bolts, 2 nuts, oil filter bracket and O-ring.
22.
REMOVE TIMING CHAIN COVER SUB-ASSEMBLY
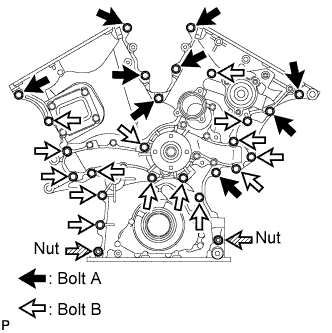
Remove the 24 bolts labeled A and B, and the 2 nuts.
Remove the timing chain cover by prying between the timing chain cover and cylinder head or cylinder block with a screwdriver.
NOTICE:
Be careful not to damage the contact surfaces of the timing chain cover, cylinder block and cylinder head.
Remove the O-ring from the cylinder head LH side.
23.
REMOVE FRONT CRANKSHAFT OIL SEAL
If the timing chain case is removed:
Using a screwdriver and wooden block, pry out the oil seal.
HINT:
Tape the screwdriver tip before use.
NOTICE:
Do not damage the surface of the oil seal press fit hole and crankshaft.