Circuit diagnosis · Vehicles built Sep 2011 – Dec 2011
Versions by build date: Sep 2011 – Dec 2011from Jan 2012
DESCRIPTION
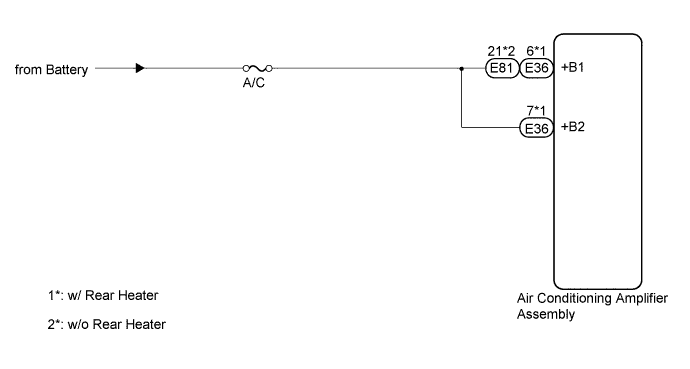
The back-up power source circuit for the air conditioning amplifier assembly is shown below. Power is supplied even when turning the engine switch off and is used for diagnostic trouble code memory, etc.
WIRING DIAGRAM
INSPECTION PROCEDURE
1. INSPECT FUSE (A/C)
Remove the A/C fuse from the cowl side junction block LH.
Measure the resistance according to the value(s) in the table below.
Standard Resistance:
Tester Connection
Condition
Specified Condition
A/C fuse
Always
Below 1 Ω
NG
REPLACE FUSE
OK
2. CHECK HARNESS AND CONNECTOR (AIR CONDITIONING AMPLIFIER - BATTERY)
w/ Rear Heater
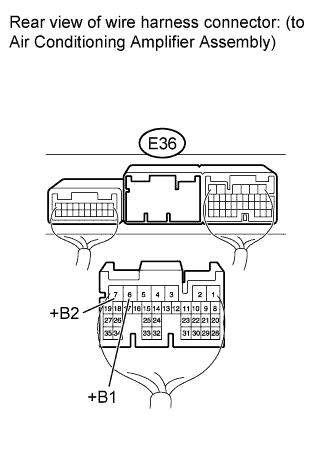
Disconnect the E36 amplifier connector.
Measure the voltage according to the value(s) in the table below.
Standard Voltage:
Tester Connection
Condition
Specified Condition
E36-6 (+B1) - Body ground
Always
11 to 14 V
E36-7 (+B2) - Body ground
w/o Rear Heater
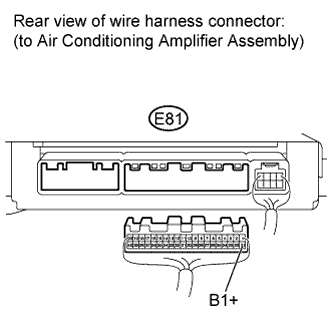
Disconnect the E81amplifier connector.
Measure the voltage according to the value(s) in the table below.
Standard Voltage:
Tester Connection
Condition
Specified Condition
E81-21 (+B1) - Body ground
Always
11 to 14 V
NG
REPAIR OR REPLACE HARNESS OR CONNECTOR
OK
REPLACE AIR CONDITIONING AMPLIFIER ASSEMBLY (Click here)