Removal / installation · Vehicles built Sep 2011 – Dec 2011
1.
REPLACE INTAKE VALVE GUIDE BUSH
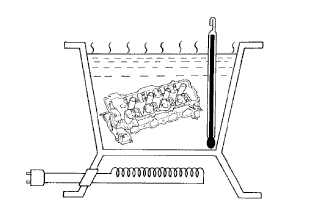
Gradually heat the cylinder head to approximately 80 to 100°C (176 to 212°F).
Place the cylinder head on wooden blocks.
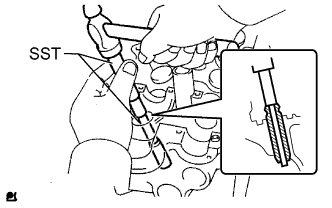
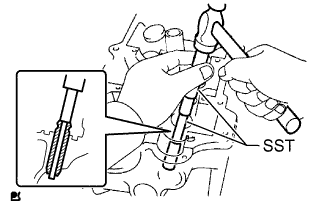
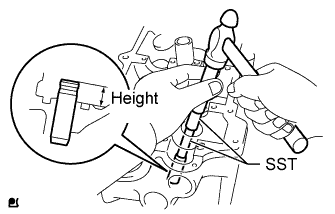
Using SST and a hammer, tap out the guide bush.
SST
09201-01055 09950-70010
(09951-07100)
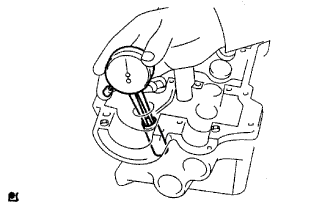
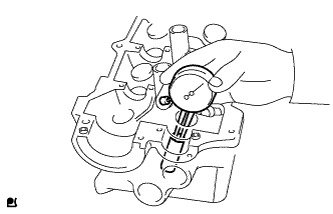
Using a caliper gauge, measure the bush bore diameter of the cylinder head.
Standard cylinder bore diameter:
10.285 to 10.306 mm (0.405 to 0.406 in.)
If the bush bore diameter of the cylinder head is between 10.285 to 10.356 mm (0.405 to 0.408 in.), proceed to the next step. If the bush bore diameter of the cylinder head is more than 10.356 mm (0.408 in.), replace the cylinder head.
Select a new guide bush (STD or O/S 0.05), and measure its diameter.
Machine the bush bore diameter of the cylinder head side to the diameter of the selected guide bush.
Bush Bore Diameter:
Bush Size
Specified Condition
Use STD
10.333 to 10.344 mm (0.4068 to 0.4072 in.)
Use O/S 0.05
10.383 to 10.394 mm (0.4087 to 0.4092 in.)
HINT:
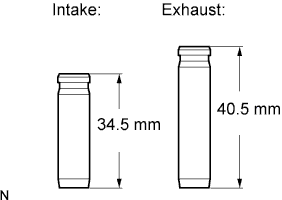
Different bushes are used for the intake and exhaust.
Standard Bush Length:
Item
Specified Condition
Intake
34.5 mm (1.36 in.)
Exhaust
40.5 mm (1.59 in.)
Gradually heat the cylinder head to approximately 80 to 100°C (176 to 212°F).
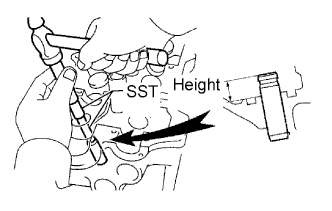
Using SST and a hammer, tap in a new guide bush to the specified protrusion height.
SST
09201-01055 09950-70010
(09951-07100)
Standard protrusion height:
9.2 to 9.8 mm (0.362 to 0.386 in.)
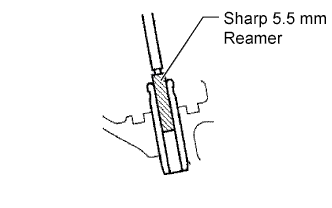
Using a sharp 5.5 mm reamer, ream the guide bush to obtain the standard clearance between the guide bush and valve stem.
Standard oil clearance:
0.025 to 0.060 mm (0.000984 to 0.00236 in.)
2.
REPLACE EXHAUST VALVE GUIDE BUSH
Gradually heat the cylinder head to approximately 80 to 100°C (176 to 212°F).
Place the cylinder head on wooden blocks.
Using SST and a hammer, tap out the guide bush.
SST
09201-01055 09950-70010
(09951-07100)
Using a caliper gauge, measure the bush bore diameter of the cylinder head.
Standard cylinder bore diameter:
10.285 to 10.306 mm (0.405 to 0.406 in.)
If the bush bore diameter of the cylinder head is between 10.285 to 10.356 mm (0.405 to 0.408 in.), proceed to the next step. If the bush bore diameter of the cylinder head is more than 10.356 mm (0.408 in.), replace the cylinder head.
Select a new guide bush (STD or O/S 0.05), and measure its diameter.
Machine the bush bore diameter of the cylinder head side to the diameter of the selected guide bush.
Bush Bore Diameter:
Bush Size
Specified Condition
Use STD
10.333 to 10.344 mm (0.4068 to 0.4072 in.)
Use O/S 0.05
10.383 to 10.394 mm (0.4087 to 0.4092 in.)
HINT:
Different bushes are used for the intake and exhaust.
Standard Bush Length:
Item
Specified Condition
Intake
34.5 mm (1.36 in.)
Exhaust
40.5 mm (1.59 in.)
Gradually heat the cylinder head to approximately 80 to 100°C (176 to 212°F).
Using SST and a hammer, tap in a new guide bush to the specified protrusion height.
SST
09201-01055 09950-70010
(09951-07100)
Standard protrusion height:
8.2 to 8.8 mm (0.323 to 0.346 in.)
Using a sharp 5.5 mm reamer, ream the guide bush to obtain the standard clearance between the guide bush and valve stem.
Standard oil clearance:
0.030 to 0.065 mm (0.00118 to 0.00256 in.)
3.
REPLACE SPARK PLUG TUBE
HINT:
When using a new cylinder head, the spark plug tubes must be replaced.
Remove the spark plug tubes.
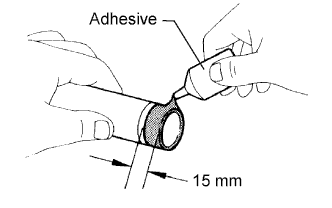
Apply adhesive to the end of a new spark plug tube.
Standard adhesive width:
15 mm (0.591 in.)
Adhesive:
Toyota Genuine Adhesive 1324, Three Bond 1324 or equivalent.
NOTICE:
Install the spark plug tube within 3 minutes after applying adhesive.
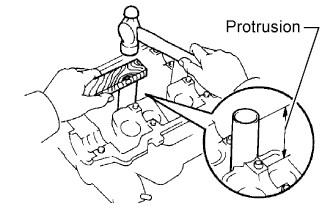
Using a wooden block and hammer, tap in the spark plug tube until it is protruding 40.9 to 42.1 mm (1.61 to 1.66 in.) from the camshaft bearing cap installation surface of the cylinder head.
Standard protrusion:
40.9 to 42.1 mm (1.61 to 1.66 in.)
NOTICE:
To avoid tapping in a new spark plug tube too far, measure the protrusion height while tapping it.
Be careful not to deform the spark plug tube.
Be careful not to expose the seal to coolant for at least 1 hour after installing it.
4.
REPLACE RING PIN
NOTICE:
It is not necessary to remove the ring pin unless it is being replaced.
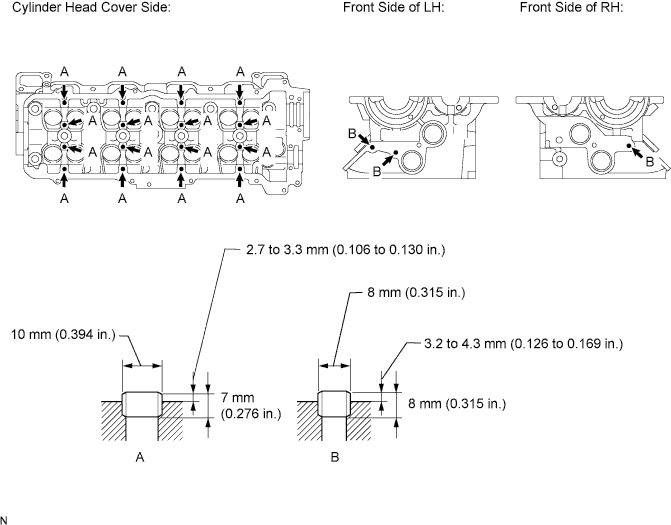
Remove the ring pin.
Using a plastic-faced hammer, tap in new ring pins until they stop.