REPLACEMENT
Removal / installation · Vehicles built from Sep 2011
| 1. REMOVE PROPELLER SHAFT ASSEMBLY |

Remove the propeller shaft assembly (Click here).
| 2. REMOVE REAR OUTPUT SHAFT COMPANION FLANGE SUB-ASSEMBLY |
Using SST and a hammer, release the staked part of the nut.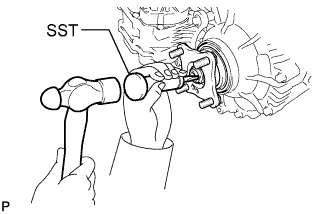

- SST
- 09930-00010
(09931-00010, 09931-00020)
- NOTICE:
- Be sure to use SST with the tapered surface facing the shaft.
- Do not grind the tip of SST with a grinder, etc.
- Completely loosen the staked part of the nut when removing it.
- Do not damage the threads of the rear transfer output shaft.
- Be sure to use SST with the tapered surface facing the shaft.
Using SST to hold the companion flange, remove the lock nut.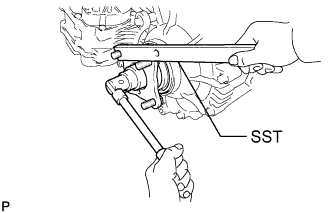
- SST
- 09330-00021
Using SST, remove the companion flange.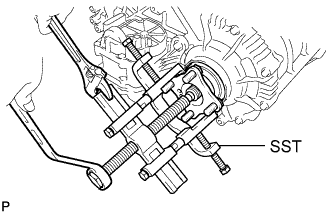
- SST
- 09950-40011
(09951-04020, 09952-04010, 09953-04030, 09954-04010, 09955-04051, 09957-04010, 09958-04011)
Remove the O-ring from the companion flange.
| 3. REMOVE TRANSFER CASE REAR OIL SEAL |
Using SST, tap out the oil seal.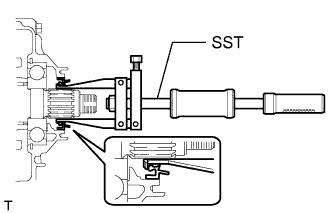
- SST
- 09308-00010
- NOTICE:
- Be careful not to damage the oil seal and rear transfer case contact surface.
| 4. INSTALL TRANSFER CASE REAR OIL SEAL |
Apply transfer oil to the spline of the output shaft.
Using SST and a hammer, tap in a new oil seal until its surface is flush with the housing upper surface.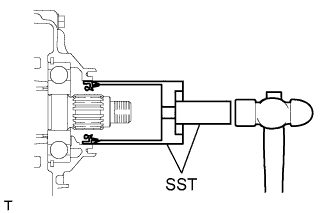
- SST
- 09649-17010
09950-70010 (09951-07150)
| 5. INSTALL REAR OUTPUT SHAFT COMPANION FLANGE SUB-ASSEMBLY |
Install the companion flange onto the output shaft.
Using SST to hold the companion flange, install a new O-ring and a new companion flange lock nut.
- SST
- 09330-00021
- Torque:
- 127 N*m{ 1299 kgf*cm , 94 ft.*lbf }
Using a chisel and hammer, stake the companion flange lock nut.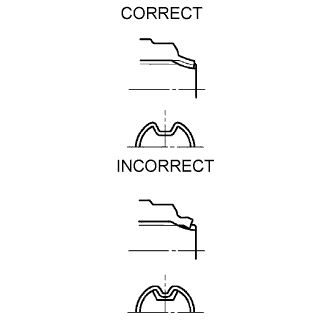
| 6. INSTALL PROPELLER SHAFT ASSEMBLY |
Install the propeller shaft assembly (Click here).