2011-2013 Land Cruiser · Service Manual Engine / Hybrid / EV System

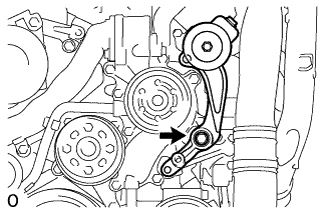
INSTALLATION

Removal / installation · Vehicles built Sep 2011 – Dec 2011

Versions by build date: Sep 2011 – Dec 2011 from Jan 2012


1. INSTALL COMPRESSOR BRACKET

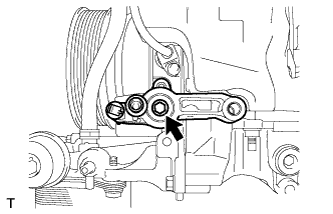
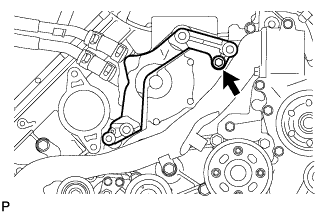
  1. A177077
    Install the compressor bracket with the bolt.

    Torque:
    21 N*m{ 214 kgf*cm , 15 ft.*lbf }


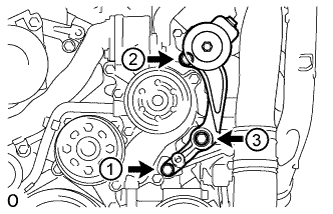
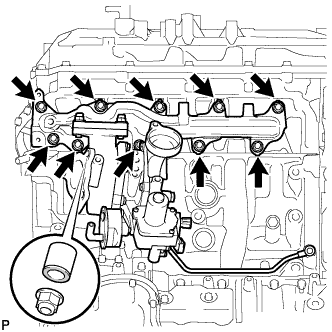
2. INSTALL V-RIBBED BELT TENSIONER ASSEMBLY

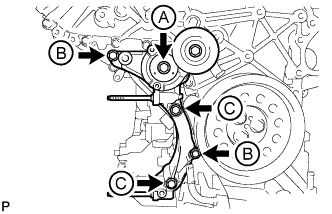
  1. A177414E01
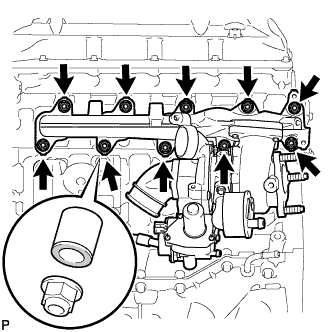
    Install the V-ribbed belt tensioner with the 5 bolts.

    Torque:
    for bolt A and C:
    43 N*m{ 438 kgf*cm , 32 ft.*lbf }
    for bolt B:
    21 N*m{ 214 kgf*cm , 15 ft.*lbf }

    Bolt Length 
    Item
    Quantity
    Length
    Bolt A
    1
    116 mm (4.57 in.)
    Bolt B
    2
    40 mm (1.58 in.)
    Bolt C
    2
    95 mm (3.74 in.)

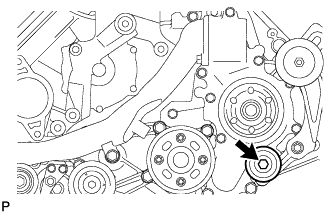
  1. Install the No. 1 idler pulley with the bolt.

    Torque:
    43 N*m{ 438 kgf*cm , 32 ft.*lbf }

  1. Install the V-ribbed belt tensioner bracket with the 3 bolts.

    Torque:
    10 N*m{ 102 kgf*cm , 7 ft.*lbf }


3. INSTALL STIFFENER INSULATOR RH (w/ Intercooler)
  1. Install the stiffener insulator RH with the 2 bolts.

    Torque:
    10 N*m{ 102 kgf*cm , 7 ft.*lbf }


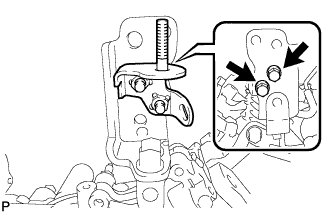
4. INSTALL OIL PRESSURE REGULATOR ASSEMBLY

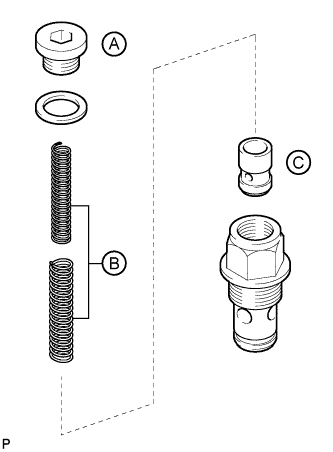
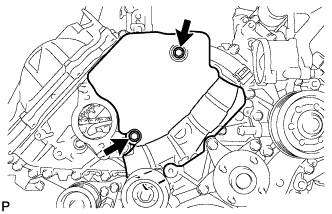
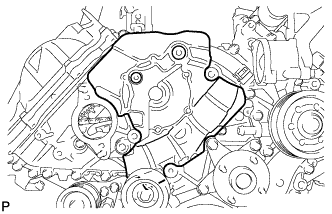
  1. A177216E01
    Hold the oil pressure regulator body in a vise between aluminum plates.

  1. Apply a light coat of engine oil to the oil pump relief valve labeled C.

  1. Install the oil pump relief valve labeled C to the oil pressure regulator body.

  1. Install the 2 springs labeled B to the oil pressure regulator body.

  1. Using a 10 mm hexagon wrench, install a new gasket and the oil pump relief valve plug labeled A.

    Torque:
    50 N*m{ 510 kgf*cm , 37 ft.*lbf }

  1. Apply a light coat of engine oil to a new O-ring, and install it to the oil pressure regulator body.

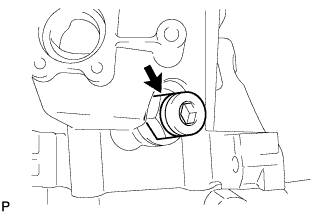
  1. A177215
    Using a 26 mm wrench, install a new gasket and the oil pressure regulator.

    Torque:
    86 N*m{ 877 kgf*cm , 63 ft.*lbf }


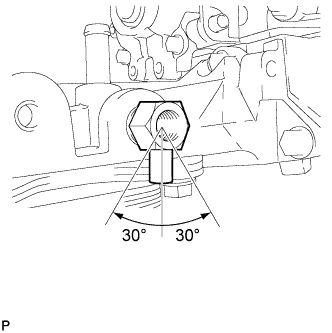
5. INSTALL OIL FILTER BRACKET DRAIN COCK ASSEMBLY

  1. A181686E01
    Install the drain cock.

    Torque:
    20 N*m{ 204 kgf*cm , 15 ft.*lbf }

  1. Using a 17 mm wrench, rotate the drain cock clockwise (360°) and align the position of the drain hole so that it is within the range shown in the illustration after tightening the drain cock to the specified torque.

    NOTICE:
    1. As the oil filter bracket may be damaged, the maximum tightening torque should be 80 N*m (816 kgf*cm, 59 ft.*lbf) or less.
    2. Do not rotate the drain cock more than 1 revolution (360°) after tightening the drain cock with the specified torque.
    3. Do not expose the drain cock to coolant within 1 hour after installation.

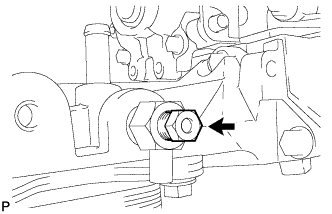
  1. A177208
    Install the oil filter drain cock plug.

    Torque:
    13 N*m{ 130 kgf*cm , 9 ft.*lbf }


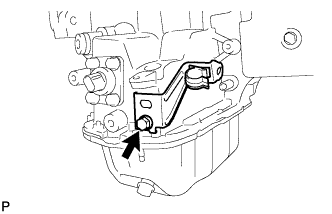
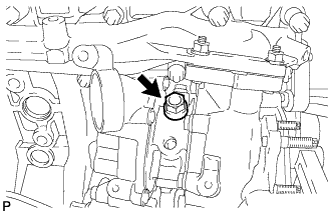
6. INSTALL OIL TANK BRACKET

  1. A177217
    Install the oil tank bracket with the bolt.

    Torque:
    10 N*m{ 102 kgf*cm , 7 ft.*lbf }


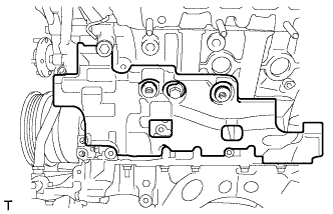
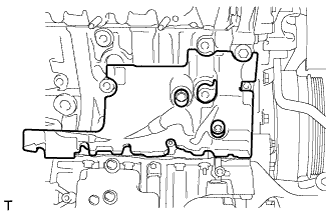
7. INSTALL NO. 2 CYLINDER BLOCK INSULATOR

A177086

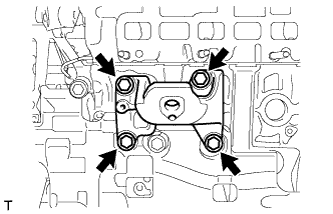
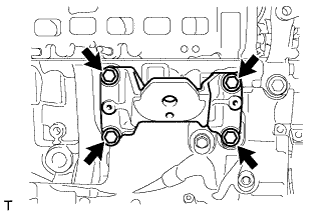
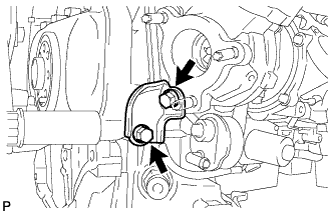
8. INSTALL ENGINE MOUNTING BRACKET LH

  1. A177084
    Install the engine mounting bracket LH with the 4 bolts.

    Torque:
    80 N*m{ 816 kgf*cm , 59 ft.*lbf }


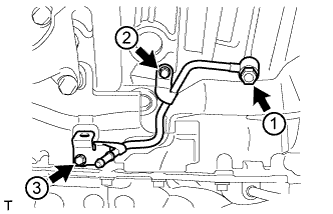
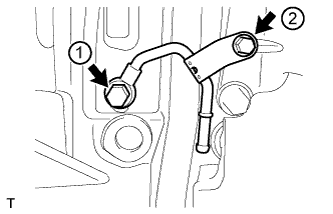
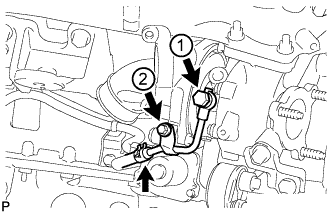
9. INSTALL NO. 2 WATER BY-PASS PIPE SUB-ASSEMBLY

  1. A177082E01
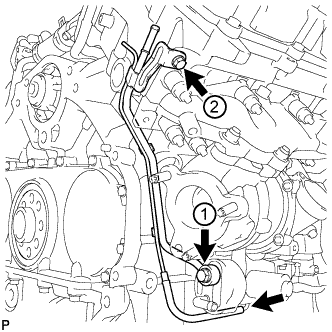
    Temporarily install a new gasket and No. 2 water by-pass pipe with the union bolt and 2 bolts.

  1. Tighten the union bolt and 2 bolts of the No. 2 water by-pass pipe in the order shown in the illustration.

    Torque:
    for union bolt:
    35 N*m{ 357 kgf*cm , 26 ft.*lbf }
    for bolt:
    10 N*m{ 102 kgf*cm , 7 ft.*lbf }


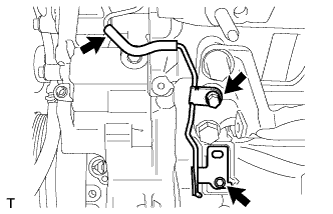
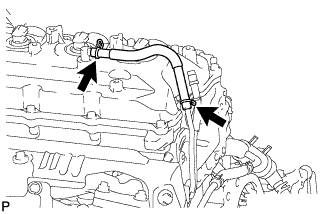
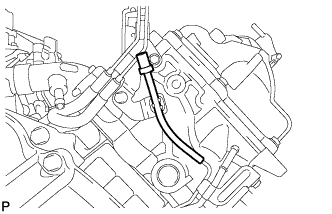
10. INSTALL NO. 3 VACUUM TRANSMITTING PIPE SUB-ASSEMBLY

  1. A177080
    Install the No. 3 vacuum transmitting pipe with the 2 bolts.

    Torque:
    6.0 N*m{ 61 kgf*cm , 53 in.*lbf }

  1. w/ Intercooler:
    Connect the vacuum hose.


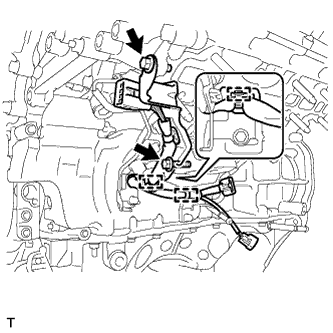
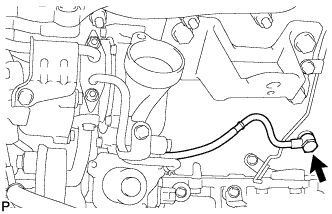
11. INSTALL TURBOCHARGER WIRE

  1. A177078
    Install the turbocharger wire with the 2 bolts.

    Torque:
    21 N*m{ 214 kgf*cm , 15 ft.*lbf }

  1. Attach the 3 wire harness clamps.


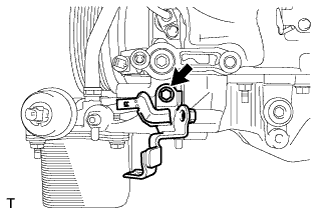
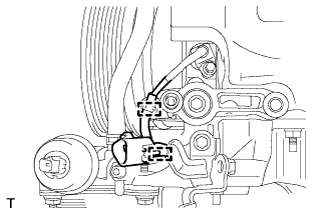
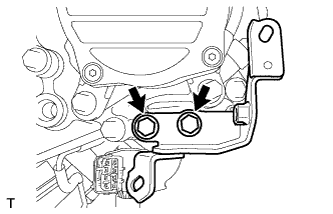
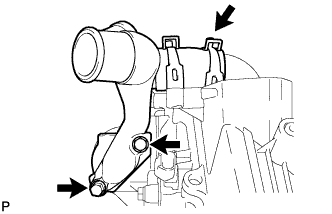
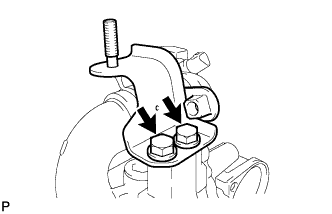
12. INSTALL NO. 2 INTAKE AIR CONNECTOR BRACKET

  1. A177076
    Install the No. 2 intake air connector bracket with the bolt.

    Torque:
    21 N*m{ 214 kgf*cm , 15 ft.*lbf }

  1. A179111
    Attach the 2 wire clamps.


13. INSTALL NO. 1 CYLINDER BLOCK INSULATOR

A177085

14. INSTALL ENGINE MOUNTING BRACKET RH

  1. A177083
    Install the engine mounting bracket RH with the 4 bolts.

    Torque:
    80 N*m{ 816 kgf*cm , 59 ft.*lbf }


15. INSTALL NO. 4 VACUUM TRANSMITTING PIPE SUB-ASSEMBLY (w/ Intercooler)

  1. A177079
    Install the No. 4 vacuum transmitting pipe with the 2 bolts.

    Torque:
    6.0 N*m{ 61 kgf*cm , 53 in.*lbf }

  1. Connect the vacuum hose.


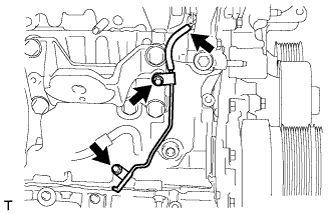
16. INSTALL NO. 1 WATER BY-PASS PIPE SUB-ASSEMBLY
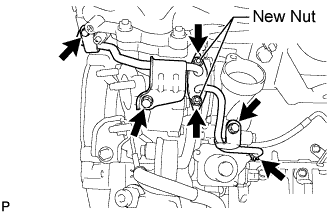
  1. Temporarily install a new gasket and the No. 1 water by-pass pipe with the union bolt and bolt.

  1. A177081E01
    Tighten the union bolt and bolt of the No. 1 water by-pass pipe in the order shown in the illustration.

    Torque:
    for union bolt:
    35 N*m{ 357 kgf*cm , 26 ft.*lbf }
    for bolt:
    10 N*m{ 102 kgf*cm , 7 ft.*lbf }


17. INSTALL AIR TUBE SUPPORT

  1. A177074
    Install the air tube support with the 2 bolts.

    Torque:
    21 N*m{ 214 kgf*cm , 15 ft.*lbf }


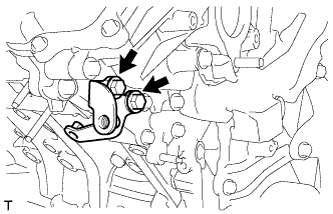
18. INSTALL NO. 1 INTAKE AIR CONNECTOR BRACKET

  1. A177073
    Install the No. 1 intake air connector bracket with the 2 bolts.

    Torque:
    21 N*m{ 214 kgf*cm , 15 ft.*lbf }


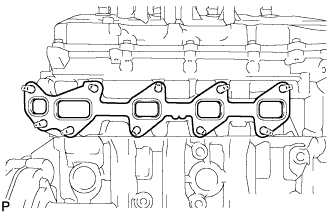
19. INSTALL REAR CYLINDER HEAD PLATE LH (w/o EGR System)

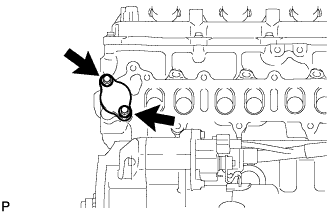
  1. A179125
    Install a new gasket and the rear cylinder head plate LH with the 2 bolts.

    Torque:
    29 N*m{ 296 kgf*cm , 21 ft.*lbf }

    HINT:
    The gasket claw should face toward the plate.


20. INSTALL REAR CYLINDER HEAD PLATE RH (w/o EGR System)

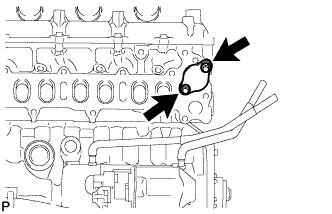
  1. A179124
    Install a new gasket and the rear cylinder head plate RH with the 2 bolts.

    Torque:
    29 N*m{ 296 kgf*cm , 21 ft.*lbf }

    HINT:
    The gasket claw should face toward the plate.


21. INSTALL CYLINDER HEAD COVER SILENCER LH (w/ Intercooler)

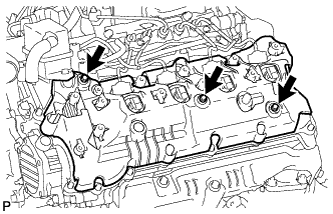
  1. A174975
    Install the cylinder head cover silencer with the 3 bolts.

    Torque:
    5.0 N*m{ 51 kgf*cm , 44 in.*lbf }


22. INSTALL CYLINDER HEAD COVER SILENCER RH (w/ Intercooler)

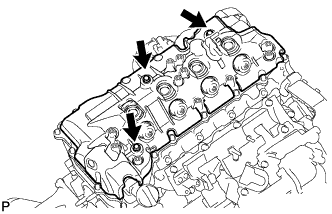
  1. A174974
    Install the cylinder head cover silencer with the 3 bolts.

    Torque:
    5.0 N*m{ 51 kgf*cm , 44 in.*lbf }


23. INSTALL NO. 1 VACUUM TRANSMITTING PIPE SUB-ASSEMBLY

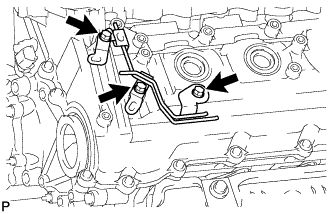
  1. A264102
    Install the vacuum transmitting pipe with the 3 bolts.

    Torque:
    6.0 N*m{ 61 kgf*cm , 53 in.*lbf }

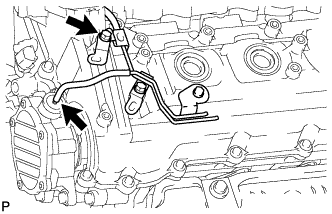
  1. A264755
    w/ Intercooler:
    Connect the 2 vacuum hoses.


24. INSTALL NO. 1 VACUUM SWITCHING VALVE ASSEMBLY (w/ Intercooler)

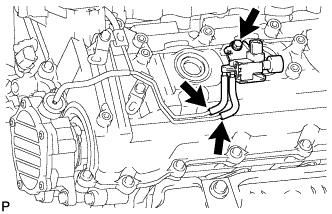
  1. A174969
    Install vacuum switching valve with the bolt.

    Torque:
    6.0 N*m{ 61 kgf*cm , 53 in.*lbf }

  1. Connect the 2 vacuum hoses.


25. INSTALL FAN BRACKET SUB-ASSEMBLY

  1. A174820E01
    Install the fan bracket with the 4 bolts.

    Torque:
    21 N*m{ 214 kgf*cm , 15 ft.*lbf }

    Bolt Length 
    Item
    Length
    Bolt A
    30 mm (1.18 in.)
    Bolt B
    80 mm (3.15 in.)


26. INSTALL NO. 2 IDLER PULLEY BRACKET (w/ Viscous Heater)

  1. A180290
    Temporarily install the No. 2 idler pulley bracket with the bolt.

  1. Temporarily install the 2 bolts to the No. 2 idler pulley bracket bolt hole.

  1. A180291E01
    Uniformly tighten the 3 bolts of the No. 2 idler pulley bracket in the order shown in the illustration.

    Torque:
    49 N*m{ 495 kgf*cm , 36 ft.*lbf }


27. INSTALL NO. 2 IDLER PULLEY (w/ Viscous Heater)

  1. A177433
    Install the collar, No. 2 idler pulley and cover with the bolt.

    Torque:
    49 N*m{ 495 kgf*cm , 36 ft.*lbf }


28. INSTALL NO. 3 ENGINE HANGER

  1. A164466
    Install the No. 3 engine hanger with the 2 bolts.

    Torque:
    43 N*m{ 438 kgf*cm , 32 ft.*lbf }


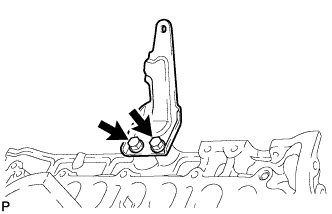
29. INSTALL NO. 1 INTERCOOLER SUPPORT BRACKET

  1. A164464
    Install the No. 1 intercooler support bracket with the 2 bolts.

    Torque:
    21 N*m{ 214 kgf*cm , 15 ft.*lbf }


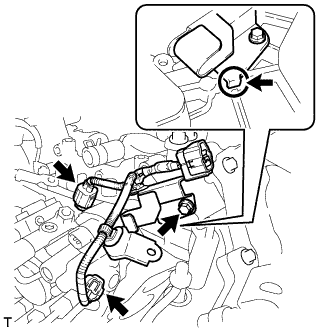
30. INSTALL FUEL PUMP MOTOR WIRE

  1. A174812
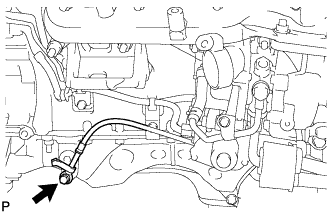
    Install the fuel pump wire with the bolt.

    Torque:
    10 N*m{ 102 kgf*cm , 7 ft.*lbf }

    HINT:
    Attach the claw of the bracket to the timing gear case when installing the bracket.


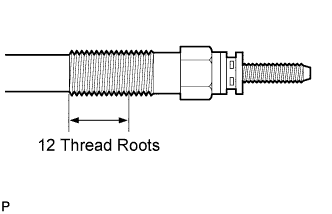
31. INSTALL GLOW PLUG ASSEMBLY

  1. A263013E01
    Apply adhesive to 3 or more thread roots in the area shown in the illustration.

    Adhesive:
    Toyota Genuine Adhesive 1324, Three Bond 1324 or equivalent

  1. A175330E01
    Using a 10 mm deep socket wrench, install the 8 glow plugs.

    Torque:
    12 N*m{ 125 kgf*cm , 9 ft.*lbf }


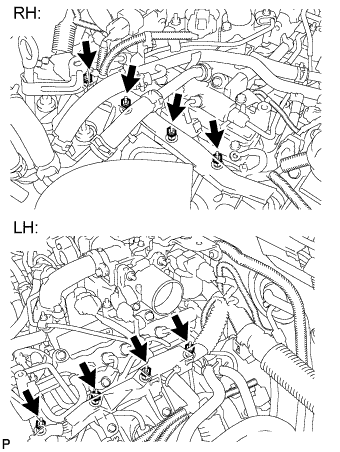
32. INSTALL NO. 1 GLOW PLUG CONNECTOR

A175329E01
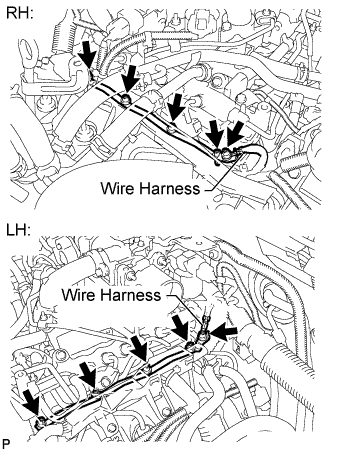
  1. Install the 2 glow plug connectors by uniformly tightening the 8 nuts.

    Torque:
    2.2 N*m{ 22 kgf*cm , 19 in.*lbf }

  1. Install the 8 screw grommets.

  1. Connect the 2 wire harnesses with the 2 nuts and 2 screw grommets.

    Torque:
    4.0 N*m{ 41 kgf*cm , 35 in.*lbf }


33. INSTALL CLUTCH FLEXIBLE HOSE BRACKET (for Manual Transmission)

  1. A177336
    Install the clutch flexible hose bracket with the 2 bolts.

    Torque:
    20 N*m{ 204 kgf*cm , 15 ft.*lbf }


34. INSTALL NO. 1 AND NO. 2 WATER OUTLET PIPES AND WATER BY-PASS OUTLET

  1. A177328
    Align the painted mark of the No. 1 water hose joint with the protrusion of the water by-pass outlet and connect the water by-pass outlet to the No. 1 water hose joint.

  1. A177327
    Align the painted mark of the No. 1 water hose joint with the painted mark of the No. 2 water outlet pipe and connect the No. 2 water outlet pipe to the No. 1 water hose joint.

  1. A164481
    Connect a new gasket and the No. 1 and No. 2 water outlet pipes with the 2 bolts.

    Torque:
    21 N*m{ 214 kgf*cm , 15 ft.*lbf }

    HINT:
    The gasket claws can face the No. 1 or No. 2 water outlet pipe.


35. INSTALL WATER OUTLET PIPE

  1. A177325
    Install 2 new gaskets and the water outlet pipe with the 4 bolts.

    Torque:
    21 N*m{ 214 kgf*cm , 15 ft.*lbf }

    HINT:
    The gasket claw should face toward the water outlet pipe.


36. INSTALL WATER OUTLET

  1. A164484
    Install a new gasket and the water outlet with the 2 bolts, and then connect the water outlet to the No. 2 water hose joint.

    Torque:
    21 N*m{ 214 kgf*cm , 15 ft.*lbf }


37. INSTALL NO. 2 INTERCOOLER SUPPORT BRACKET

  1. A164465
    Install the No. 2 intercooler support bracket with the 2 bolts.

    Torque:
    43 N*m{ 438 kgf*cm , 32 ft.*lbf }


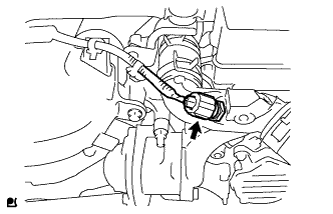
38. INSTALL DIESEL ENGINE COOLANT TEMPERATURE SENSOR
  1. Install a new gasket to the sensor.

  1. A175726
    Using a 19 mm deep socket wrench, install the sensor.

    Torque:
    20 N*m{ 204 kgf*cm , 15 ft.*lbf }

  1. Connect the sensor connector.


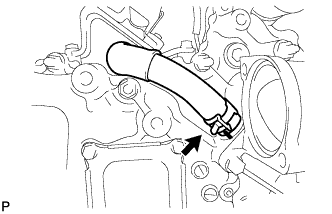
39. CONNECT INLET WATER HOSE

A164893

40. INSTALL STARTER HOSE BRACKET

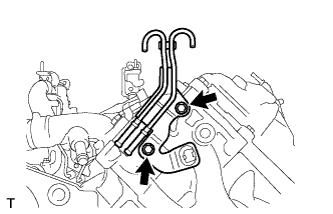
  1. A177087
    Install the starter hose bracket with the 2 bolts.

    Torque:
    10 N*m{ 102 kgf*cm , 7 ft.*lbf }


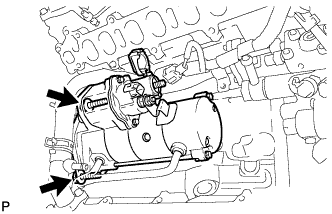
41. INSTALL STARTER ASSEMBLY

  1. A177367
    Install the starter with the 2 bolts.

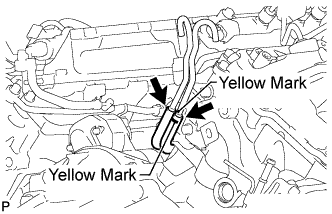
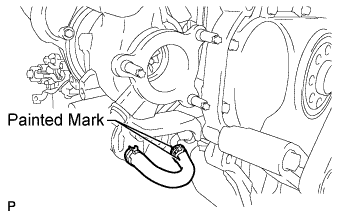
  1. A175297E01
    Connect the 2 hoses to the starter hose bracket.

    HINT:
    Align the paint marks of the hose and bracket.

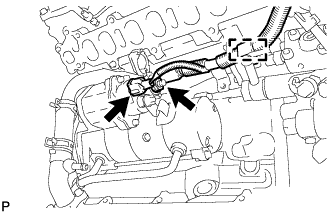
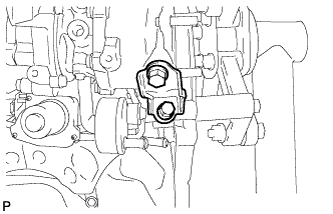
  1. A177366
    Install the No. 2 engine wire to the starter with the nut.

    Torque:
    80 N*m{ 816 kgf*cm , 59 ft.*lbf }

  1. Connect the connector to the starter.

  1. Attach the wire harness clamp.


42. INSTALL TIMING GEAR COVER INSULATOR (w/ Intercooler)

  1. A174822
    w/o Viscous Heater:
    Install the timing gear cover insulator with the 2 bolts.

    Torque:
    21 N*m{ 214 kgf*cm , 15 ft.*lbf }

  1. A174823
    w/ Viscous Heater:
    Install the timing gear cover insulator.


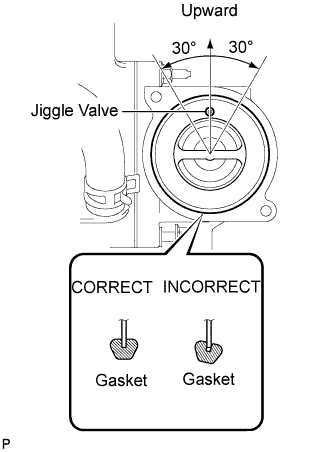
43. INSTALL THERMOSTAT

  1. A161937E01
    Install a new gasket to the thermostat.

    NOTICE:
    When installing the gasket to the thermostat, be careful not to deform the gasket. Make sure that the groove of the gasket is properly installed onto the thermostat, as shown in the illustration.

  1. Insert the thermostat into the water pump with the jiggle valve facing straight upward.

    HINT:
    The jiggle valve may be set within 30° of either side of the prescribed position.


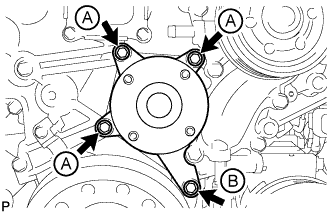
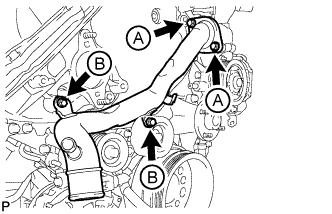
44. INSTALL WATER INLET

  1. A174816E01
    Install the water inlet with the 4 bolts.

    Torque:
    for bolt A:
    21 N*m{ 214 kgf*cm , 15 ft.*lbf }
    for bolt B:
    25 N*m{ 250 kgf*cm , 18 ft.*lbf }

  1. A174815
    Connect the No. 2 oil cooler hose to the clamp and water pump.


45. INSTALL NO. 1 IDLER PULLEY BRACKET (w/ Viscous Heater)

  1. A177432
    Install the No. 1 idler pulley bracket with the bolt.

    Torque:
    49 N*m{ 495 kgf*cm , 36 ft.*lbf }


46. INSTALL VISCOUS HEATER ASSEMBLY WITH MAGNET CLUTCH (w/ Viscous Heater)

E154426
  1. Install the heater assembly with the 2 bolts.

    Torque:
    48.5 N*m{ 495 kgf*cm , 36 ft.*lbf }

  1. Connect the 2 heater hoses.

  1. Using pliers, grip the claws of the clips and slide the 2 clips.

  1. Connect the connector and attach the clamp.


47. INSTALL NO. 2 TURBOCHARGER SUB-ASSEMBLY WITH EXHAUST MANIFOLD LH

  1. A177409
    Set a new gasket to the cylinder head LH.

  1. A177394
    Install the No. 2 turbocharger with exhaust manifold LH and 10 collars to the cylinder head LH with 10 new nuts.

    Torque:
    36 N*m{ 367 kgf*cm , 27 ft.*lbf }

    HINT:
    Install the collars with the colored side facing the nuts.

  1. A177391
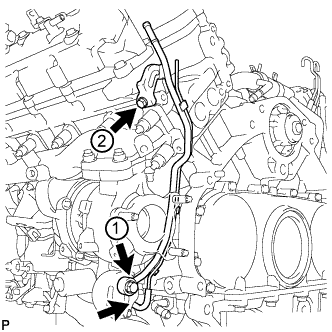
    Install a new gasket and the No. 2 inlet turbo oil pipe to the No. 1 oil pan with the union bolt.

    Torque:
    29 N*m{ 296 kgf*cm , 21 ft.*lbf }

  1. A179471
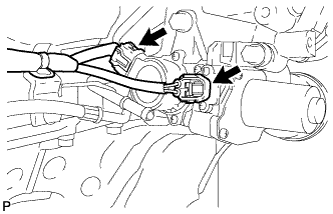
    Connect the 2 connectors to the turbocharger.


48. INSTALL NO. 2 VENTILATION TUBE SUB-ASSEMBLY

  1. A177390E01
    Temporarily install a new gasket and the No. 2 ventilation tube with the union bolt and bolt.

  1. Tighten the union bolt and bolt in the order shown in the illustration.

    Torque:
    for union bolt:
    29 N*m{ 296 kgf*cm , 21 ft.*lbf }
    for bolt:
    10 N*m{ 102 kgf*cm , 7 ft.*lbf }

    NOTICE:
    Clean and remove any oil labeled 1shown in the illustration.

  1. Connect the No. 2 vacuum transmitting hose.


49. INSTALL NO. 2 TURBOCHARGER STAY

  1. A177389
    Install the No. 2 turbocharger stay with the 2 bolts.

    Torque:
    49 N*m{ 495 kgf*cm , 36 ft.*lbf }


50. CONNECT NO. 2 OUTLET TURBO OIL HOSE

HINT:
A177388E01
Align the white paint marks on the oil hose and pipe, and connect the hose.


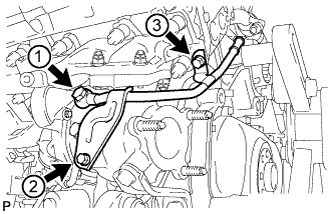
51. INSTALL NO. 2 TURBO WATER PIPE SUB-ASSEMBLY

  1. A170290E01
    Temporarily install a new gasket and the No. 2 turbo water pipe with the union bolt and bolt.

  1. Tighten the union bolt and bolt in the order shown in the illustration.

    Torque:
    for union bolt:
    35 N*m{ 357 kgf*cm , 26 ft.*lbf }
    for bolt:
    10 N*m{ 102 kgf*cm , 7 ft.*lbf }

  1. Connect the water hose to the pipe.


52. INSTALL FRONT WATER BY-PASS JOINT

  1. A177435
    Install a new gasket and the front water by-pass joint.

    Torque:
    50 N*m{ 510 kgf*cm , 37 ft.*lbf }


53. INSTALL NO. 3 TURBO WATER PIPE SUB-ASSEMBLY

  1. A177386E01
    Temporarily install a new gasket and the No. 3 turbo water pipe with the union bolt and 2 bolts.

  1. Tighten the union bolt and 2 bolts in the order shown in the illustration.

    Torque:
    for union bolt:
    35 N*m{ 357 kgf*cm , 26 ft.*lbf }
    for bolt:
    10 N*m{ 102 kgf*cm , 7 ft.*lbf }


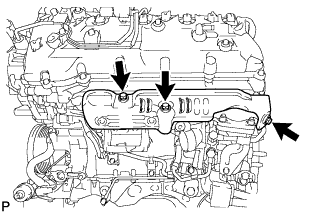
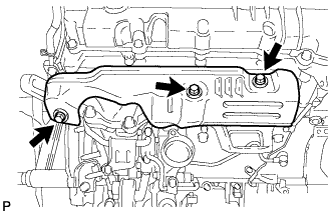
54. INSTALL NO. 2 EXHAUST MANIFOLD HEAT INSULATOR

  1. A177385
    Install the No. 2 exhaust manifold heat insulator with the 3 bolts.

    Torque:
    25 N*m{ 255 kgf*cm , 18 ft.*lbf }


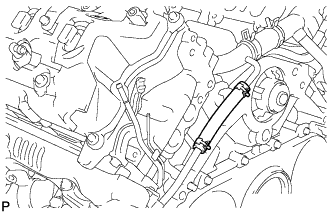
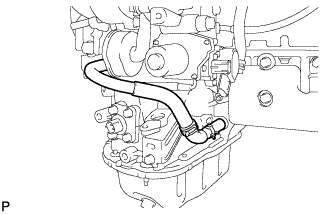
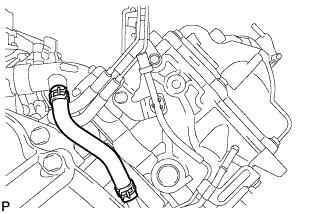
55. CONNECT NO. 2 TURBO WATER HOSE

A177384

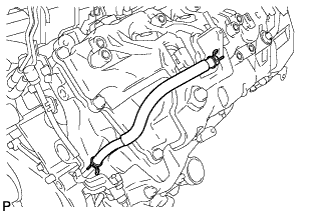
56. CONNECT BREATHER PLUG LH

A177383

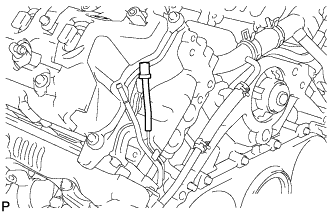
57. CONNECT NO. 3 VENTILATION HOSE

A177382

58. INSTALL NO. 1 TURBOCHARGER SUB-ASSEMBLY WITH EXHAUST MANIFOLD RH

  1. A177408
    Set a new gasket to the cylinder head RH.

  1. A170311E02
    Install the No. 1 turbocharger with exhaust manifold RH and 10 collars to the cylinder head RH with 10 new nuts.

    Torque:
    36 N*m{ 367 kgf*cm , 27 ft.*lbf }

    HINT:
    Install the collars with the colored side facing the nuts.

  1. A177405
    Install a new gasket and the No. 1 inlet turbo oil pipe to the cylinder block with the union bolt.

    Torque:
    Case is dry:
    29 N*m{ 296 kgf*cm , 21 ft.*lbf }
    Case is wet:
    23 N*m{ 235 kgf*cm , 17 ft.*lbf }

    NOTICE:
    1. The case is "dry" when there is absolutely no engine oil on the union bolt and cylinder block bolt hole.
    2. The case is "wet" when there is engine oil on the union bolt and cylinder block bolt hole.


59. INSTALL NO. 1 VENTILATION TUBE SUB-ASSEMBLY

  1. A177404E01
    Temporarily install a new gasket and the No. 1 ventilation tube with the union bolt and bolt.

  1. Tighten the union bolt and bolt in the order shown in the illustration.

    Torque:
    for union bolt:
    29 N*m{ 296 kgf*cm , 21 ft.*lbf }
    for bolt:
    10 N*m{ 102 kgf*cm , 7 in.*lbf }

    NOTICE:
    Clean and remove any oil labeled 1 shown in the illustration.

  1. Connect the vacuum hose.


60. INSTALL NO. 1 TURBOCHARGER STAY

  1. A177403
    Temporarily install the No. 1 turbocharger stay with the 2 bolts.

  1. Tighten the 2 bolts.

    Torque:
    49 N*m{ 495 kgf*cm , 36 ft.*lbf }


61. INSTALL NO. 1 TURBO WATER PIPE SUB-ASSEMBLY

  1. A177401E01
    Install a new gasket and the No. 1 turbo water pipe with 2 new nuts and 3 bolts.

    Torque:
    10 N*m{ 102 kgf*cm , 7 ft.*lbf }

  1. Connect the water hose.


62. CONNECT NO. 1 OUTLET TURBO OIL HOSE

A177402

63. INSTALL NO. 1 EXHAUST MANIFOLD HEAT INSULATOR

  1. A177400
    Install the No. 1 exhaust manifold heat insulator with the 3 bolts.

    Torque:
    25 N*m{ 255 kgf*cm , 18 ft.*lbf }


64. CONNECT NO. 2 TURBO WATER HOSE

A177399

65. CONNECT BREATHER PLUG RH

A177398

66. CONNECT NO. 2 VENTILATION HOSE

A177397

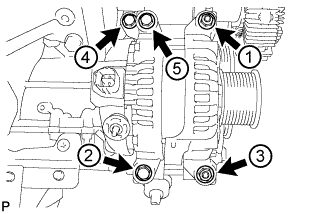
67. INSTALL GENERATOR ASSEMBLY

  1. A163035E02
    Temporarily install the generator with the 3 bolts and 2 nuts.

  1. Uniformly tighten the 3 bolts and 2 nuts in the order shown in the illustration.

    Torque:
    21 N*m{ 214 kgf*cm , 15 ft.*lbf }

  1. Connect the generator cable and install the nut and bolt.

    Torque:
    for bolt:
    13 N*m{ 133 kgf*cm , 10 ft.*lbf }
    for nut (130A Type and 150A Type:):
    9.8 N*m{ 100 kgf*cm , 87 in.*lbf }
    for nut (180A Type:):
    12 N*m{ 122 kgf*cm , 9 ft.*lbf }


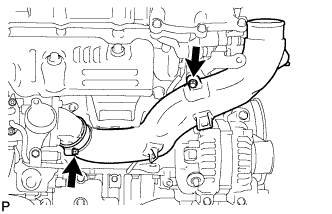
68. INSTALL NO. 1 INTAKE AIR CONNECTOR PIPE

  1. A177381
    Install the No. 1 intake air connector pipe with the bolt. Then tighten the hose clamp.

    Torque:
    for bolt:
    21 N*m{ 214 kgf*cm , 15 ft.*lbf }
    for clamp:
    6.0 N*m{ 61 kgf*cm , 53 in.*lbf }

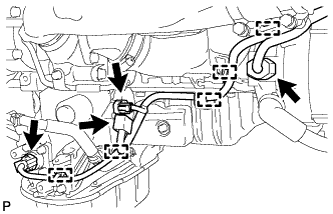
  1. A174753
    Connect the 4 connectors and attach the 5 wire harness clamps.


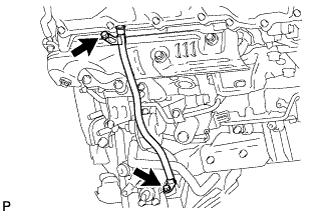
69. INSTALL NO. 1 ENGINE OIL LEVEL DIPSTICK GUIDE

  1. A170301
    Apply a light coat of engine oil to a new O-ring and install it to the No. 1 engine oil level dipstick guide.

  1. Install the No. 1 engine oil level dipstick guide with the 2 bolts.

    Torque:
    10 N*m{ 102 kgf*cm , 7 ft.*lbf }


70. INSTALL VACUUM PUMP ASSEMBLY (w/ Intercooler)

  1. C160668
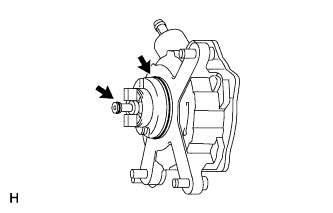
    Apply engine oil to 2 new O-rings.

  1. Install the 2 O-rings to the vacuum pump.
  1. C160890E01
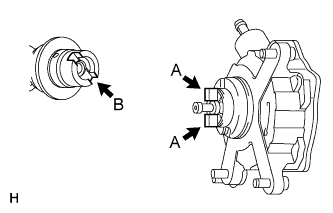
    Install the vacuum pump so that the coupling teeth of the vacuum pump (labeled A) and the groove of the camshaft (labeled B) are aligned.

    NOTICE:
    Be careful not to damage the O-ring.

  1. C172878
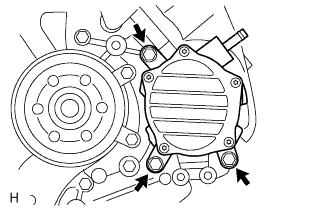
    Install the vacuum pump with the 3 bolts.

    Torque:
    21 N*m{ 214 kgf*cm , 15 ft.*lbf }

    NOTICE:
    Confirm that the vacuum pump is not at an angle, and that there is no clearance between the fitting surfaces.

← REASSEMBLY (from Jan 2012)INSTALLATION (from Jan 2012) →