2011-2013 Land Cruiser · Service Manual Vehicle Exterior

DISASSEMBLY

Removal / installation · Vehicles built from Jan 2012

Versions by build date: Sep 2011 – Dec 2011 from Jan 2012


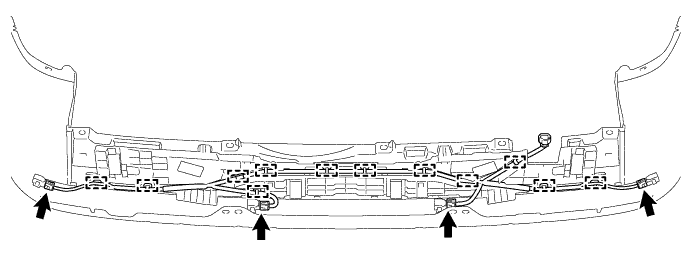
1. REMOVE NO. 2 FRAME WIRE (w/ TOYOTA Parking Assist-sensor System)
  1. Disconnect the 4 connectors.

  1. Detach the 12 clamps and remove the No. 2 frame wire.

    B302192


2. REMOVE NO. 1 ULTRASONIC SENSOR (w/ TOYOTA Parking Assist-sensor System)

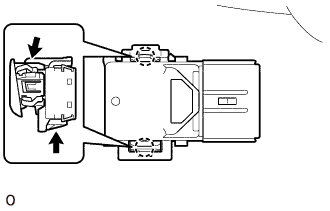
  1. E244161
    Detach the 2 claws and remove the No. 1 ultrasonic sensor.

    HINT:
    1. Use the same procedure for all No. 1 ultrasonic sensors.
    2. The illustration shows the No. 1 ultrasonic sensor for the RH corner and back sensor LH and RH. The installation position of the No. 1 ultrasonic sensor for the LH corner is on the opposite side.


3. REMOVE NO. 1 ULTRASONIC SENSOR RETAINER (w/ TOYOTA Parking Assist-sensor System)

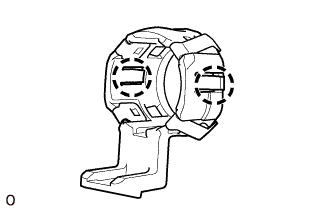
  1. E244162
    Detach the 2 claws and remove the No. 1 ultrasonic sensor retainer from the rear bumper cover.

    HINT:
    1. Use the same procedure to remove the No. 1 ultrasonic sensor retainer on the other side.
    2. The illustration shows the No. 1 ultrasonic sensor retainer for the RH corner. The vertical orientation of the No. 1 ultrasonic sensor retainers for the LH corner is opposite that of the image shown in the illustration.

4. REMOVE NO. 2 ULTRASONIC SENSOR RETAINER (w/ TOYOTA Parking Assist-sensor System)

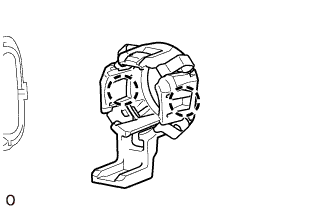
  1. E244159
    Detach the 2 claws and remove the No. 2 ultrasonic sensor retainer from the rear bumper cover.

    HINT:
    Use the same procedure to remove the No. 2 ultrasonic sensor retainer on the other side.


5. REMOVE REAR BUMPER ENERGY ABSORBER

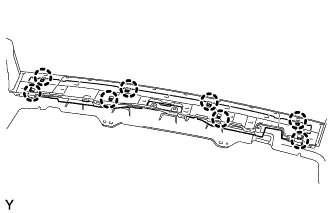
  1. B302173
    Detach the 8 claws and remove the rear bumper energy absorber.


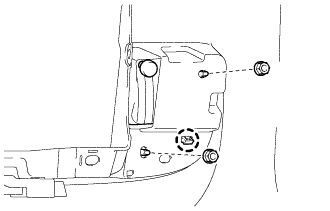
6. REMOVE REFLEX REFLECTOR ASSEMBLY LH

  1. B302187
    Remove the 2 nuts.

  1. Detach the claw and remove the reflex reflector assembly LH.


7. REMOVE REFLEX REFLECTOR ASSEMBLY RH

HINT:
Use the same procedure described for the LH side.


8. REMOVE REAR LOWER BUMPER COVER
  1. Remove the clip and rear lower bumper cover.


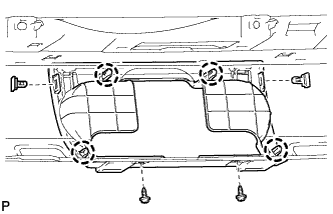
9. REMOVE REAR NO. 2 STEP COVER

  1. B181018
    Remove the 2 screws and 2 clips.

  1. Detach the 4 claws and remove the rear No. 2 step cover.

← DISASSEMBLY (Sep 2011 – Dec 2011)REASSEMBLY (Sep 2011 – Dec 2011) →