REMOVAL
Removal / installation · Vehicles built Sep 2011 – Dec 2011
Versions by build date: Sep 2011 – Dec 2011 from Jan 2012
- HINT:
- Use the same procedures for the RH side and LH side.
- The procedures listed below are for the LH side.
| 1.
DISCONNECT CABLE FROM NEGATIVE BATTERY TERMINAL |
 |
- NOTICE:
- When disconnecting the cable, some systems need to be initialized after the cable is reconnected (Click here).
| 2.
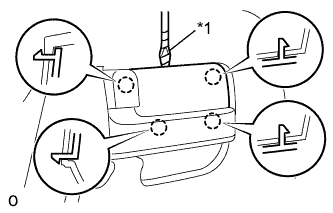
REMOVE REAR DOOR INSIDE HANDLE BEZEL LH
|
|
- Using a screwdriver, detach the 4 claws and remove the bezel.
- HINT:
- Tape the screwdriver tip before use.
Text in Illustration
*1
|
Protective tape
|
| 3.
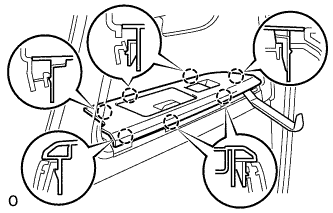
REMOVE REAR DOOR ARMREST BASE PANEL ASSEMBLY LH
|
|
- Using a moulding remover, detach the 7 claws.
Disconnect the connector and remove the armrest base panel.
| 4.
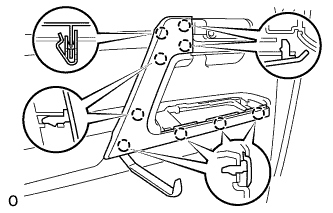
REMOVE ASSIST GRIP COVER LH
|
|
- Using a moulding remover, detach the 9 claws and remove the door assist grip cover.
| 5.
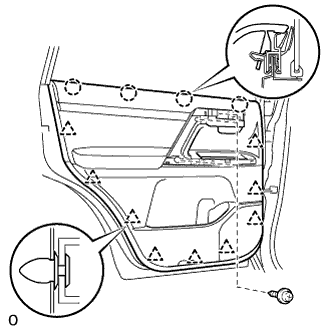
REMOVE REAR DOOR TRIM BOARD SUB-ASSEMBLY LH
|
|
- Remove the 3 screws.
Remove the 9 clips, 4 claws and trim board.
Disconnect the connector and remove the trim board.
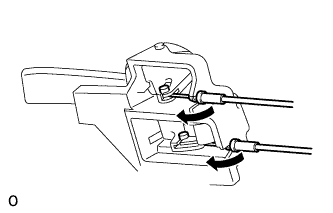
- Disconnect the 2 cables from the inside handle.
| 6.
REMOVE REAR INNER DOOR GLASS WEATHERSTRIP LH
|
|
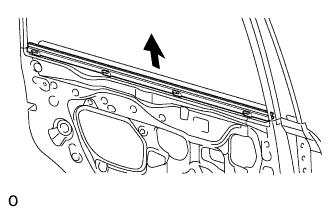
- Remove the weatherstrip by pulling it upward in the direction indicated by the arrow.
| 7.
REMOVE REAR DOOR SERVICE HOLE COVER LH
|
|
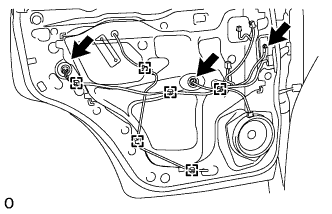
- Using a clip remover, detach the 6 clamps.
Remove the bolt and disconnect the 2 connectors.
Remove the service hole cover.
- HINT:
- Remove the remaining tape on the door.
| 8.
REMOVE REAR DOOR GLASS RUN LH
|
|
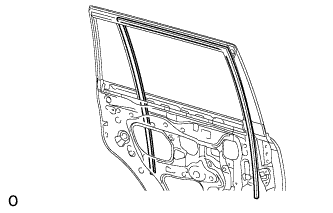
- Remove the rear door glass run from the window frame.
| 9.
REMOVE REAR DOOR REAR LOWER WINDOW FRAME SUB-ASSEMBLY LH
|
|
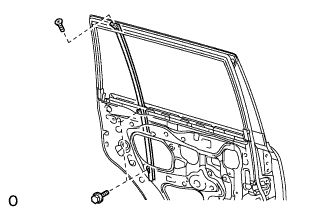
- Remove the 2 bolts.
Remove the screw and window frame.
| 10.
REMOVE REAR DOOR QUARTER WINDOW GLASS LH
|
|
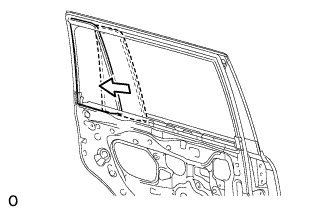
- Install the quarter glass together with the rear door quarter window weatherstrip in the direction indicated by the arrow in the illustration.
| 11.
REMOVE REAR DOOR GLASS SUB-ASSEMBLY LH
|
|
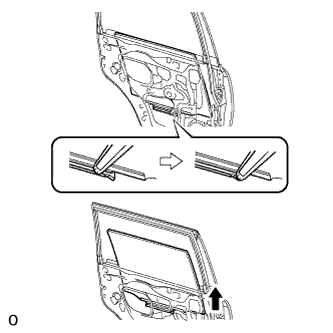
- Remove the rear door glass sub-assembly from the rear door window regulator sub-assembly as shown in the illustration.
- NOTICE:
- Do not damage the door glass.
| 12.
REMOVE REAR DOOR BELT MOULDING ASSEMBLY LH |
|
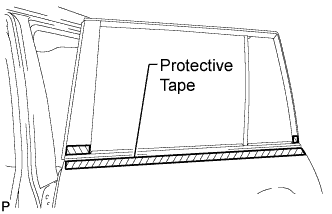
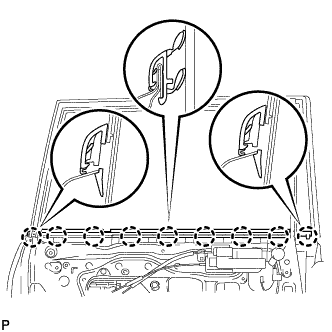
Put protective tape around the belt moulding.
- Detach the claw and remove the belt moulding.