REMOVAL
Removal / installation · Vehicles built from Sep 2011
- HINT:
- Use the same procedure for the RH and LH sides.
- The procedure listed below is for the LH side.
- Use the same procedure for the RH and LH sides.
| 1. REMOVE REAR COMBINATION LIGHT ASSEMBLY LH |

Put protective tape around the rear combination light assembly LH.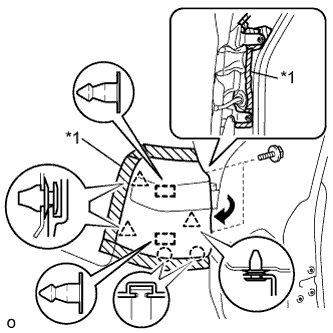

Text in Illustration *1
Protective tape
Remove the 2 bolts.
Detach the 3 clips, 2 guides and 2 claws.
- NOTICE:
- Detach the bolt installation bracket from inside the body while being careful not to bend it.
Disconnect the connector to remove the rear combination light assembly.
| 2. REMOVE REAR TURN SIGNAL LIGHT BULB |
Turn the rear combination light socket and wire sub-assembly LH in the direction indicated by the arrow in the illustration and remove the socket.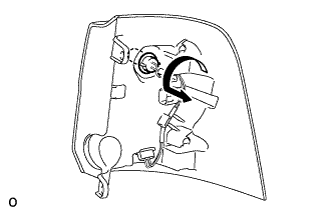
Remove the rear turn signal light bulb from the rear combination light socket and wire sub-assembly LH.
| 3. REMOVE TAIL AND STOP LIGHT BULB |
Turn the rear combination light socket and wire sub-assembly LH in the direction indicated by the arrow in the illustration and remove the socket.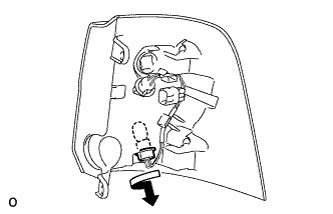
Remove the tail and stop light bulb from the rear combination light socket and wire sub-assembly LH.
| 4. REMOVE REAR COMBINATION LIGHT SOCKET AND WIRE SUB-ASSEMBLY LH |
Using a screwdriver, detach the claw.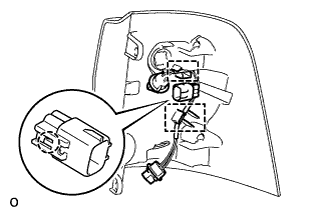
Detach the 2 guide and remove the rear combination light socket and wire sub-assembly LH.