INSTALLATION
Removal / installation · Vehicles built from Jan 2012
Versions by build date: Sep 2011 – Dec 2011 from Jan 2012
- CAUTION:
- Wear protective gloves. Sharp areas on the parts may injure your hands.
- HINT:
- Use the same procedures for LHD and RHD vehicles.
- The procedures listed below are for LHD vehicles.
| 1.
INSTALL FRONT SEAT AIRBAG ASSEMBLY LH |
 |
- CAUTION:
- Make sure that the seat frame assembly is not deformed. If it is, replace it with a new one.
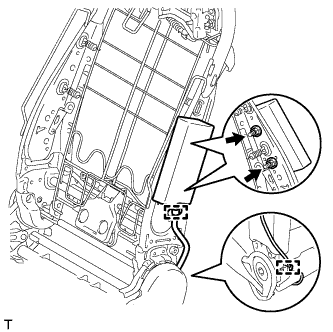
- Install the front seat airbag assembly with 2 nuts.
-
Torque:
- 5.5 N*m{
56 kgf*cm
, 49 in.*lbf
}
Attach the 2 clamps to connect the wire harness.
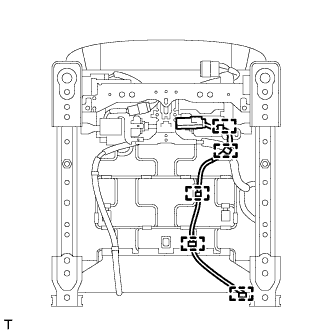
- Attach the 5 clamps to connect the wire harness.
| 2.
INSTALL SEAT CLIMATE CONTROL CONTROLLER LH (w/ Climate Control Seat System)
|
|
Install the seat climate control controller LH with the 2 screws.
Attach the wire harness clamp.
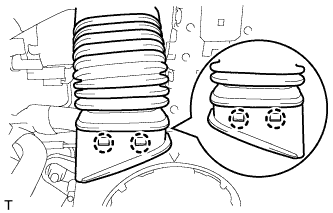
- Attach the 4 claws to connect the seat climate control blower LH.
| 3.
INSTALL FRONT SEATBACK PROTECTOR (w/ Climate Control Seat System)
|
|
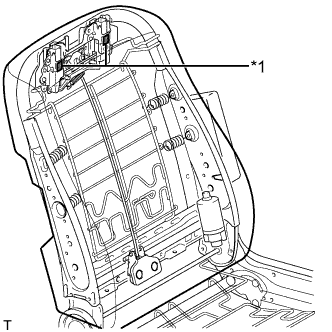
Apply double-sided tape as shown in the illustration.
Text in Illustration
*1
|
Double-sided tape
|
Install the front seatback protector.
| 4.
INSTALL SEATBACK COVER WITH PAD
|
|
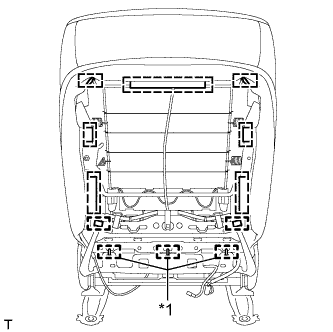
- Remove the hog rings.
Text in Illustration
*1
|
Hog Ring
|
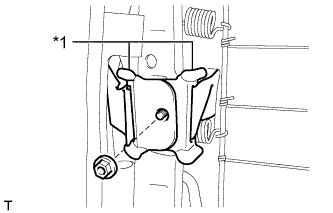
- Remove the nut and detach the seatback cover bracket.
Text in Illustration
*1
|
Seatback Cover Bracket
|
Detach the hooks and remove the seatback cover with pad.
| 5.
INSTALL FRONT SEAT HEADREST SUPPORT
|
|
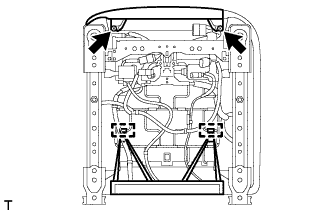
Attach the 4 claws to install the 2 front seat headrest supports.
| 6.
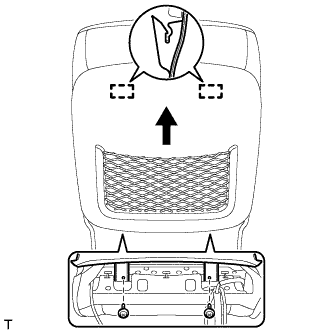
INSTALL FRONT SEATBACK BOARD SUB-ASSEMBLY LH
|
|
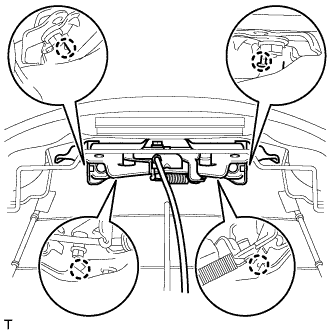
Move the front seatback board sub-assembly in the direction of the arrow to attach the 2 hooks and install it.
Install the 2 screws.
| 7.
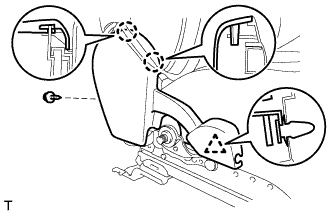
INSTALL FRONT INNER SEAT CUSHION SHIELD LH
|
|
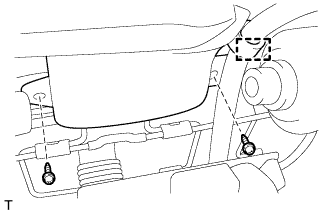
Attach the 2 claws and clip to install the front inner seat cushion shield LH.
Install the screw.
| 8.
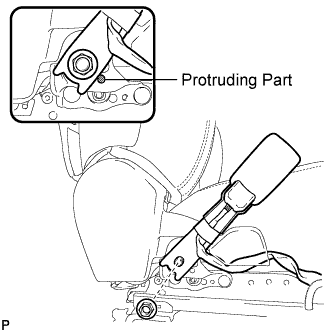
INSTALL FRONT SEAT INNER BELT ASSEMBLY LH
|
|
Install the front seat inner belt assembly with the nut.
-
Torque:
- 42 N*m{
428 kgf*cm
, 31 ft.*lbf
}
- NOTICE:
- Do not allow the anchor part of the front seat inner belt assembly to overlap the protruding parts of the front seat adjuster.
Connect the connectors and attach the clamps.
| 9.
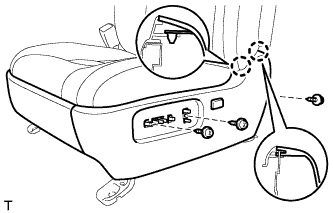
INSTALL FRONT SEAT CUSHION SHIELD LH
|
|
for Driver Side:
Connect the connector.
- Attach the 2 claws to install the front seat cushion shield LH together with the front inner No. 1 cushion shield LH.
Install the 3 screws.
- Connect the 2 rubber bands.
Install the 2 screws.
| 10.
INSTALL RECLINING POWER SEAT SWITCH KNOB
|
|
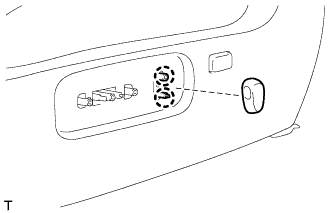
Attach the 2 claws to install the reclining power seat switch knob.
| 11.
INSTALL SLIDE AND VERTICAL POWER SEAT SWITCH KNOB
|
|
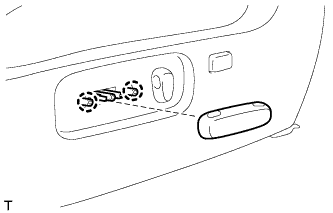
Attach the 2 claws to install the slide and vertical power seat switch knob.
| 12.
INSTALL FRONT SEAT ASSEMBLY LH |
|
Install the front seat assembly LH (Click here).