REMOVAL
Removal / installation · Vehicles built from Jan 2012
Versions by build date: Sep 2011 – Dec 2011 from Jan 2012
- CAUTION:
- Wear protective gloves. Sharp areas on the parts may injure your hands.
- HINT:
- Use the same procedure for the RH and LH sides.
- The procedure listed below is for the LH side.
| 1.
REMOVE REAR NO. 2 SEAT HEADREST ASSEMBLY LH (w/ Rear Center Seat Headrest) |
|
| 2.
REMOVE REAR SEAT CUSHION HINGE COVER LH |
 |
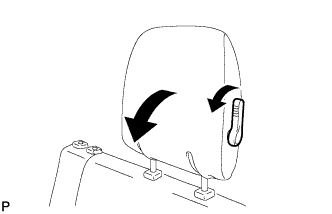
- Operate the rear seat headrest handle and lower the headrest.
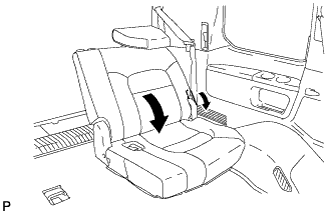
- Operate the reclining adjuster release handle and fold down the seat.
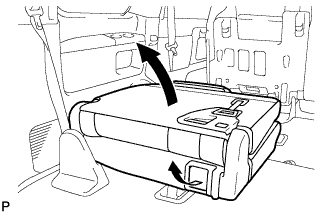
- Operate the seat cushion lock release lever and move the seat to the storage position.
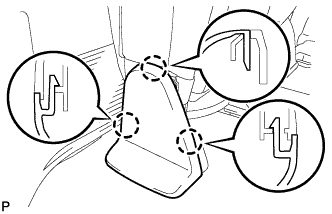
- Using a screwdriver, detach the 3 claws and remove the cover.
- HINT:
- Tape the screwdriver tip before use.
| 3.
REMOVE REAR NO. 2 SEAT HINGE COVER LH |
|
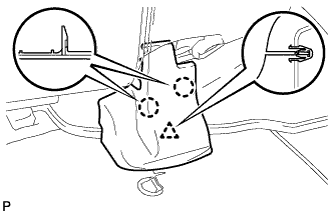
Detach the 2 claws and clip, and then remove the cover.
| 4.
REMOVE REAR NO. 2 SEAT ASSEMBLY |
|
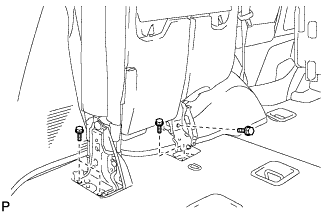
Remove the 4 bolts and seat assembly.
- NOTICE:
- Be careful not to damage the vehicle body.
| 5.
REMOVE REAR STEP COVER
|
|
- HINT:
- Use the same procedure to remove the step cover on the other side.
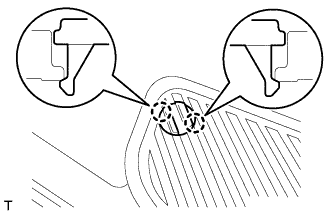
Detach the 2 claws and remove the step cover.
| 6.
REMOVE REAR DOOR SCUFF PLATE LH
|
|
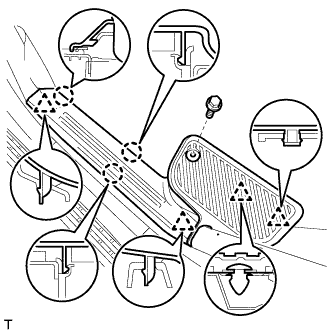
Remove the screw.
Detach the 3 claws and 4 clips, and remove the scuff plate.
| 7.
REMOVE REAR FLOOR MAT REAR SUPPORT PLATE
|
|
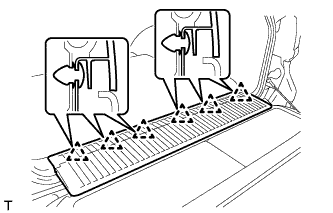
Detach the 6 clips and remove the support plate.
| 8.
REMOVE REAR SEAT COVER CAP
|
|
- HINT:
- Use the same procedure to remove the rear seat cover cap on the other side.
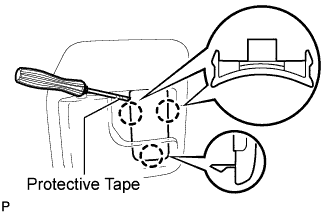
Using a screwdriver, detach the 3 claws and remove the rear seat cover cap.
- HINT:
- Tape the screwdriver tip before use.
| 9.
REMOVE FRONT QUARTER TRIM PANEL ASSEMBLY LH |
|
w/ Sliding Roof:
Remove the front quarter trim panel assembly LH (Click here).
w/o Sliding Roof:
Remove the front quarter trim panel assembly LH (Click here).
| 10.
REMOVE REAR SEAT LOCK CONTROL LEVER SUB-ASSEMBLY LH |
|
Detach the 4 claws and remove the seat lock control lever.
| 11.
REMOVE REAR ROOF NO. 1 AIR DUCT (w/ Rear Air Conditioning System)
|
|
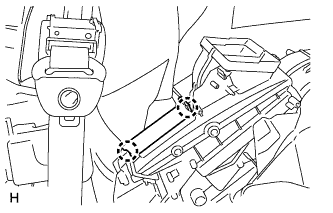
Detach the 2 claws and remove the cooler plate.
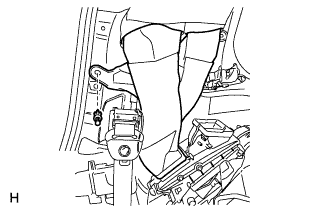
- Remove the clip and duct.
| 12.
REMOVE FOLD SEAT LEG LOCK SUB-ASSEMBLY |
|
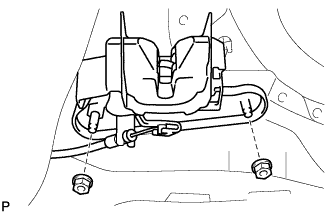
Detach the 2 cable clamps.
- Remove the 2 nuts and fold seat leg lock.
| 13.
REMOVE NO. 3 SEAT CUSHION COVER |
|
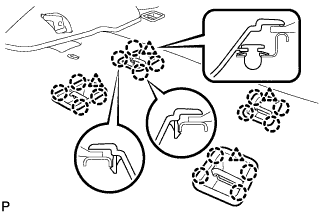
- Detach the 4 clips and 16 claws, and then remove the 4 seat cushion covers.
| 14.
REMOVE REAR SEAT LOCK STRIKER SUB-ASSEMBLY |
|
Fold back the floor carpet.
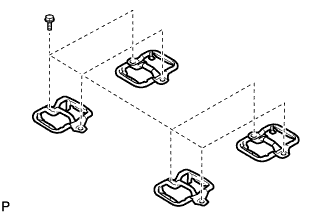
- Remove the 8 bolts and 4 seat lock strikers.