Removal / installation · Vehicles built Sep 2011 – Dec 2011
Versions by build date: Sep 2011 – Dec 2011from Jan 2012
HINT:
Use the same procedures for the LH side and RH side.
The procedures listed below are for the LH side.
A bolt without a torque specification is shown in the standard bolt chart (Click here).
1.
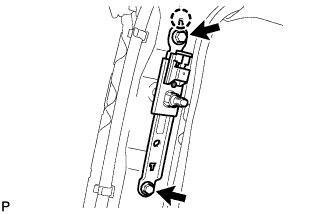
INSTALL REAR SHOULDER BELT ANCHOR PLATE SUB-ASSEMBLY LH
Align the anchor plate positioning hole with the claw, and install the anchor plate with the 2 bolts.
HINT:
First install the upper bolt, and then install the lower bolt.
Torque:
42 N*m{
428 kgf*cm
, 31 ft.*lbf
}
2.
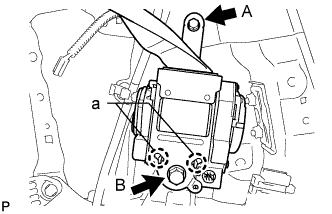
INSTALL REAR NO. 1 SEAT OUTER BELT ASSEMBLY LH
NOTICE:
w/ Pretensioner:
When installing the retractor, make sure the claws of the vehicle (labeled "a" in the illustration) only contact the installation areas of the retractor.
Align the claws with the seat belt positioning holes and install the retractor of the seat belt as shown in the illustration.
Install the seat belt with the 2 bolts.
HINT:
First install bolt A, and then install bolt B.
Torque:
for bolt A:
8.5 N*m{
87 kgf*cm
, 75 in.*lbf
}
for bolt B:
42 N*m{
428 kgf*cm
, 31 ft.*lbf
}
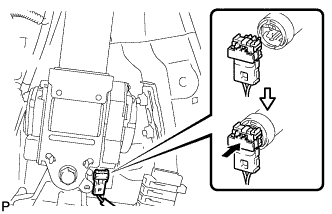
w/ Pretensioner: Connect the pretensioner connector as shown in the illustration.
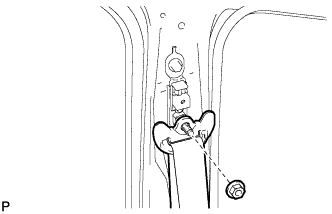
Install the seat belt shoulder anchor with the nut.
Torque:
42 N*m{
428 kgf*cm
, 31 ft.*lbf
}
3.
INSTALL REAR FRONT QUARTER TRIM PANEL ASSEMBLY LH
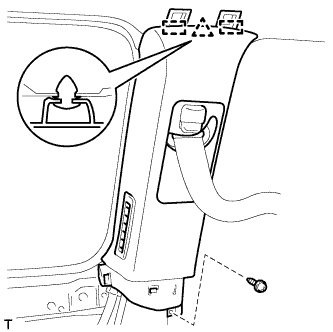
Pass the seat belt anchor through the quarter trim garnish.
Attach the clip and 2 guides to install the quarter trim garnish.
Install the screw.
4.
INSTALL FRONT QUARTER TRIM PANEL ASSEMBLY LH
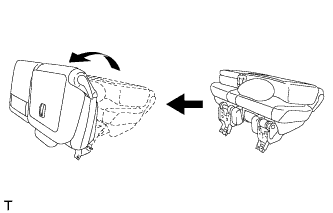
HINT:
When installing the front quarter trim panel, operate the reclining adjuster release handle and move the No. 1 rear seat to the position shown in the illustration.
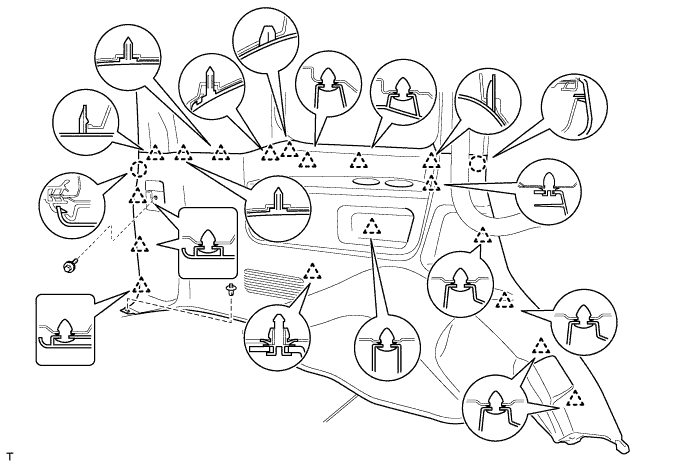
w/o Tonneau Cover:
w/o Rear Air Conditioning System: Connect the rear seat lock control lever cable.
w/ Rear Air Conditioning System: Connect the thermistor connector and rear seat lock control lever cable.
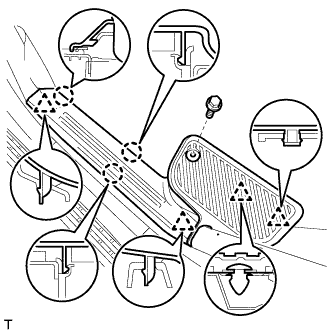
Attach the 18 clips and 2 claws to install the quarter trim panel.
Install the clip and bolt.
Torque:
12 N*m{
122 kgf*cm
, 9 ft.*lbf
}
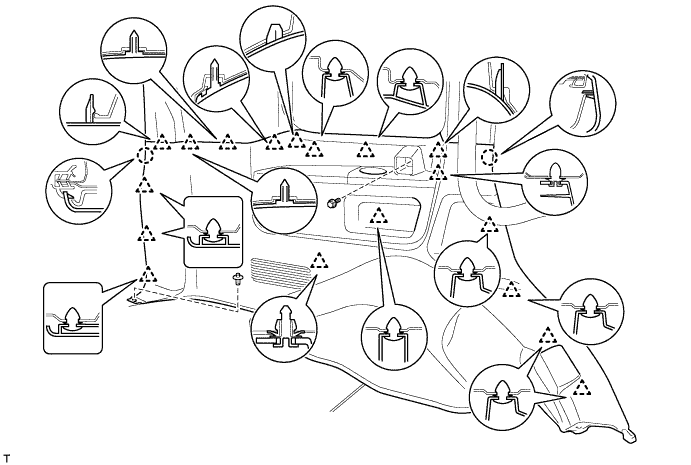
w/ Tonneau Cover:
Attach the 18 clips and 2 claws to install the quarter trim panel.
Install the screw and clip.
w/ Rear No. 2 Seat, for LH side:
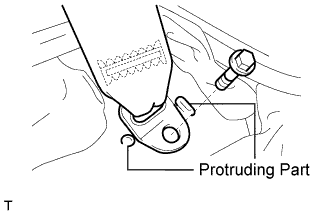
Install the rear No. 2 seat belt anchor LH with the bolt.
Torque:
42 N*m{
428 kgf*cm
, 31 ft.*lbf
}
NOTICE:
Do not overlap the anchor part of the seat belt and protruding parts of the vehicle body.
w/ Rear No. 2 Seat, for RH side:
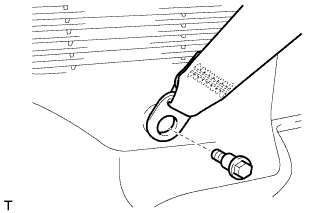
Install the rear No. 2 seat belt anchor with the bolt.
Torque:
42 N*m{
428 kgf*cm
, 31 ft.*lbf
}
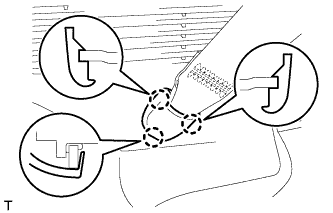
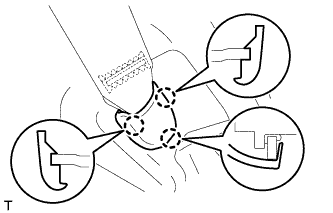
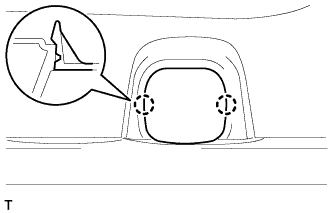
Attach the 3 claws to install the cover.
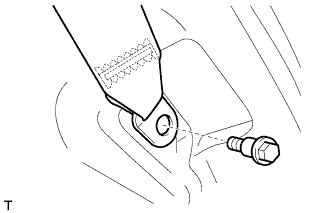
Install the rear No. 1 seat belt anchor with the bolt.
Torque:
42 N*m{
428 kgf*cm
, 31 ft.*lbf
}
Attach the 3 claws to install the cover.
5.
INSTALL REAR NO. 2 SEAT COVER BEZEL
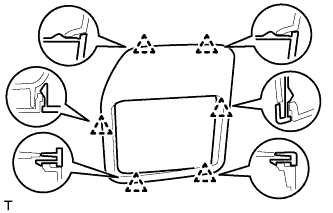
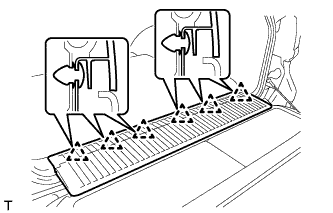
Attach the 6 clips to install the rear No. 2 seat cover bezel.