2011-2013 Land Cruiser · Service Manual Vehicle Interior

INSTALLATION

Removal / installation · Vehicles built from Jan 2012

Versions by build date: Sep 2011 – Dec 2011 from Jan 2012

HINT:
  1. Use the same procedures for the LH side and RH side.
  2. The procedures listed below are for the LH side.


1. INSTALL REAR DOOR INSIDE LOCKING CABLE ASSEMBLY LH

  1. B188530E03
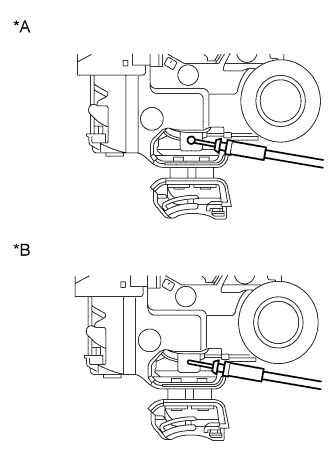
    Install the rear door inside locking cable assembly LH.
    Text in Illustration 
    *A
    w/o Double Lock
    *B
    w/ Double Lock

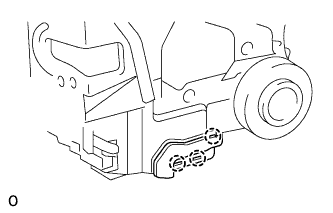
  1. B183929
    Attach the 3 claws.


2. INSTALL REAR DOOR LOCK REMOTE CONTROL CABLE ASSEMBLY LH
  1. Install the rear door lock remote control cable assembly LH.

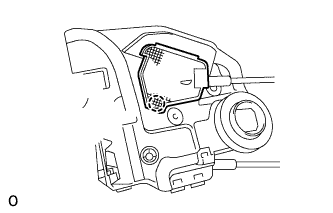
  1. B183928
    Attach the claw.


3. INSTALL REAR DOOR LOCK ASSEMBLY LH

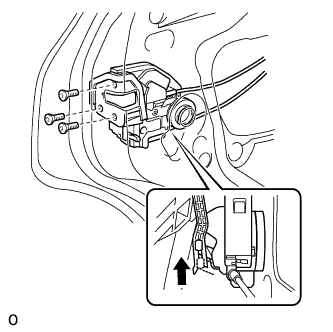
  1. B183927
    Apply MP grease to the sliding parts of the rear door lock assembly.

  1. Insert the rear door lock assembly to the rear door outside handle release plate, and set it to the rear door panel.

  1. Make sure that the rear door outside handle frame release plate is securely connected to the rear door lock assembly.

  1. Using a T30 ''TORX'' wrench, the 3 screws.

    Torque:
    5.0 N*m{ 51 kgf*cm , 44 in.*lbf }


4. INSTALL REAR DOOR SERVICE HOLE COVER LH
  1. Apply butyl tape to the door.

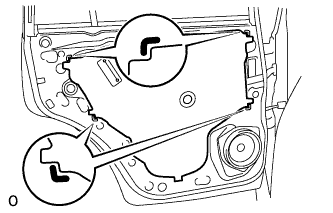
  1. B180918
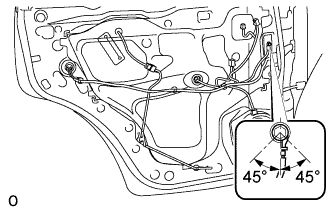
    Pass the rear door lock remote control cable assembly LH and rear door inside locking cable assembly LH through a new rear door service hole cover LH.

    NOTICE:
    1. When installing the rear door service hole cover LH, pull the links and connectors through the rear door service hole cover LH.
    2. There should be no wrinkles or folds after attaching the rear door service hole cover LH.
    3. After attaching the rear door service hole cover LH, check the sealing quality.

  1. Connect the 2 connectors.

  1. Attach the 6 clamps.

  1. B180916E01
    Install the bolt as shown in the illustration.

    Torque:
    8.4 N*m{ 86 kgf*cm , 74 in.*lbf }


5. INSTALL COURTESY LIGHT ASSEMBLY (w/ Courtesy Light)

  1. E155902
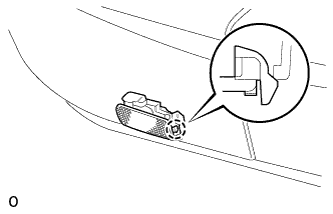
    Connect the connector.

  1. Attach the claw of the courtesy light to the rear door trim.


6. INSTALL REAR DOOR TRIM BOARD SUB-ASSEMBLY LH
  1. Connect the connector.

  1. B183925
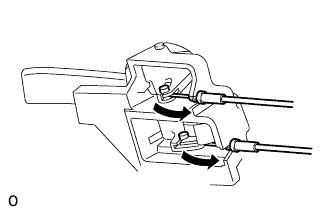
    Connect the rear door lock remote control cable assembly LH and rear door inside locking cable assembly LH to the rear door inside handle sub-assembly LH.

  1. B180912
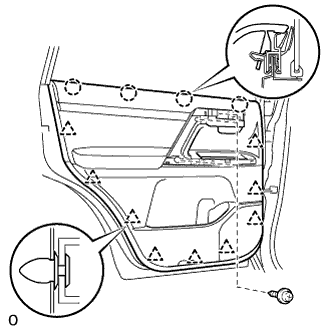
    Attach the 4 claws and 9 clips to install the rear door trim board sub-assembly LH.

  1. Install the 3 screws.


7. INSTALL ASSIST GRIP COVER LH
  1. Attach the 9 claws to install the assist grip cover LH to the rear door trim board sub-assembly LH.


8. INSTALL REAR DOOR INSIDE HANDLE BEZEL LH
  1. Attach the 4 claws to install the rear door inside handle bezel LH.


9. INSTALL REAR DOOR ARMREST BASE PANEL ASSEMBLY LH
  1. Connect the connector.

  1. B183923
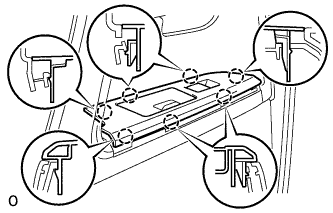
    Attach the 7 claws to install the armrest base panel.


10. CONNECT CABLE TO NEGATIVE BATTERY TERMINAL

NOTICE:
When disconnecting the cable, some systems need to be initialized after the cable is reconnected (Click here).

← INSTALLATION (Sep 2011 – Dec 2011)COMPONENTS (Sep 2011 – Dec 2011) →