REMOVAL
Removal / installation · Vehicles built Sep 2011 – Dec 2011
Versions by build date: Sep 2011 – Dec 2011 from Jan 2012
| 1.
REMOVE CENTER BACK DOOR GARNISH
|
 |
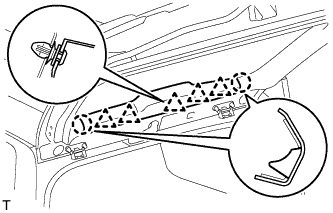
- Detach the 5 clips and 2 claws, and remove the back door garnish.
| 2.
REMOVE BACK DOOR SIDE GARNISH LH
|
|
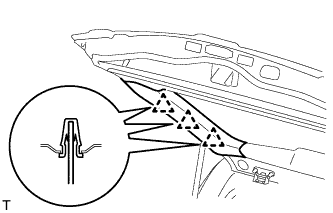
- Detach the 3 clips and remove the back door side garnish.
| 3.
REMOVE BACK DOOR SIDE GARNISH RH
|
|
- HINT:
- Use the same procedures described for the LH side.
| 4.
REMOVE ASSIST GRIP (for Parallel Seat Type)
|
|
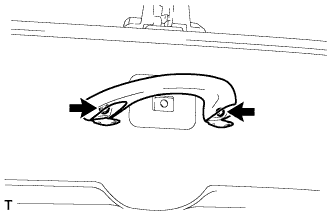
- Remove the 2 screws and assist grip.
| 5.
REMOVE NO. 2 BACK DOOR SERVICE HOLE COVER (for Parallel Seat Type)
|
|
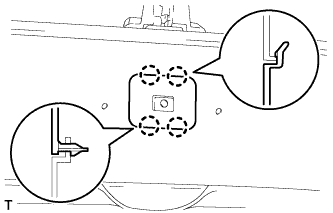
- Using a screwdriver, detach the 4 claws and remove the back door service hole cover.
Disconnect connector.
| 6.
REMOVE POWER BACK DOOR MAIN SWITCH (for Parallel Seat Type)
|
|
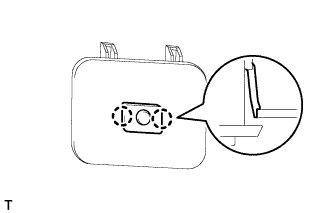
- Detach the 2 claws and remove the power back door main switch.
| 7.
REMOVE BACK DOOR GARNISH
|
|
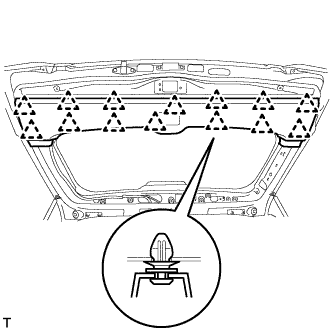
Using a screwdriver, detach the 14 clips and remove the back door garnish.
- HINT:
- Tape the screwdriver tip before use.
| 8.
REMOVE REAR ASSIST GRIP REINFORCEMENT (for Parallel Seat Type)
|
|
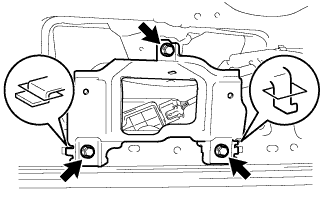
- Remove the 3 bolts.
Detach the 2 claws and remove the rear assist grip reinforcement.
| 9.
REMOVE BACK DOOR LOCK COVER |
|
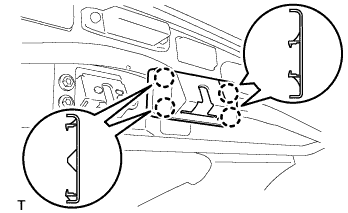
- Detach the 4 claws and remove the cover.
| 10.
REMOVE BACK DOOR LOCK ASSEMBLY |
|
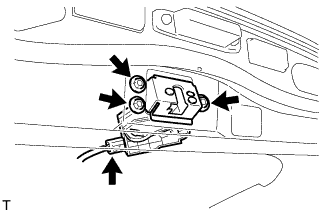
- Disconnect the connector.
Remove the 3 bolts and door lock.