REMOVAL
Removal / installation · Vehicles built Sep 2011 – Dec 2011
Versions by build date: Sep 2011 – Dec 2011 from Jan 2012
| 1. DISABLE AUTO TILT AWAY FUNCTION |

Disable the Autoaway/Return function by changing the customize parameter (Click here).
- NOTICE:
- Record the current customize parameter setting (whether the Autoaway/Return function is enabled or disabled) in order to restore the current setting after finishing the operation.
- HINT:
- Performing the above operation causes the Autoaway/Return function to be disabled when the engine switch is turned off.
Turn the engine switch on (IG). Operate the tilt and telescopic switch to fully extend and lower the steering column.
Turn the engine switch off.
| 2. REMOVE NO. 1 INSTRUMENT CLUSTER FINISH PANEL GARNISH |
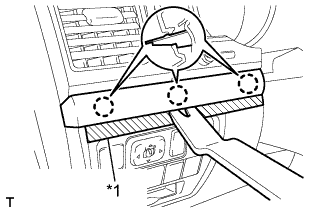  |
Place protective tape as shown in the illustration.
Text in Illustration *1
Protective Tape
Using a moulding remover, detach the 3 claws and remove the No. 1 instrument cluster finish panel garnish.
| 3. REMOVE NO. 2 INSTRUMENT PANEL FINISH PANEL CUSHION |
Place protective tape as shown in the illustration.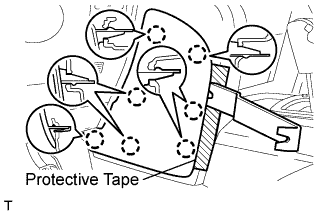
Using a moulding remover, detach the 7 claws and remove the panel cushion.
| 4. REMOVE LOWER INSTRUMENT PANEL PAD SUB-ASSEMBLY LH |
Remove the clip.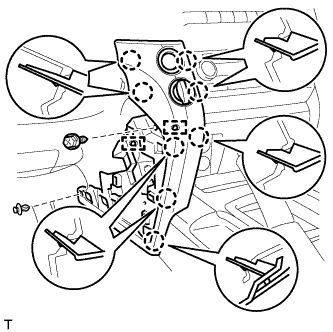
Remove the screw.
Detach the 8 claws.
Remove the panel pad and disconnect the connectors and 2 clamps.
| 5. REMOVE NO. 2 INSTRUMENT CLUSTER FINISH PANEL GARNISH |
Place protective tape as shown in the illustration.
Using a moulding remover, detach the 2 claws and remove the No. 2 instrument cluster finish panel garnish.
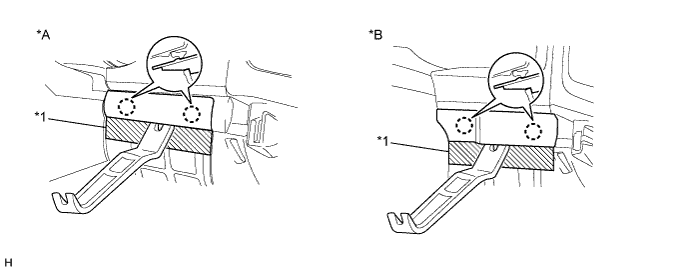
Text in Illustration *A
w/ Entry and Start System
*B
w/o Entry and Start System
*1
Protective Tape
-
-
| 6. REMOVE INSTRUMENT CLUSTER FINISH PANEL SUB-ASSEMBLY |
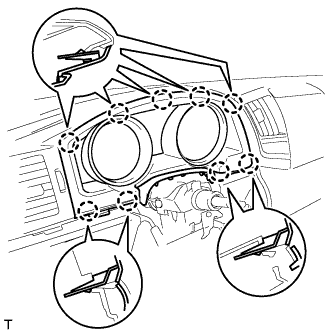 |
Detach the 9 claws.
Disconnect the connector and remove the instrument cluster finish panel.
| 7. REMOVE LIGHT CONTROL RHEOSTAT |
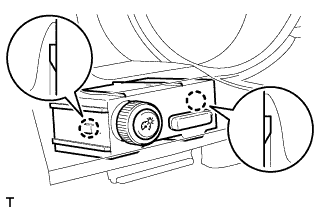
Detach the 2 claws and remove the rheostat.