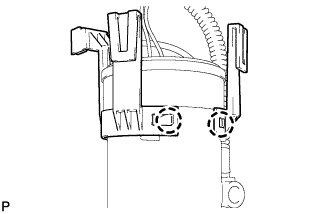
DISASSEMBLY
Removal / installation · Vehicles built from Jan 2012
- NOTICE:
- Do not disconnect the hoses indicated in the illustration.
-
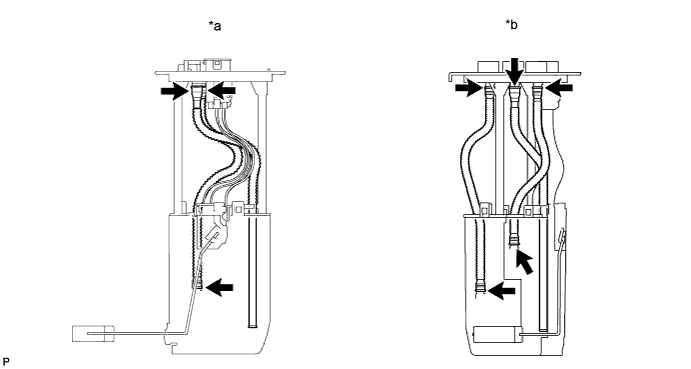

| *a |
for Single Tank Type |
*b |
for Double Tank Type |
| 1. REMOVE FUEL SENDER GAUGE ASSEMBLY |

Disconnect the fuel sender gauge connector.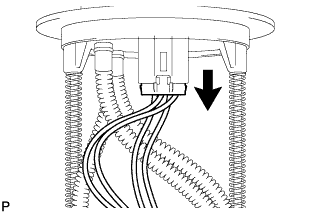
Press down on the sender gauge claw labeled A. Then slide the sender gauge upward to remove it.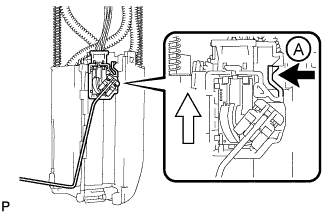
Text in Illustration 
Press Down

Slide
| 2. REMOVE NO. 1 FUEL SUB-TANK (for Single Tank Type) |
Disconnect the fuel pump connector.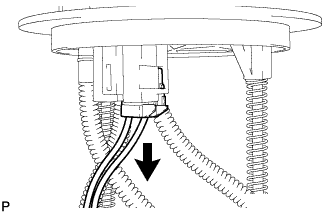
Disconnect the jet pump from the No. 1 fuel sub-tank.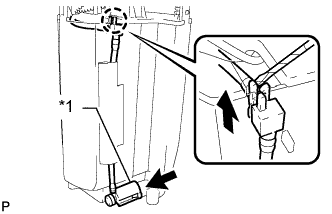
Text in Illustration *1
Jet Pump
Using a small screwdriver, detach the claw from the No. 1 fuel sub-tank.
- HINT:
- Tape the screwdriver tip before use.
Detach the tube from the 2 clamps on the No. 1 fuel sub-tank.
Using a screwdriver, detach the 3 claws from the claw holes.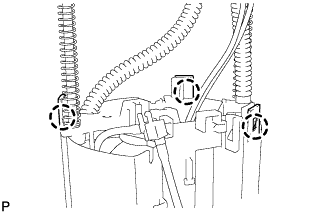
- NOTICE:
- Do not damage the No. 1 fuel sub-tank.
- HINT:
- Tape the screwdriver tip before use.
Using a screwdriver, detach the 3 claws from the claw holes and remove the No. 1 fuel sub-tank.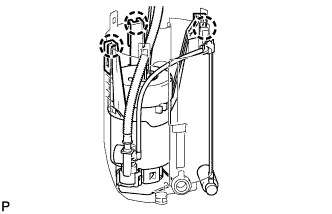
- NOTICE:
- Do not damage the No. 1 fuel sub-tank.
- HINT:
- Tape the screwdriver tip before use.
| 3. REMOVE NO. 1 FUEL SUB-TANK (for Double Tank Type) |
Disconnect the fuel pump connector.
Disconnect the jet pump (labeled A) from the No. 1 fuel sub-tank.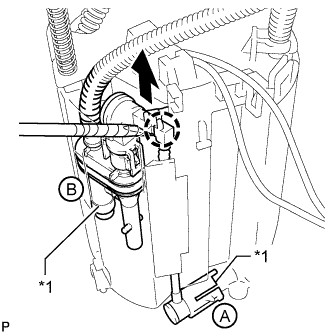
Text in Illustration *1
Jet Pump
Disconnect the jet pump (labeled B) from the No. 1 fuel sub-tank.
Using a small screwdriver, detach the claw from the No. 1 fuel sub-tank.
- HINT:
- Tape the screwdriver tip before use.
Using a screwdriver, detach the 3 claws from the claw holes.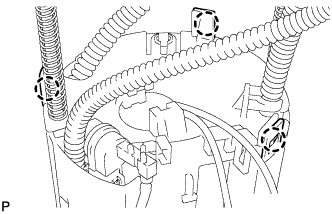
- NOTICE:
- Do not damage the No. 1 fuel sub-tank.
- HINT:
- Tape the screwdriver tip before use.
Using a screwdriver, detach the 3 claws from the claw holes.
- NOTICE:
- Do not damage the No. 1 fuel sub-tank.
- HINT:
- Tape the screwdriver tip before use.
| 4. REMOVE FUEL PUMP |
Using a screwdriver, detach the 5 claws from the claw holes and disconnect the fuel pump from the fuel filter case.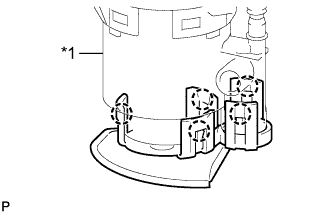
Text in Illustration *1
Fuel Filter Case
- HINT:
- Tape the screwdriver tip before use.
Disconnect the fuel pump wire harness connector from the fuel pump to remove it.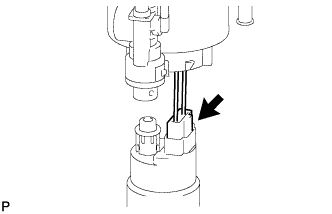
Remove the O-ring and spacer from the fuel pump.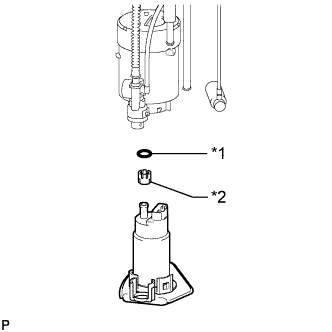
Text in Illustration *1
O-Ring
*2
Spacer
| 5. REMOVE FUEL MAIN VALVE ASSEMBLY |
Remove the fuel main valve from the fuel filter case.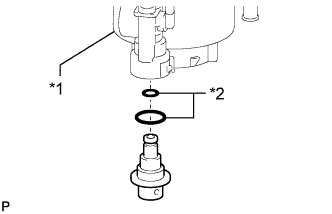
Text in Illustration *1
Fuel Filter Case
*2
O-Ring
Remove the 2 O-rings from the fuel main valve.
| 6. REMOVE NO. 1 FUEL SUCTION SUPPORT |
Detach the 2 claws from the claw holes to remove the fuel suction support.