INSTALLATION
Removal / installation · Vehicles built from Sep 2011
| 1. INSTALL INLET AIR CLEANER SEAL BRACKET SUB-ASSEMBLY |

Install the inlet air cleaner seal bracket with the 2 bolts.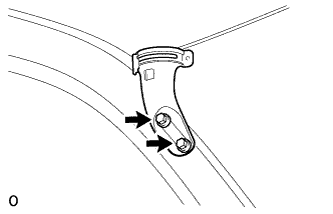

- Torque:
- 6.5 N*m{ 70 kgf*cm , 58 in.*lbf }
| 2. INSTALL NO. 2 INLET AIR CLEANER |
Install the No. 2 inlet air cleaner with the 2 bolts.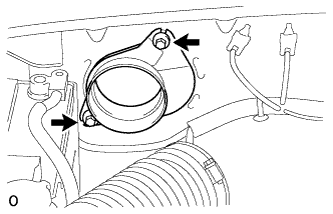
- Torque:
- 5.5 N*m{ 56 kgf*cm , 49 in.*lbf }
| 3. INSTALL AIR CLEANER ASSEMBLY |
Install the air cleaner case with the 3 bolts.
- Torque:
- 5.0 N*m{ 51 kgf*cm , 44 in.*lbf }
Attach the wire harness clamp to the air cleaner case.
Connect the mass air flow meter connector and attach the wire harness clamp to the air cleaner cap.
| 4. INSTALL NO. 1 INLET AIR CLEANER |
Attach the claw of the No. 1 inlet air cleaner to the No. 2 inlet air cleaner, and install the No. 1 inlet air cleaner with the 2 bolts.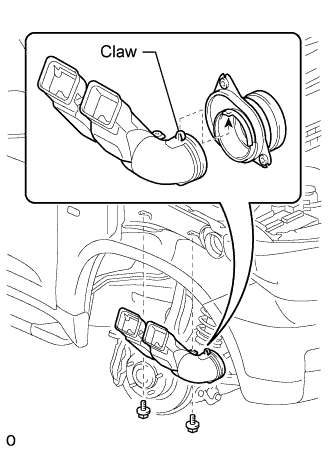
- Torque:
- 5.5 N*m{ 56 kgf*cm , 49 in.*lbf }
| 5. INSTALL FRONT FENDER LINER RH |
Install the fender liner with the 5 clips.
Using a T30 "TORX" socket, install the 3 screws.
Connect the liner to the front bumper cover with the screw.
| 6. INSTALL FRONT FENDER SPLASH SHIELD SUB-ASSEMBLY RH |
Install the splash shield with the clip, and then install the 3 bolts and screw.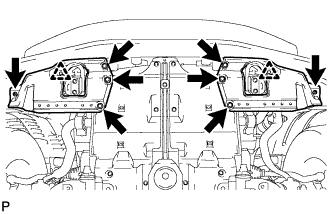
| 7. INSTALL COOL AIR INTAKE PIPE RETAINER |
Install the cool air intake pipe retainer with the 2 bolts.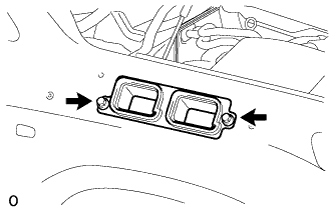
| 8. INSTALL COOL AIR INTAKE DUCT |
Install the cool air intake duct with the 2 bolts.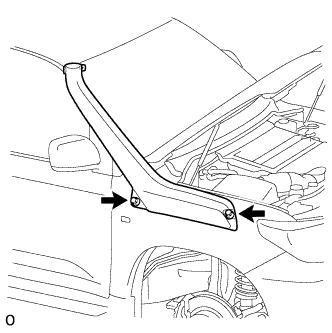
| 9. INSTALL AIR PRE-CLEANER ASSEMBLY |
Temporarily install the No. 2 inlet air cleaner bracket to the inlet air cleaner seal bracket with the bolt.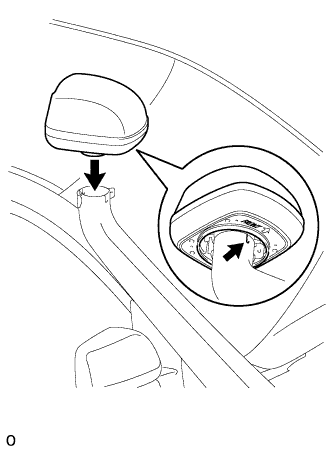
Install the air pre-cleaner to the cool air intake duct.
- HINT:
- Fit the air pre-cleaner into the groove of the cool air intake duct with the side stamped "FRONT" facing forward.
Tighten the bolt of the inlet air cleaner bracket.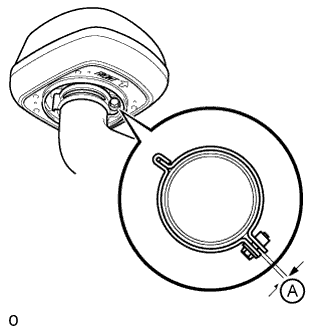
- HINT:
- When tightening bolt, make sure that the clearance labeled A in the illustration os as specified.
- Standard clearance:
- 0 to 5 mm (0 to 1.97 in.)