INSTALLATION
Removal / installation · Vehicles built Sep 2011 – Dec 2011
Versions by build date: Sep 2011 – Dec 2011 from Jan 2012
| 1. INSTALL TURBO MOTOR DRIVER |

Install the 2 turbo motor drivers to the brackets with the 8 screws.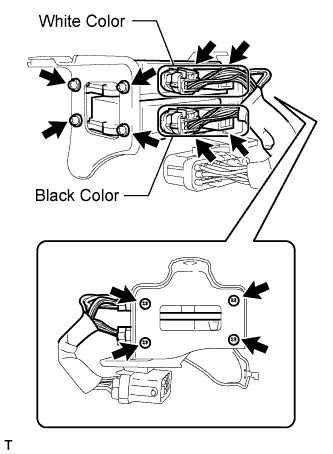

- Torque:
- 2.0 N*m{ 20 kgf*cm , 18 in.*lbf }
Connect the 4 connectors to the turbo motor driver.
- NOTICE:
- Mach the 10 pin and 4 pin connector colors when connecting them to the turbo motor driver.
- Make sure to connect the white connectors to the upper side and the black connectors to the lower side.
- Mach the 10 pin and 4 pin connector colors when connecting them to the turbo motor driver.
Insert the bracket tab into the slot labeled A and insert the 2 stud bolts into the bracket hole as shown in illustration.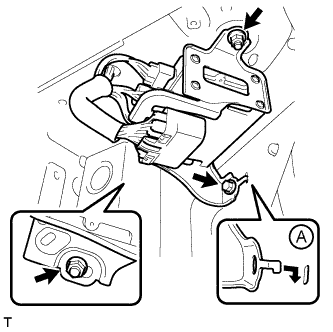
Install the 2 nuts and bolt.
- Torque:
- 20 N*m{ 199 kgf*cm , 14 ft.*lbf }
Connect the connector. Then move the lock lever as shown in the illustration to lock the connectors.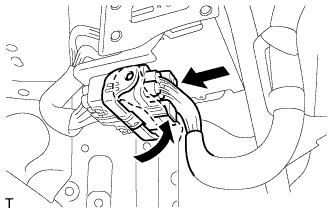
| 2. INSTALL FRONT FENDER LINER RH |
Install the fender liner with the 5 clips.
Using a T30 "TORX" socket, install the 3 screws.
Connect the liner to the front bumper cover with the screw.
| 3. INSTALL FRONT FENDER SPLASH SHIELD SUB-ASSEMBLY RH |
Install the splash shield with the clip, and then install the 3 bolts and screw.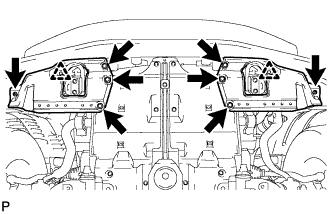
| 4. CONNECT CABLE TO NEGATIVE NEGATIVE BATTERY TERMINAL |
- NOTICE:
- When disconnecting the cable, some systems need to be initialized after the cable is reconnected (Click here).
Connect the cables to the negative (-) main battery and sub-battery terminals.