REMOVAL
Removal / installation · Vehicles built Sep 2011 – Dec 2011
Versions by build date: Sep 2011 – Dec 2011 from Jan 2012
| 1.
DISCONNECT CABLE FROM NEGATIVE BATTERY TERMINAL |
 |
- NOTICE:
- When disconnecting the cable, some systems need to be initialized after the cable is reconnected (Click here).
| 2.
REMOVE NO. 2 INSTRUMENT PANEL FINISH PANEL CUSHION
|
|
Put protective tape around the No. 2 instrument panel finish panel cushion.
Text in Illustration
*1
|
Protective Tape
|
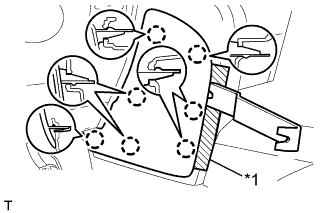
Using a moulding remover, detach the 7 claws and remove the No. 2 instrument panel finish panel cushion.
| 3.
REMOVE LOWER INSTRUMENT PANEL PAD SUB-ASSEMBLY LH
|
|
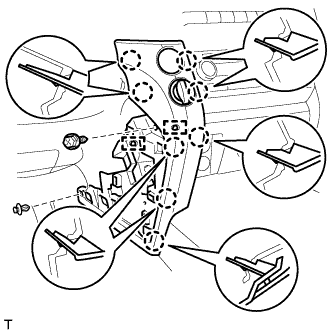
Remove the clip and screw.
Detach the 8 claws.
Disconnect the connectors, detach the 2 clamps and remove the lower instrument panel pad sub-assembly.
| 4.
REMOVE NO. 1 INSTRUMENT PANEL FINISH PANEL CUSHION
|
|
Put protective tape around the No. 1 instrument panel finish panel cushion.
Text in Illustration
*1
|
Protective Tape
|
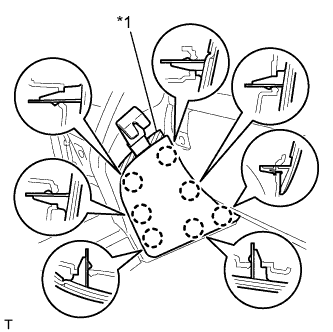
Using a moulding remover, detach the 7 claws and remove the No. 1 instrument panel finish panel cushion.
| 5.
REMOVE LOWER INSTRUMENT PANEL PAD SUB-ASSEMBLY RH
|
|
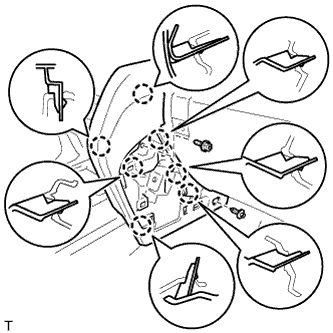
Remove the clip and screw.
Detach the 7 claws and remove the lower instrument panel pad sub-assembly.
| 6.
REMOVE LOWER CENTER INSTRUMENT CLUSTER FINISH PANEL SUB-ASSEMBLY
|
|
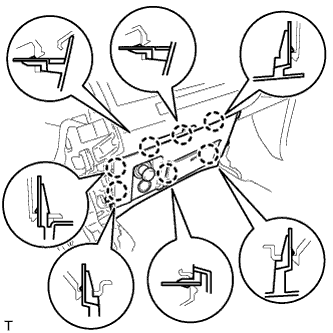
Detach the 7 claws.
Disconnect the connectors and remove the lower center instrument cluster finish panel sub-assembly.
| 7.
REMOVE NO. 1 SPEAKER OPENING COVER ASSEMBLY
|
|
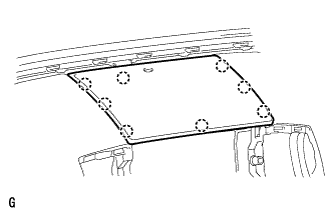
Detach the 8 claws and remove the opening cover.
| 8.
REMOVE NO. 3 INSTRUMENT PANEL REGISTER ASSEMBLY
|
|
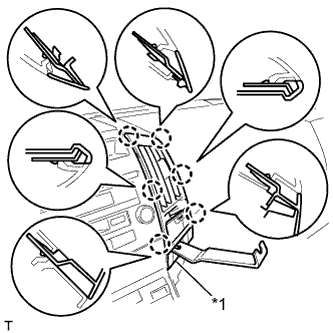
Place protective tape as shown in the illustration.
Text in Illustration
*1
|
Protective Tape
|
Using a moulding remover, detach the 6 claws.
Disconnect the connector and remove the No. 3 instrument panel register.
| 9.
REMOVE NO. 4 INSTRUMENT PANEL REGISTER ASSEMBLY
|
|
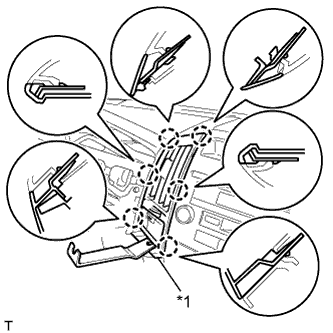
Place protective tape as shown in the illustration.
Text in Illustration
*1
|
Protective Tape
|
Using a moulding remover, detach the 6 claws.
Disconnect the connector and remove the No. 4 instrument panel register.
| 10.
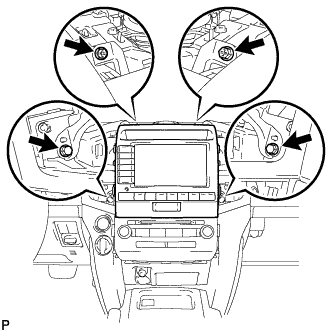
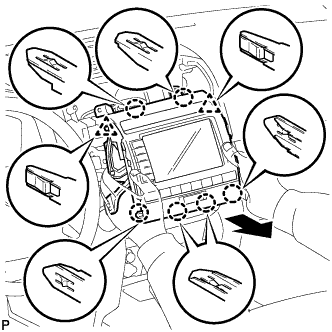
REMOVE MULTI-DISPLAY ASSEMBLY WITH BRACKET
|
|
- Remove the 2 screws and 2 bolts.
- Pull the radio receiver to detach the 2 clips and 6 claws on the backside of the display.
Disconnect the connectors and remove the display.
| 11.
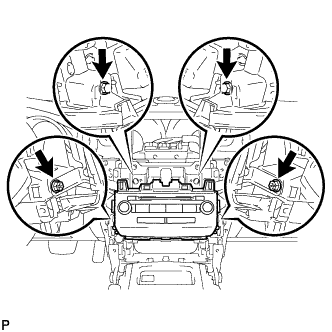
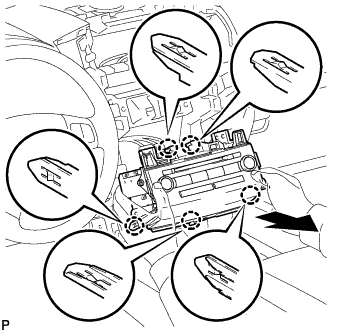
REMOVE RADIO RECEIVER ASSEMBLY WITH BRACKET |
|
- Remove the 2 screws and 2 bolts.
- Pull the radio receiver to detach the 5 claws on the backside of the radio receiver.
Disconnect the connectors and remove the radio receiver.
| 12.
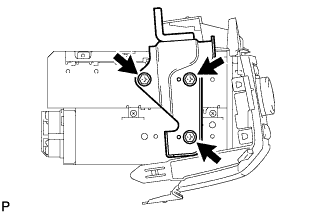
REMOVE NO. 1 RADIO BRACKET |
|
- Remove the 3 bolts and bracket.
| 13.
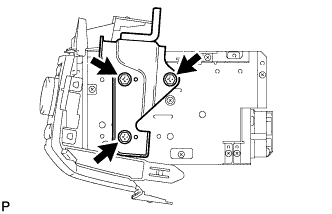
REMOVE NO. 2 RADIO BRACKET |
|
- Remove the 3 bolts and bracket.