INSTALLATION
Removal / installation · Vehicles built Sep 2011 – Dec 2011
Versions by build date: Sep 2011 – Dec 2011 from Jan 2012
| 1.
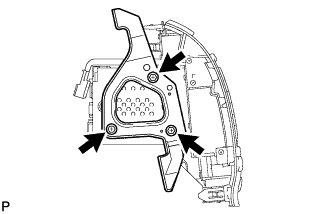
INSTALL NO. 2 RADIO RECEIVER BRACKET |
 |
- Install the bracket with the 3 bolts.
-
Torque:
- 3.0 N*m{
30 kgf*cm
, 26 in.*lbf
}
| 2.
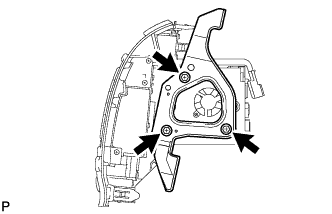
INSTALL NO. 1 RADIO RECEIVER BRACKET |
|
- Install the bracket with the 3 bolts.
-
Torque:
- 3.0 N*m{
30 kgf*cm
, 26 in.*lbf
}
| 3.
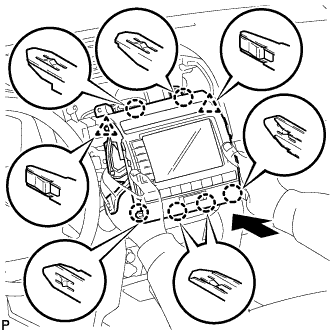
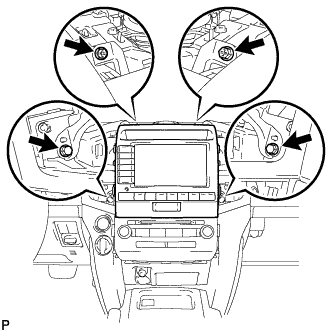
INSTALL MULTI-DISPLAY ASSEMBLY |
|
Connect the connectors.
- Insert the display and attach the 2 clips and 6 claws on its backside.
- NOTICE:
- When inserting the display, do not press the knobs on it.
- Install the display with the 2 screws and 2 bolts.
-
Torque:
- Bolt:
- 12 N*m{
122 kgf*cm
, 9 ft.*lbf
}
| 4.
INSTALL NO. 4 INSTRUMENT PANEL REGISTER ASSEMBLY
|
|
Connect the connector.
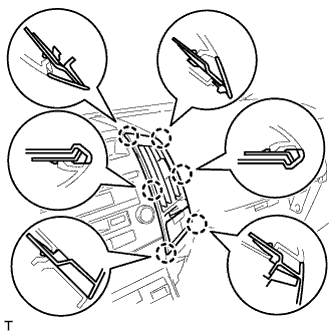
Attach the 6 claws to install the No. 4 instrument panel register.
| 5.
INSTALL NO. 3 INSTRUMENT PANEL REGISTER ASSEMBLY
|
|
Connect the connector.
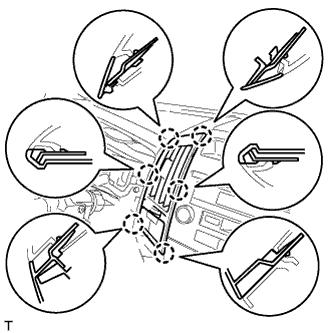
Attach the 6 claws to install the No. 3 instrument panel register.
| 6.
INSTALL NO. 1 SPEAKER OPENING COVER ASSEMBLY
|
|
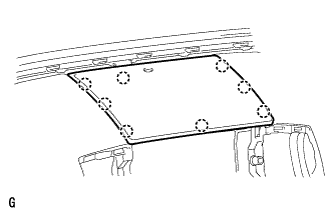
Attach the 8 claws to install the opening cover.
| 7.
CONNECT CABLE TO NEGATIVE BATTERY TERMINAL |
|
- NOTICE:
- When disconnecting the cable, some systems need to be initialized after the cable is reconnected (Click here).