Home › Vehicle Exterior › LIGHTING (EXT) › HEADLIGHT ASSEMBLY (for Halogen Headlight)REASSEMBLY
Removal / installation · Vehicles built from Jan 2012
Versions by build date: Sep 2011 – Dec 2011 from Jan 2012
HINT:
Use the same procedure for the RH and LH sides.
The procedure listed below is for the LH side.
1.
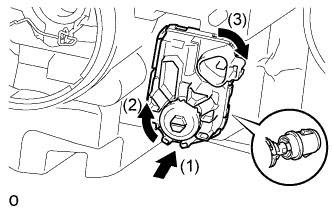
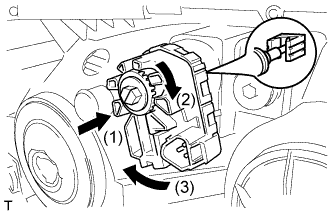
INSTALL HEADLIGHT LEVELING MOTOR LH (w/ Projector Headlight)
Insert the headlight leveling motor LH in the direction indicated by the arrow (1) in the illustration. Turn the aiming screw in the direction indicated by the arrow (2) in the illustration to connect the shaft.
Turn the headlight leveling motor LH in the direction indicated by the arrow (3) in the illustration to install it.
Connect the connector.
2.
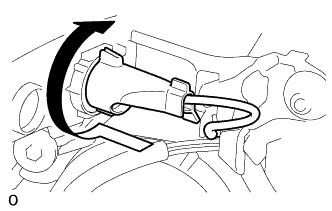
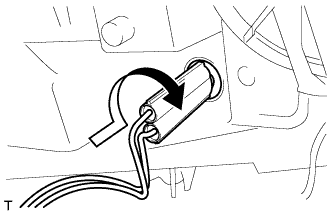
INSTALL FRONT TURN SIGNAL LIGHT BULB (w/ Projector Headlight)
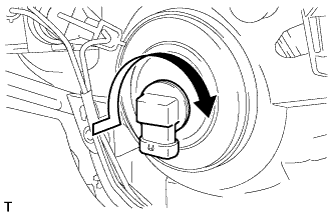
Install the front turn signal light bulb to the socket. Turn the socket in the direction indicated by the arrow in the illustration to install the socket.
3.
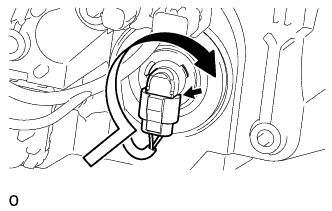
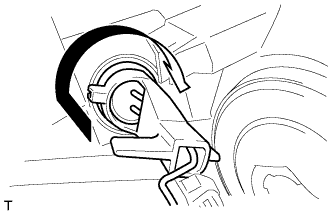
INSTALL NO. 1 HEADLIGHT BULB (w/ Projector Headlight)
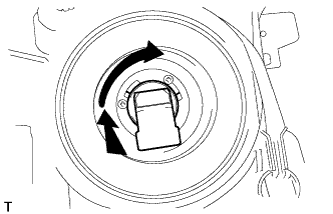
Turn the No. 1 headlight bulb in the direction indicated by the arrow in the illustration to install the No. 1 headlight bulb.
NOTICE:
Do not touch the glass part of the No. 1 headlight bulb glass.
Connect the connector.
4.
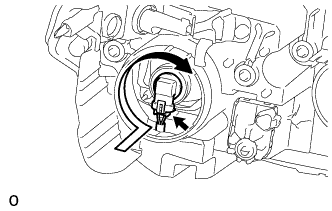
INSTALL NO. 2 HEADLIGHT BULB (w/ Projector Headlight)
Turn the No. 2 headlight bulb in the direction indicated by the arrow in the illustration to install the No. 2 headlight bulb.
NOTICE:
Do not touch the glass part of the No. 2 headlight bulb glass.
Connect the connector.
5.
INSTALL HEADLIGHT GASKET (w/ Projector Headlight)
Install a new headlight gasket to the No. 1 headlight cover.
6.
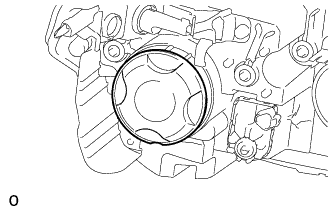
INSTALL NO. 1 HEADLIGHT COVER (w/ Projector Headlight)
Turn the No. 1 headlight cover in the direction indicated by the arrow in the illustration to install the No. 1 headlight cover to the headlight unit LH.
7.
INSTALL HEADLIGHT LEVELING MOTOR LH (w/o Projector Headlight)
Insert the headlight leveling motor LH in the direction indicated by the arrow (1) in the illustration. Turn the aiming screw in the direction indicated by the arrow (2) in the illustration to connect the shaft.
Turn the headlight leveling motor LH in the direction indicated by the arrow (3) in the illustration to install it.
8.
INSTALL CLEARANCE LIGHT BULB (w/o Projector Headlight)
Install the clearance light bulb to the socket. Turn the socket in the direction indicated by the arrow in the illustration to install the socket.
9.
INSTALL FRONT TURN SIGNAL LIGHT BULB (w/o Projector Headlight)
Install the front turn signal light bulb to the socket. Turn the socket in the direction indicated by the arrow in the illustration to install the socket.
10.
INSTALL NO. 2 HEADLIGHT BULB (w/o Projector Headlight)
Turn the No. 2 headlight bulb in the direction indicated by the arrow in the illustration to install the No. 2 headlight bulb.
NOTICE:
Do not touch the glass part of the No. 2 headlight bulb glass.
11.
INSTALL NO. 1 HEADLIGHT BULB (w/o Projector Headlight)
Turn the No. 1 headlight bulb in the direction indicated by the arrow in the illustration to install the No. 1 headlight bulb.
NOTICE:
Do not touch the glass part of the No. 1 headlight bulb glass.