REMOVAL
Removal / installation · Vehicles built from Sep 2011
| 1.
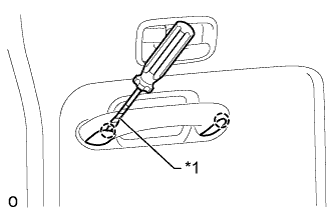
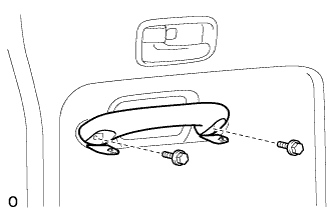
REMOVE ASSIST GRIP LH
|
 |
- Using a screwdriver, detach the 2 claws and open the 2 covers.
- HINT:
- Tape the screwdriver tip before use.
Text in Illustration
*1
|
Protective Tape
|
- Remove the 2 bolts and assist grip.
| 2.
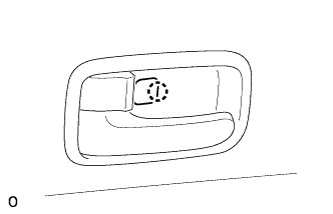
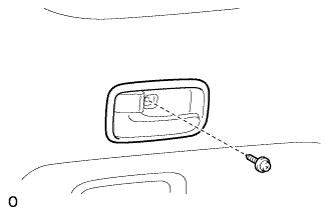
REMOVE DOOR INSIDE HANDLE BEZEL LH
|
|
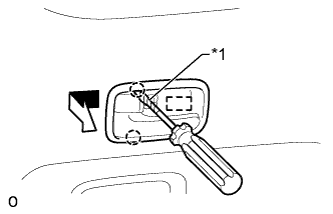
- Detach the claw and open the cover.
- Remove the screw.
- Using a screwdriver, detach the 2 claws.
- HINT:
- Tape the screwdriver tip before use.
Text in Illustration
*1
|
Protective Tape
|
Detach the guide and remove the door inside handle bezel in the direction indicated by the arrow in the illustration.
| 3.
REMOVE BACK DOOR TRIM PANEL ASSEMBLY LH
|
|
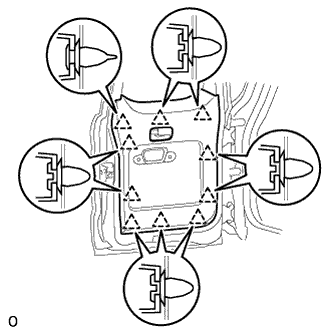
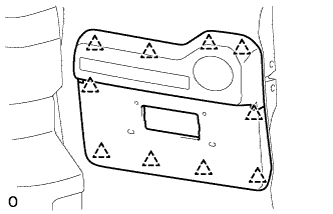
- Detach the 10 clips and remove the back door trim panel.
| 4.
REMOVE REAR ASSIST GRIP REINFORCEMENT LH
|
|
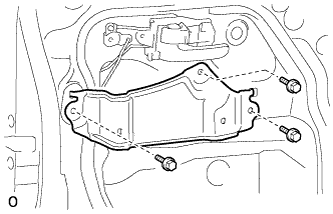
- Remove the 3 bolts and rear assist grip reinforcement.
| 5.
REMOVE BACK DOOR INSIDE HANDLE ASSEMBLY LH
|
|
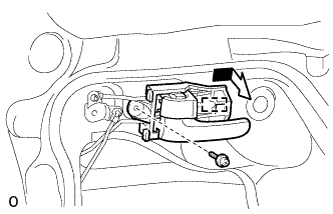
- Remove the screw.
Detach the guide and remove the back door inside handle in the direction indicated by the arrow in the illustration.
Disconnect the 2 links from the back door inside handle.
| 6.
REMOVE BACK DOOR SERVICE HOLE COVER LH
|
|
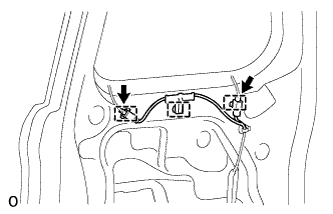
- Disconnect the 2 connectors and detach the 3 clamps.
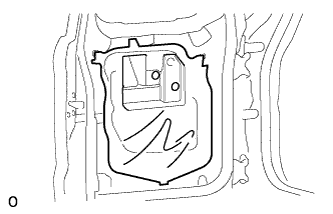
- Pull out the 2 links and wire harness from the back door service hole cover, and then remove the back door service hole cover.
- HINT:
- Remove any remaining butyl tape from the back door panel.
| 7.
REMOVE BACK DOOR OUTSIDE HANDLE |
|
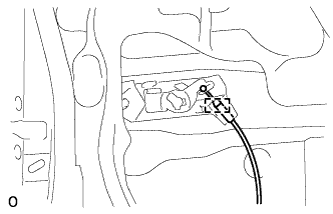
- Detach the guide and disconnect the cable.
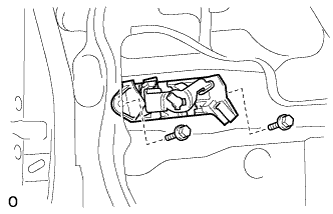
- Remove the 2 bolts and back door outside handle.
| 8.
REMOVE BACK DOOR OUTSIDE GARNISH SUB-ASSEMBLY |
|
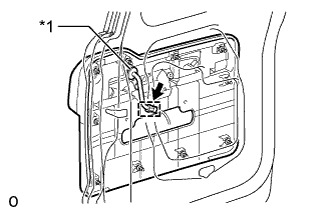
- Detach the clamp and disconnect the connector.
Detach the grommet, and then pull out the wire harness from the back door panel.
Text in Illustration
*1
|
Grommet
|
- Detach the 10 clips and remove the back door outside garnish.