BRAKE SYSTEM (OTHER) BRAKE PEDAL(for RHD) ADJUSTMENT
PROCEDURE

 1.CHECK BRAKE PEDAL HEIGHT
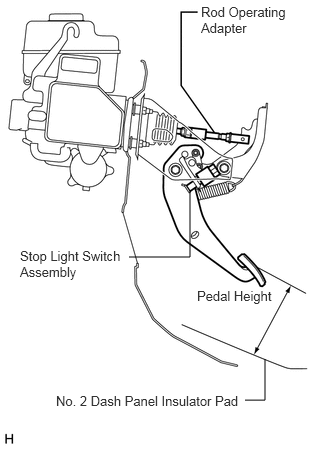
Check the brake pedal height.
- Standard Pedal Height from No. 2 Dash Panel Insulator Pad:
149.1 to 159.1 mm (5.87 to 6.26 in.)
- NOTICE:
-
Do not adjust the pedal height. Doing so by changing the push rod length will structurally change the pedal ratio.
If the pedal height is incorrect, adjust the rod operating adapter length.
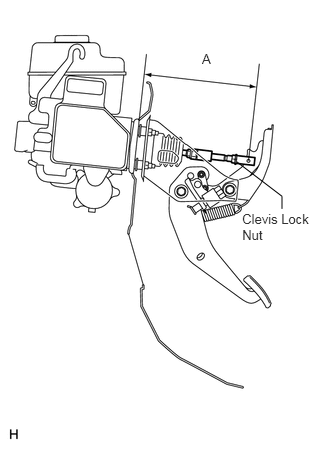
Adjust the rod operating adapter length.
Remove the clip and clevis pin.
Loosen the clevis lock nut.
Adjust the rod operating adapter length by turning the pedal push rod clevis.
- Standard Rod Operating Adapter Length "A":
201.7 to 202.7 mm (7.94 to 7.98 in.)
Tighten the clevis lock nut.
- Torque:
- 26 N*m (260 kgf*cm, 19 ft.*lbf)
Set the master cylinder push rod clevis in place, insert the push rod pin from the outside of the vehicle and then install a new clip. If the pedal height is incorrect even if the rod operating adapter is adjusted, check that there is no damage in the brake pedal, brake pedal lever, brake pedal support and dash panel.
Even if there is damage, there is no problem if the reserve distance is within the standard value.
If necessary, replace any damaged parts.
84340
2.CHECK AND ADJUST STOP LIGHT SWITCH ASSEMBLY
- HINT:
-
If the pedal height is incorrect, check and adjust the stop light switch clearance.
Disconnect the stop light switch assembly connector from the stop light switch assembly.
Turn the stop light switch assembly counterclockwise and remove the stop light switch assembly.
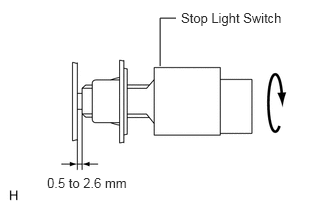
Insert the stop light switch assembly until the body hits the brake pedal bracket.
- NOTICE:
-
When inserting the stop light switch assembly, support the pedal from behind so that the pedal is not pushed in.
Turn the stop light switch assembly a quarter turn clockwise to install it.
- HINT:
-
Turning the stop light switch assembly counterclockwise loosens the switch.
Connect the stop light switch connector to the stop light switch.
Check the protrusion of the rod.
- Standard Rod Protrusion:
0.5 to 2.6 mm (0.0197 to 0.102 in.)
After adjusting the pedal height, check the pedal free play.
3.CHECK PEDAL FREE PLAY
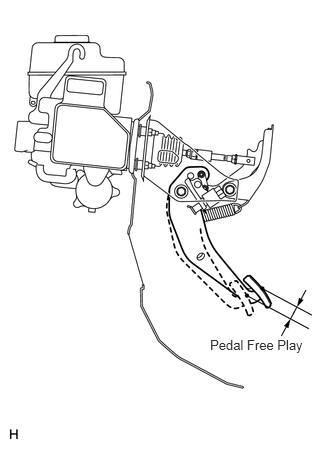
Push in the pedal until the beginning of the resistance is felt. Measure the pedal free play.
- Standard Pedal Free Play:
1 to 6 mm (0.0394 to 0.236 in.)
4.CHECK PEDAL RESERVE DISTANCE
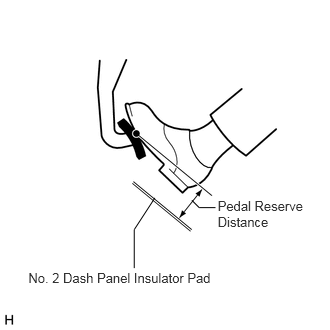
Release the parking brake lever.
With the engine running, depress the pedal and measure the pedal reserve distance as shown in the illustration.
- Standard Pedal Reserve Distance from No. 2 Dash Panel Insulator Pad at 490 N (50 kgf, 110.2 lbf):
More than 67.5 mm (2.66 in.)
If incorrect, troubleshoot the brake system.