AUDIO / VIDEO STEREO JACK ADAPTER ASSEMBLY INSTALLATION
PROCEDURE

 86190B
1.INSTALL REMOTE CONTROL ADAPTER ASSEMBLY
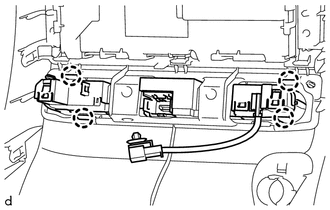
Attach the 4 claws to install the headphone terminal.
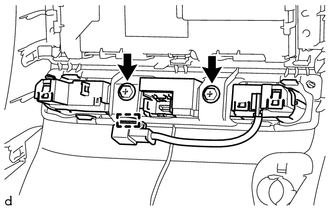
Install the 2 screws.
Attach the clamp.
58903A
2.INSTALL REAR CONSOLE END PANEL SUB-ASSEMBLY
86203
3.INSTALL RADIO WIRE
for Automatic Transmission:
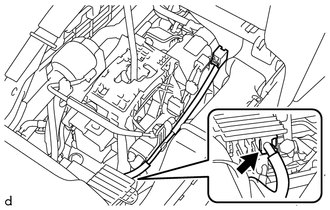
Connect the connector and remove the radio wire.
for Manual Transmission:
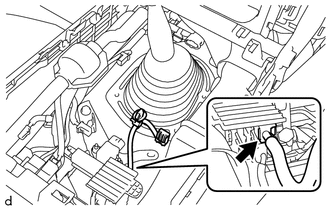
Connect the connector and remove the radio wire.
86190C
4.INSTALL NO. 1 STEREO JACK ADAPTER ASSEMBLY
for Automatic Transmission:
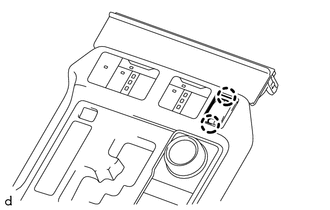
Attach the 2 claws to install the stereo jack adapter.
for Manual Transmission:
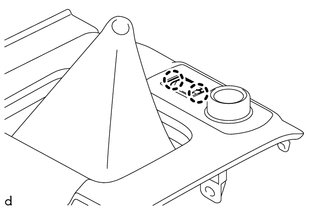
Attach the 2 claws to install the stereo jack adapter.
58804A
5.INSTALL UPPER CONSOLE PANEL SUB-ASSEMBLY
58805C
6.INSTALL REAR UPPER CONSOLE PANEL SUB-ASSEMBLY
58821C
7.INSTALL UPPER CONSOLE PANEL
58803C
8.INSTALL CONSOLE CUP HOLDER BOX SUB-ASSEMBLY
55406B
9.INSTALL LOWER CENTER INSTRUMENT CLUSTER FINISH PANEL SUB-ASSEMBLY
33504F
10.INSTALL SHIFT LEVER KNOB SUB-ASSEMBLY
55402C
11.INSTALL LOWER INSTRUMENT PANEL PAD SUB-ASSEMBLY RH
55448A
12.INSTALL NO. 1 INSTRUMENT PANEL FINISH PANEL CUSHION
55403C
13.INSTALL LOWER INSTRUMENT PANEL PAD SUB-ASSEMBLY LH
55449C
14.INSTALL NO. 2 INSTRUMENT PANEL FINISH PANEL CUSHION
15.CONNECT CABLE TO NEGATIVE BATTERY TERMINAL
- NOTICE:
-
When disconnecting the cable, some systems need to be initialized after the cable is reconnected (See page General>INTRODUCTION>REPAIR INSTRUCTION>INITIALIZATION).