INTERIOR PANELS / TRIM FRONT CONSOLE BOX(w/o Cool Box) REMOVAL
CAUTION / NOTICE / HINT
- HINT:
- ·
Use the same procedure for RHD and LHD vehicles.
·The procedure listed below is for LHD vehicles.
PROCEDURE

 55449C
1.REMOVE NO. 2 INSTRUMENT PANEL FINISH PANEL CUSHION
for Type A:
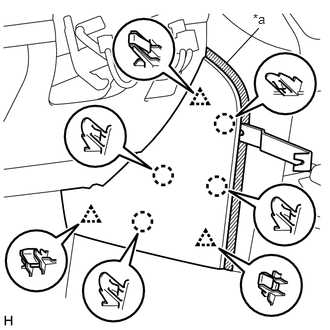
Put protective tape around the No. 2 instrument panel finish panel cushion.
| *a | Protective Tape |
Using a moulding remover B, detach the 4 claws and 3 clips and remove the No. 2 instrument panel finish panel cushion.
for Type B:
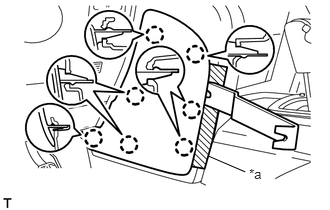
Put protective tape around the No. 2 instrument panel finish panel cushion.
| *a | Protective Tape |
Using a moulding remover, detach the 7 claws and remove the No. 2 instrument panel finish panel cushion.
55403C
2.REMOVE LOWER INSTRUMENT PANEL PAD SUB-ASSEMBLY LH
for Type A:
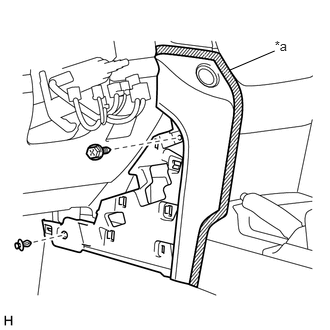
Put protective tape around the lower instrument panel pad sub-assembly LH.
| *a | Protective Tape |
Remove the clip and screw.
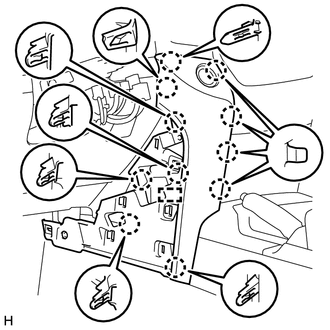
Detach the 11 claws and guide.
Disconnect the connector and detach the clamps and remove the lower instrument panel pad sub-assembly LH.
for Type B:
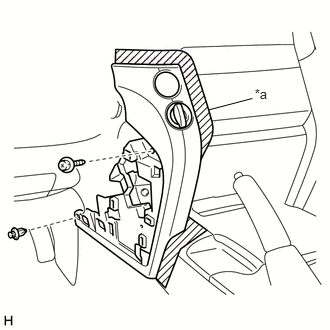
Put protective tape around the lower instrument panel pad sub-assembly LH.
| *a | Protective Tape |
Remove the clip and screw.
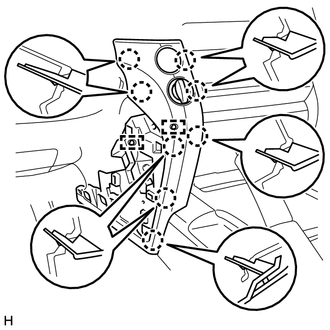
Detach the 8 claws and 2 guides and remove the lower instrument panel pad sub-assembly LH.
55448A
3.REMOVE NO. 1 INSTRUMENT PANEL FINISH PANEL CUSHION
for Type A:
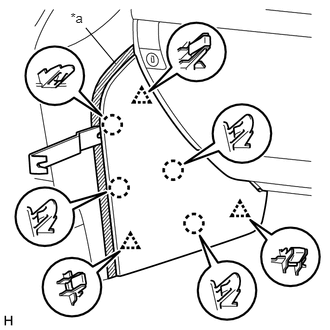
Put protective tape around the No. 1 instrument panel finish panel cushion.
| *a | Protective Tape |
Using a moulding remover B, detach the 4 claws and 3 clips and remove the No. 2 instrument panel finish panel cushion.
for Type B:
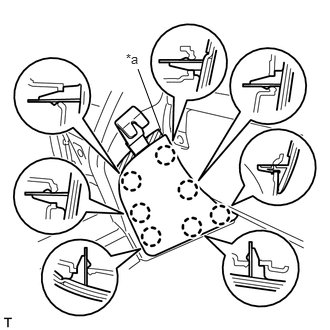
Put protective tape around the No. 1 instrument panel finish panel cushion.
| *a | Protective Tape |
Using a moulding remover, detach the 7 claws and remove the No. 2 instrument panel finish panel cushion.
55402C
4.REMOVE LOWER INSTRUMENT PANEL PAD SUB-ASSEMBLY RH
for Type A:
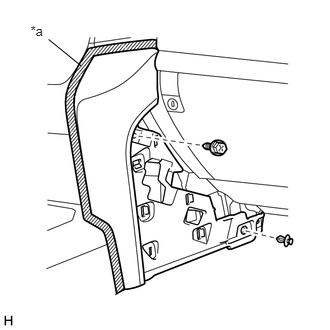
Put protective tape around the lower instrument panel pad sub-assembly RH.
| *a | Protective Tape |
Remove the clip and screw.
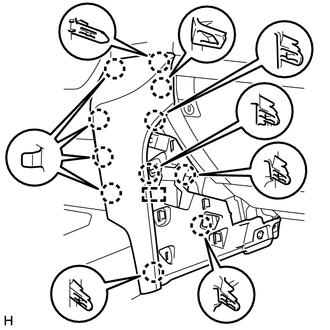
Detach the 11 claws and guide and remove the lower instrument panel pad sub-assembly RH.
for Type B:
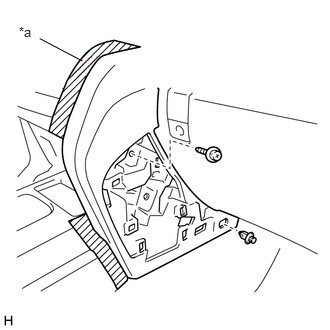
Put protective tape around the lower instrument panel pad sub-assembly RH.
| *a | Protective Tape |
Remove the clip and screw.
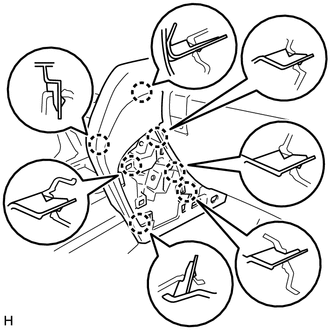
Detach the 7 claws and remove the lower instrument panel pad sub-assembly RH.
33504F
5.REMOVE SHIFT LEVER KNOB SUB-ASSEMBLY
for Type A, for Automatic Transmission:
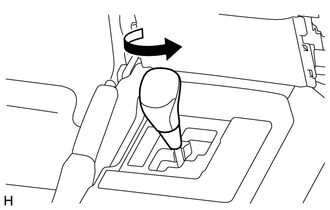
Twist the shift lever knob sub-assembly in the direction indicated by the arrow and remove it.
for Type A, for Manual Transmission:
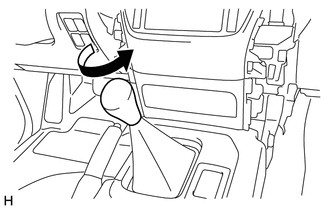
Twist the shift lever knob sub-assembly in the direction indicated by the arrow and remove it.
for Type B:
Twist the shift lever knob sub-assembly in the direction indicated by the arrow and remove it.
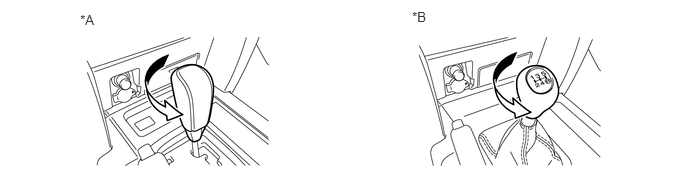
| *A | for Automatic Transmission | *B | for Manual Transmission |
55406B
6.REMOVE LOWER CENTER INSTRUMENT CLUSTER FINISH PANEL SUB-ASSEMBLY
for Type A:
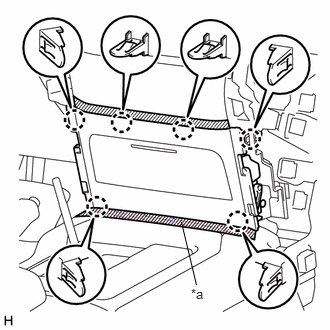
Put protective tape around the lower center instrument cluster finish panel sub-assembly.
| *a | Protective Tape |
Detach the 6 claws and remove the lower center instrument cluster finish panel sub-assembly.
for Type B:
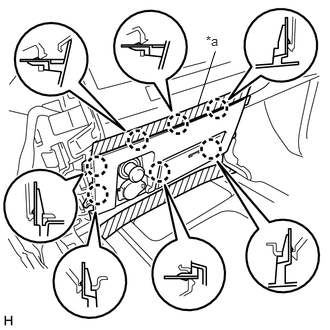
Put protective tape around the lower center instrument cluster finish panel sub-assembly.
| *a | Protective Tape |
Detach the 7 claws.
Disconnect the connectors and remove the lower center instrument cluster finish panel sub-assembly.
58803C
7.REMOVE CONSOLE CUP HOLDER BOX SUB-ASSEMBLY
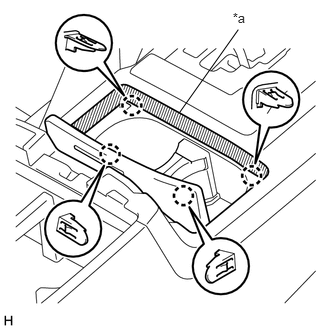
Put protective tape around the lower console cup holder box sub-assembly.
| *a | Protective Tape |
Detach the 4 claws and remove the console cup holder box sub-assembly.
58821C
8.REMOVE UPPER CONSOLE PANEL (for Type A)
for Automatic Transmission:
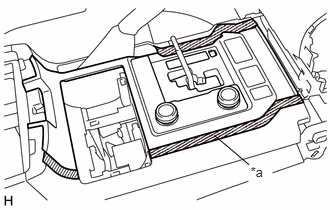
Put protective tape around the upper console panel.
| *a | Protective Tape |
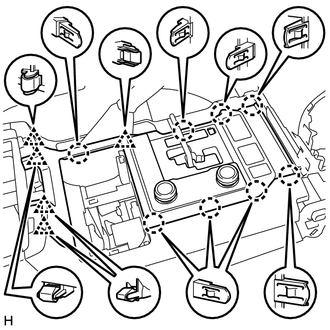
Detach the 8 claws and 5 clips.
Disconnect the connectors and remove the upper console panel.
for Manual Transmission:
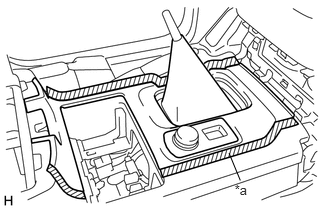
Put protective tape around the upper console panel.
| *a | Protective Tape |
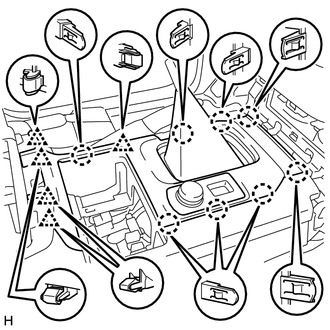
Detach the 8 claws and 5 clips.
Disconnect the connectors and remove the upper console panel.
58805C
9.REMOVE REAR UPPER CONSOLE PANEL SUB-ASSEMBLY
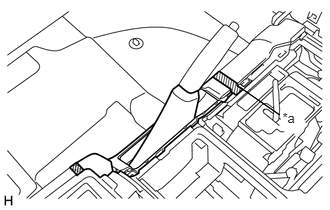
Put protective tape around the upper rear console panel sub-assembly.
| *a | Protective Tape |
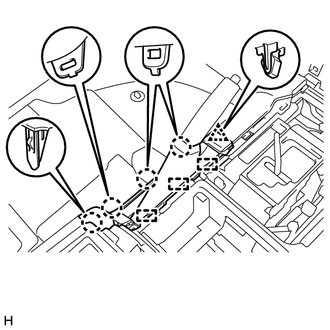
Detach the 4 claws, clip and 3 guides and remove the upper rear console panel sub-assembly.
58804A
10.REMOVE UPPER CONSOLE PANEL SUB-ASSEMBLY
for Type A:
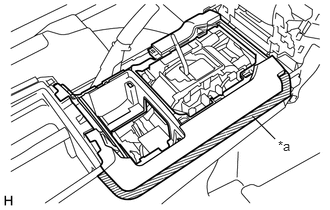
Put protective tape around the upper console panel sub-assembly.
| *a | Protective Tape |
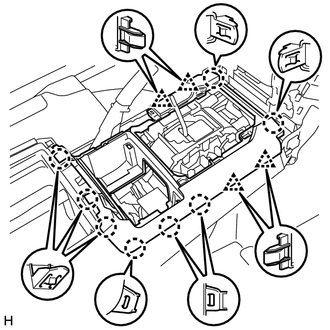
Detach the 8 claws and 4 clips and remove the upper console panel sub-assembly.
for Type B:
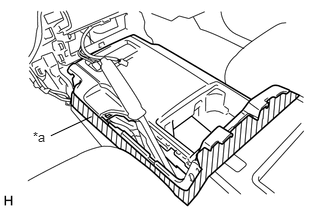
Put protective tape around the upper console panel sub-assembly.
| *a | Protective Tape |
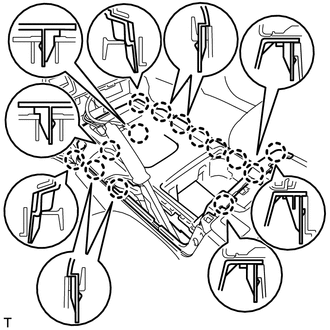
Detach the 14 claws.
Detach the 14 claws. (b) Disconnect the connectors and remove the upper console panel sub-assembly.
58903A
11.REMOVE REAR CONSOLE END PANEL SUB-ASSEMBLY
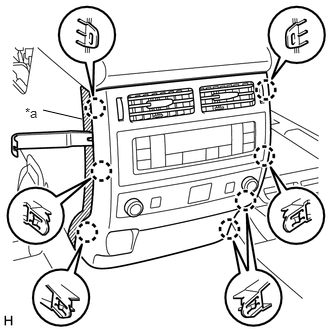
Put protective tape around the rear console end panel sub-assembly.
| *a | Protective Tape |
Using a moulding remover B, detach the 7 claws.
Disconnect the connectors and detach the clamps and remove the rear console end panel sub-assembly.
58901A
12.REMOVE REAR CONSOLE BOX SUB-ASSEMBLY
Remove the 2 screws and 4 bolts.
Detach the 2 claws and remove the rear console box sub-assembly.
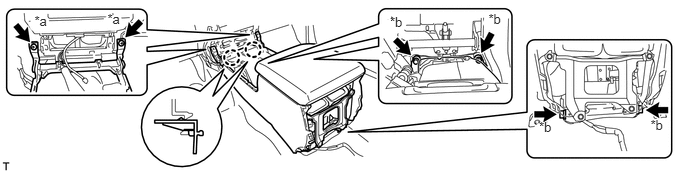
| *a | Screw | *b | Bolt |