WIPER / WASHER RAIN SENSOR INSTALLATION
PROCEDURE

 89944
1.INSTALL RAIN SENSOR TAPE
- HINT:
-
Only perform this procedure when replacing the rain sensor tape.
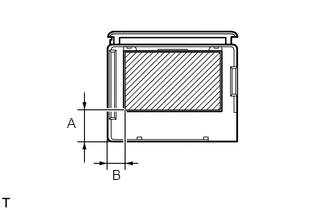
Apply new rain sensor tape to the rain sensor surface, indicated by the hatched area.
- NOTICE:
- ·
Keep the exposed adhesive on the tape free from dust and fingerprints.
·Apply the tape exactly according to the specifications below.
·When installing a new rain sensor, peel the release paper off from the silicon sheet first.
·Be careful not to leave any air bubbles in the rain sensor tape when installing it.
- Specification:
Area Measurement A 15 mm (0.591 in.) B 8 mm (0.315 in.)
89941
2.INSTALL RAIN SENSOR
- NOTICE:
- ·
Make sure the adhesive between the bracket and windshield glass is normal.
·If there is any residue left from the rain sensor tape on the windshield, remove it.
·Clean the glass surface with cloth or similar material.
·Make sure there are no air bubbles between the rain sensor and windshield.
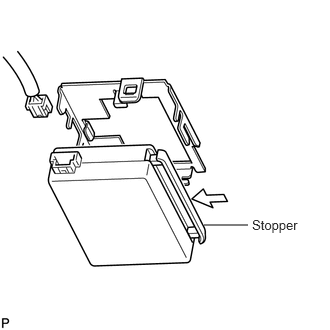
Securely attach the rain sensor to the bracket.
Push in the stopper.
- NOTICE:
-
The stopper can be used a maximum of 5 times.
Connect the connector.
89943
3.INSTALL RAIN SENSOR COVER
Push in the stopper in the direction of the arrow labeled (1) to install the rain sensor cover.
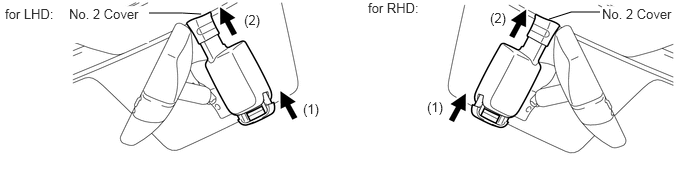
Slide the No. 2 cover in the direction of the arrow labeled (2) to fix it in place.