LIGHTING (EXT) HEADLIGHT ASSEMBLY(for LED Headlight) DISASSEMBLY
CAUTION / NOTICE / HINT
- NOTICE:
- ·
Handle components indoors as much as possible to prevent foreign matter from entering and adhering to headlight assembly components.
·Do not reuse parts which have reduced fastening ability due to thread damage.
·Do not touch the inner surface of the lens and metallic surfaces as much as possible, or they may become dirty.
·Do not allow metallic surfaces to become dirty, as such surfaces become damaged even if they are only lightly wiped with a soft cloth.
·When installing components, make sure that the wire harness is not pinched or pulled.
·Do not use solvent to clean components. Only clean them with a dry cloth.
- HINT:
- ·
Use the same procedure for the RH and LH sides.
·The procedure listed below is for the LH side.
PROCEDURE

 81194A
1.REMOVE HEADLIGHT PROTECTOR LH
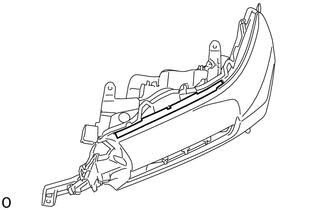
Remove the headlight protector LH.
- NOTICE:
-
Do not reuse the headlight protector LH.
81510C
2.REMOVE FRONT TURN SIGNAL LIGHT BULB
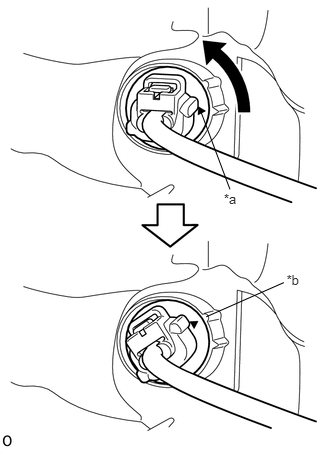
Turn the front turn signal light socket counterclockwise until the matchmark is aligned with the unlock position mark to disconnect the front turn signal light socket.
| *a | Matchmark |
| *b | Unlock Position Mark |
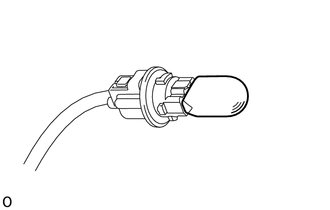
Remove the front turn signal light bulb from the front turn signal light socket.
81515B
3.REMOVE FRONT TURN SIGNAL LIGHT SOCKET
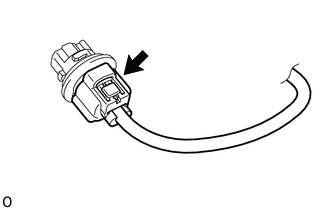
Disconnect the connector and remove the front turn signal light socket.
81156A
4.REMOVE HEADLIGHT BRACKET LH (for Outside)
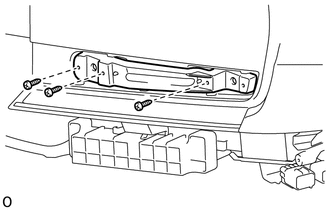
Remove the 3 screws and headlight bracket LH.
81158
5.REMOVE HEADLIGHT BRACKET LH (for Inside)
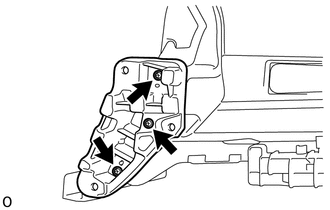
Remove the 3 screws and headlight bracket LH.
52134J
6.REMOVE FRONT BUMPER BAR REINFORCEMENT LH
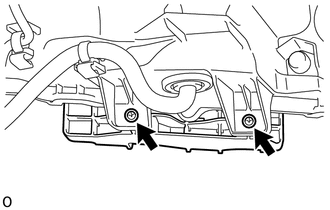
Remove the 2 screws.
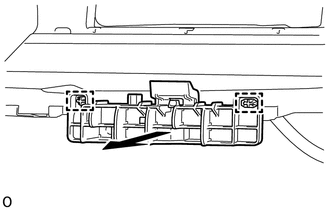
Detach the 2 guides and remove the front bumper reinforcement LH.
81171B
7.REMOVE HEADLIGHT LENS LH
- NOTICE:
- ·
Perform work using clean rubber gloves.
·Do not touch the inner surface of the lens and metallic surfaces as much as possible, or they may become dirty.
·Do not allow metallic surfaces to become dirty, as such surfaces become damaged even if they are only lightly wiped with a soft cloth.
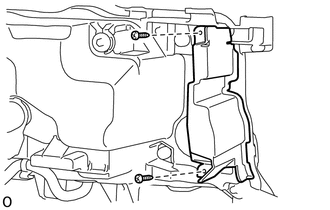
Remove the 2 screws and inner bracket.
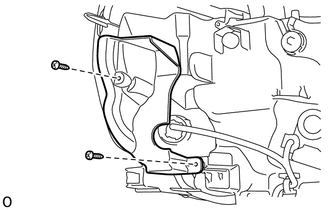
Remove the 2 screws and outer bracket.
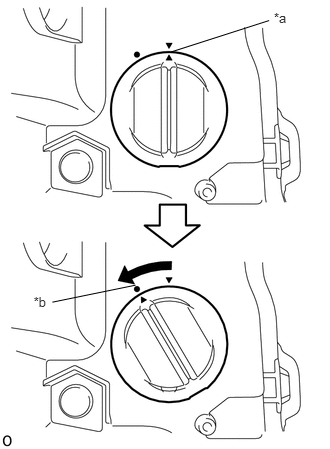
Turn the locking cap counterclockwise until the matchmark is aligned with the unlock position mark to remove the locking cap.
| *a | Matchmark |
| *b | Unlock Position Mark |
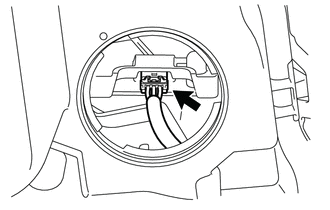
Disconnect the connector.
Remove the 7 screws.
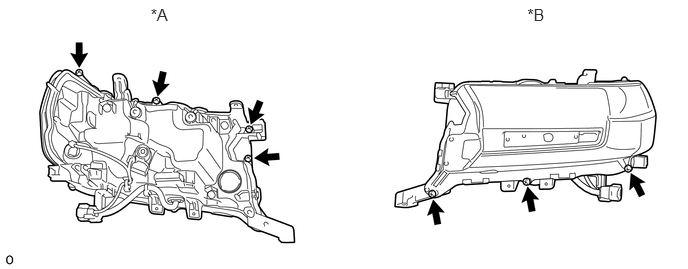
| *A | Headlight Assembly LH Backside | *B | Headlight Assembly LH Surface |
Remove the headlight lens LH:
- NOTICE:
- ·
Perform work using clean rubber gloves.
·Do not touch the inner surface of the lens and metallic surfaces as much as possible, or they may become dirty.
·Do not allow metallic surfaces to become dirty, as such surfaces become damaged even if they are only lightly wiped with a soft cloth.
- HINT:
- ·
The connection between the headlight lens LH and headlight housing is extremely tight. Therefore, make sure to use the following method of using a dryer to warm and soften the headlight lens gasket to separate the headlight lens LH and headlight housing.
·With the headlight lens LH slightly lifted, cut the headlight lens gasket and separate the headlight lens LH.
Using a dryer, warm the headlight lens gasket from the backside of the headlight assembly LH at the separation starting point of the headlight lens LH and headlight housing.
- NOTICE:
-
If the headlight assembly LH is heated unevenly, it will deform or melt.
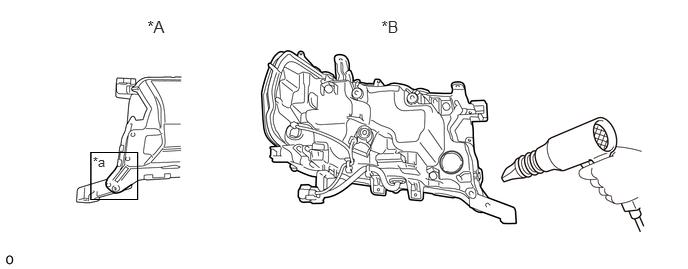
| *A | Headlight Assembly LH Surface | *B | Headlight Assembly LH Backside |
| *a | Separation Starting Point | - | - |
- HINT:
- ·
If the headlight lens LH cannot be lifted, even after heating, using a screwdriver, lift the headlight lens LH.
·Tape the screwdriver tip before use.
Detach the 2 claws A and slightly lift the headlight lens LH.
Heat the headlight lens gasket starting from the backside of the headlight assembly LH and finishing at the area around claw B.
Detach the claw B and slightly lift the headlight lens LH.
Heat the headlight lens gasket starting from the backside of the headlight assembly LH and finishing at the area around claw C.
Detach the 2 claws C and slightly lift the headlight lens LH.
Heat the headlight lens gasket starting from the backside of the headlight assembly LH and finishing at the area around claw D.
Detach the 2 claws D and remove the headlight lens LH.
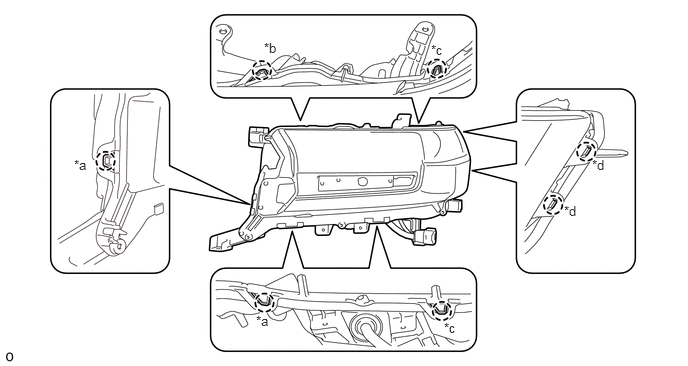
| *a | Claw A | *b | Claw B |
| *c | Claw C | *d | Claw D |
81132B
8.REMOVE HEADLIGHT LENS GASKET
- NOTICE:
- ·
Perform work using clean rubber gloves.
·Do not touch the inner surface of the lens and metallic surfaces as much as possible, or they may become dirty.
·Do not allow metallic surfaces to become dirty, as such surfaces become damaged even if they are only lightly wiped with a soft cloth.
·The gasket must not be reused.
Remove the headlight lens gasket from the headlight lens and headlight housing.
- HINT:
-
Using a dryer, heat the headlight lens gasket. While softening the headlight lens gasket, remove it from the headlight lens LH and headlight housing.
81171A
9.REMOVE HEADLIGHT UNIT LH
- NOTICE:
- ·
Perform work using clean rubber gloves.
·Do not touch the headlight unit LH with bare hands.
·Do not allow metallic surfaces to become dirty, as such surfaces become damaged even if they are only lightly wiped with a soft cloth.
Using a vernier caliper, measure and record the protrusion amount of the horizontal and vertical aiming screw.
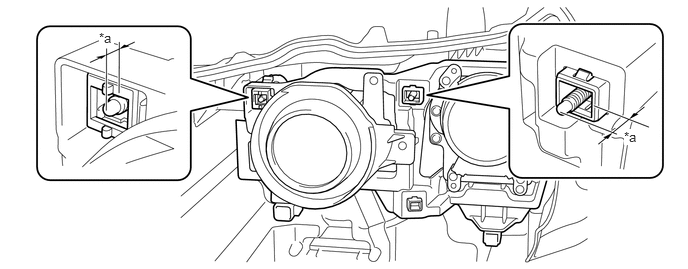
| *a | Protrusion Amount Measurement Area | - | - |
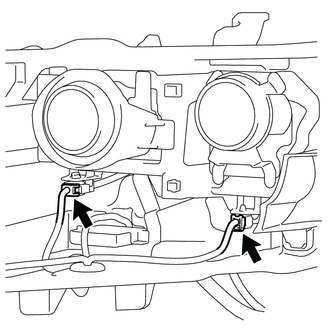
Disconnect the 2 connectors.
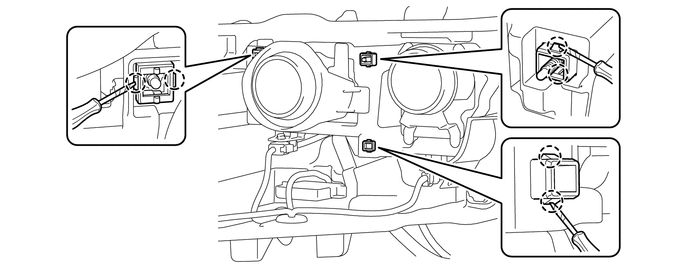
Using a screwdriver, detach the 6 claws and remove the headlight unit LH.

|
Protective Tape | - | - |
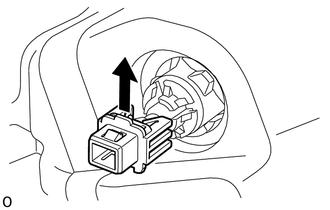
Remove the leveling motor joint.
- HINT:
-
Install the removed leveling motor joint to the headlight unit LH.
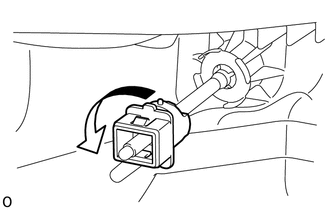
Turn the vertical aiming screw joint counterclockwise and remove it.
- HINT:
-
Install the removed aiming screw joint to the headlight unit LH.
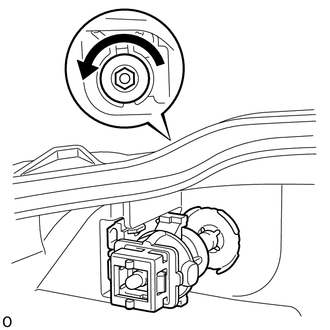
Loosen the horizontal aiming screw and remove the horizontal aiming screw joint.
- HINT:
-
Install the removed aiming screw joint to the headlight unit LH.
85967
10.REMOVE LIGHT CONTROL ECU
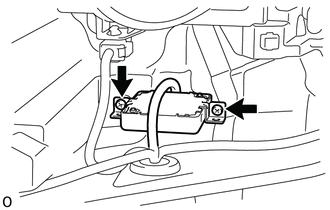
Remove the 2 screws and light control ECU.
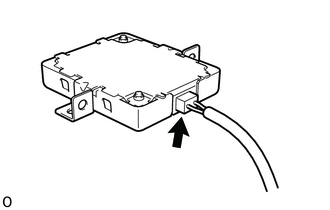
Disconnect the connector.
85662
11.REMOVE HEADLIGHT LEVELING MOTOR LH
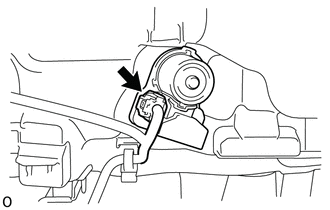
Disconnect the connector.
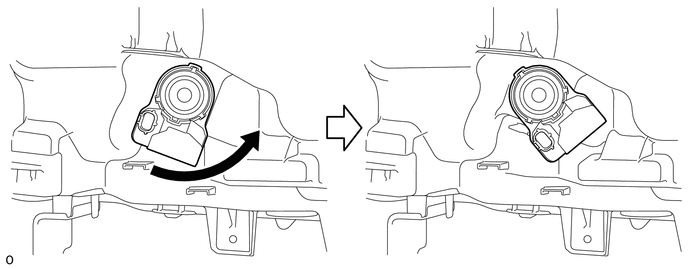
Turn the headlight leveling motor LH counter clockwise and remove it.
85669
12.REMOVE HEADLIGHT LEVELING MOTOR BASE PACKING
Remove the headlight leveling motor base packing from the headlight leveling motor LH.
- NOTICE:
-
The packing must not be reused.