MIRROR (EXT) OUTER REAR VIEW MIRROR COVER REMOVAL
CAUTION / NOTICE / HINT
- HINT:
- ·
Use the same procedure for RHD and LHD vehicles.
·The procedure listed below is for LHD vehicles.
·Use the same procedure for the RH and LH sides.
·The procedure listed below is for the LH side.
PROCEDURE

 87961
1.REMOVE OUTER MIRROR LH
87945B
2.REMOVE OUTER MIRROR COVER LH
- HINT:
-
Be sure to detach the claws of the outer mirror cover LH in the order shown in the illustration.
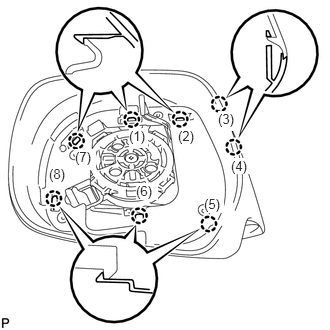
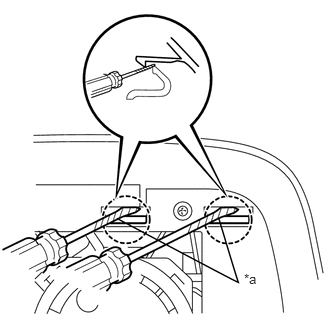
| *a | Protective Tape |
Using 2 screwdrivers, detach the 2 claws.
- HINT:
-
Tape the screwdriver tip before use.
Insert a screwdriver into the slot as shown in the illustration and push on the outer mirror body to create a space between the outer mirror body and outer mirror cover LH.
- NOTICE:
-
Be careful not to break the ribs.
- HINT:
-
Tape the screwdriver tip before use.
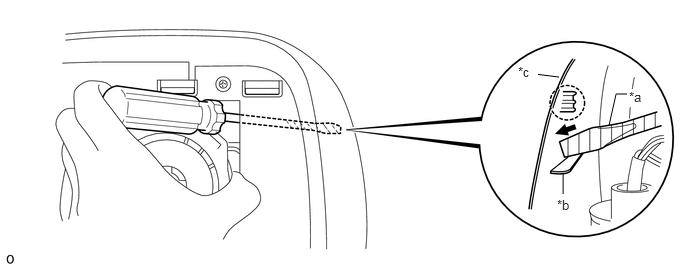
| *a | Protective Tape | *b | Rib |
| *c | Inner Side of Outer Mirror Cover | - | - |
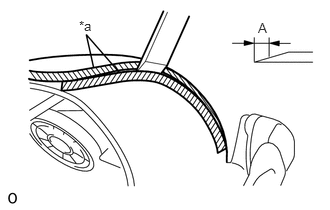
| *a | Protective Tape |
Insert a moulding remover B into the space made between the outer mirror body and outer mirror cover LH.
- NOTICE:
-
Do not insert the moulding remover B more than 4.0 mm (0.16 in.).
- Standard:
Area Specified Condition A 4.0 mm (0.16 in.)
Slide the moulding remover B downwards as shown in the illustration to detach the 2 claws.
- NOTICE:
- ·
Do not insert the moulding remover B more than 4.0 mm (0.16 in.).
·Do not slide the moulding remover B past the point approximately 40 mm (1.57 in.) from the bottom edge of the outer mirror cover LH as the outer mirror body will become damaged.
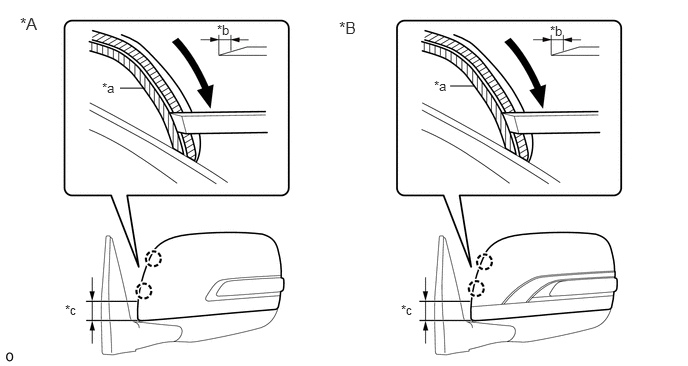
| *A | for Type A | *B | for Type B |
| *a | Protective Tape | *b | 4.0 mm (0.16 in.) |
| *c | 40 mm (1.57 in.) | - | - |
Remove the moulding remover B.
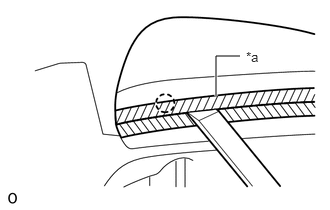
| *a | Protective Tape |
Put protective tape around the outer mirror cover LH and outer mirror body.
Insert moulding remover B between the outer mirror cover LH and outer mirror body as shown in the illustration and detach the claw.
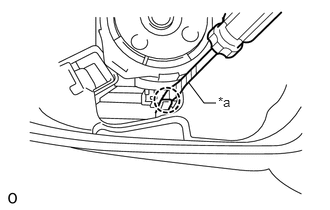
| *a | Protective Tape |
Using a screwdriver, detach the claw.
- HINT:
-
Tape the screwdriver tip before use.
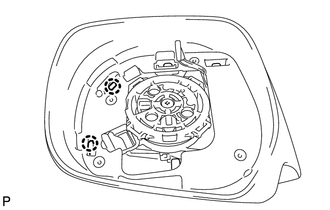
Detach the 2 claws and remove the outer mirror cover LH.
- NOTICE:
-
When removing the outer mirror cover LH, be careful not to damage the side turn signal light assembly LH.