HEATING / AIR CONDITIONING REAR AIR CONDITIONING UNIT DISASSEMBLY
CAUTION / NOTICE / HINT
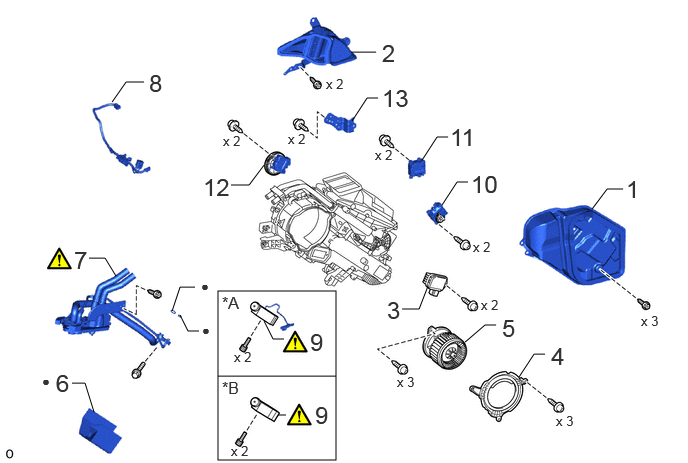
| Procedure | Part Name Code |

|

|

|
|
|---|---|---|---|---|---|
| 1 | REAR NO. 2 SIDE AIR DUCT | 87217E | - | - | - |
| 2 | REAR NO. 1 SIDE AIR DUCT | 87217D | - | - | - |
| 3 | BLOWER MOTOR CONTROL | 87165C | - | - | - |
| 4 | HEATER BLOWER COVER | 87236C | - | - | - |
| 5 | REAR BLOWER MOTOR WITH FAN SUB-ASSEMBLY | 87103D | - | - | - |
| 6 | REAR NO. 1 AIR CONDITIONING UNIT PACKING | 88561P | - | - | - |
| 7 | NO. 6 AIR CONDITIONING TUBE AND ACCESSORY ASSEMBLY | 88G10B | ( ) |
- | - |
| 8 | NO. 1 COOLER WIRING HARNESS SUB-ASSEMBLY | 88605 | - | - | - |
| 9 | REAR COOLING UNIT EXPANSION VALVE | 88515B | () |
- | - |
| 10 | REAR AIRMIX DAMPER SERVO SUB-ASSEMBLY | 87106W | - | - | - |
| 11 | NO. 2 AIRMIX DAMPER SERVO SUB-ASSEMBLY | 87106V | - | - | - |
| 12 | REAR MODE DAMPER SERVO SUB-ASSEMBLY | 87106X | - | - | - |
| 13 | REAR NO. 1 AIR CONDITIONING UNIT BRACKET | 88F88G | - | - | - |
| *A | w/ Magnet Valve | *B | w/o Magnet Valve |
| ● | Non-reusable part | - | - |
| Procedure | Part Name Code |
|
|
|
|
|---|---|---|---|---|---|
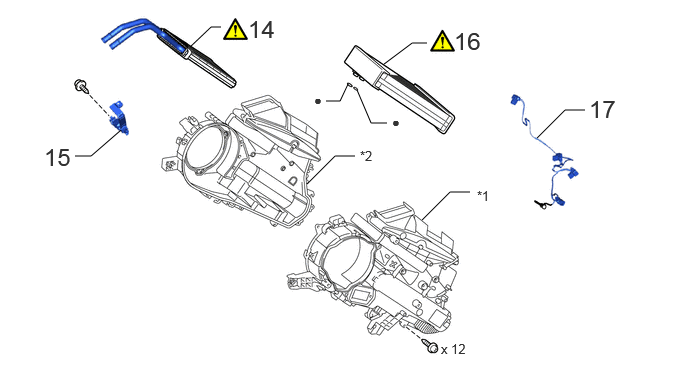
| 14 | HEATER RADIATOR UNIT SUB-ASSEMBLY | 87107B | () |
- | - |
| 15 | HEATER CLAMP | - | - | - | - |
| 16 | EVAPORATOR SUB-ASSEMBLY (REAR) | 88501R | () |
- | - |
| 17 | NO. 2 COOLER WIRING HARNESS SUB-ASSEMBLY | 88605C | - | - | - |
| *1 | COOLING UNIT CASE LH | *2 | COOLING UNIT CASE RH |
| ● | Non-reusable part | - | - |
PROCEDURE

 87217E 1.REMOVE REAR NO. 2 SIDE AIR DUCT

87217D 2.REMOVE REAR NO. 1 SIDE AIR DUCT
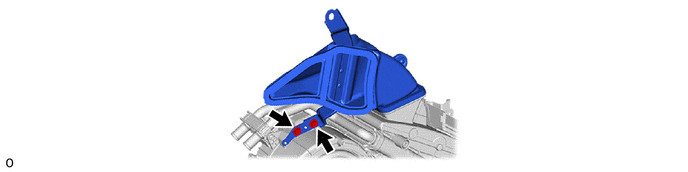
87165C 3.REMOVE BLOWER MOTOR CONTROL
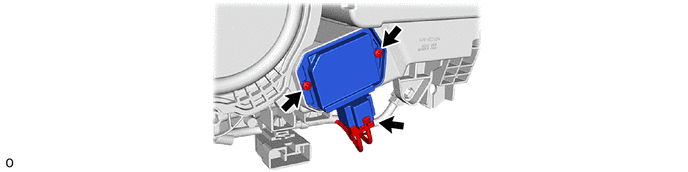
87236C 4.REMOVE HEATER BLOWER COVER
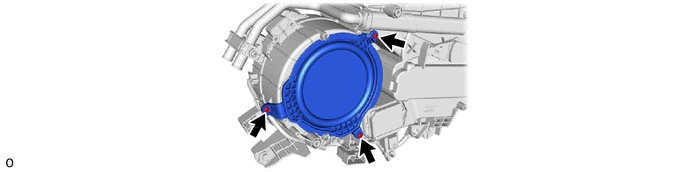
87103D 5.REMOVE REAR BLOWER MOTOR WITH FAN SUB-ASSEMBLY
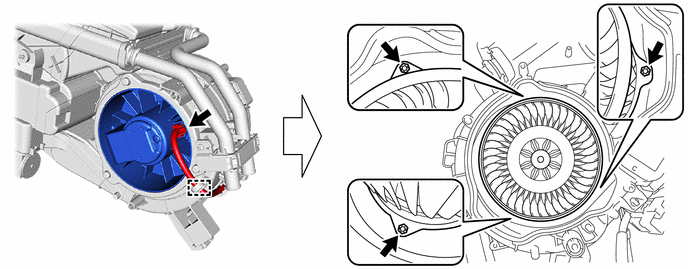
88561P 6.REMOVE REAR NO. 1 AIR CONDITIONING UNIT PACKING
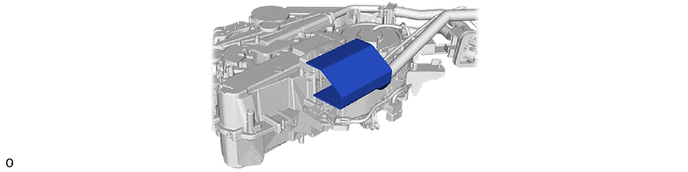
88G10B 7.REMOVE NO. 6 AIR CONDITIONING TUBE AND ACCESSORY ASSEMBLY
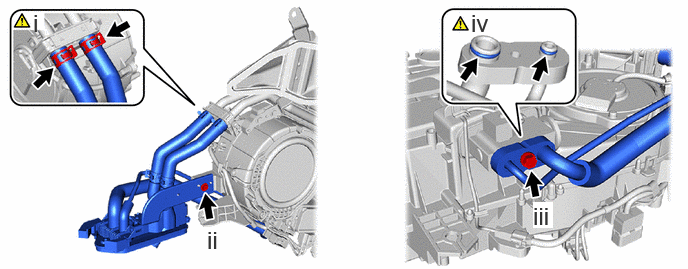
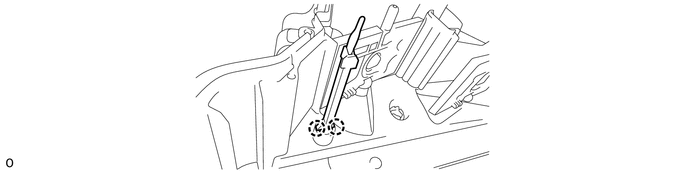
Using pliers, grip the claws of the clip and slide the 2 clips to disconnect the No. 6 air conditioning tube and accessory assembly.
- NOTICE:
-
·
Do not apply excessive force to the No. 6 air conditioning tube and accessory assembly.
·Prepare a drain pan or cloth in case the coolant leaks.
Remove the screw.
Remove the bolt and No. 6 air conditioning tube and accessory assembly.
Remove the 2 O-rings from the No. 6 air conditioning tube and accessory assembly.
- NOTICE:
-
Seal the openings of the disconnected parts using vinyl tape to prevent the entry of moisture and foreign matter.
88605 8.REMOVE NO. 1 COOLER WIRING HARNESS SUB-ASSEMBLY
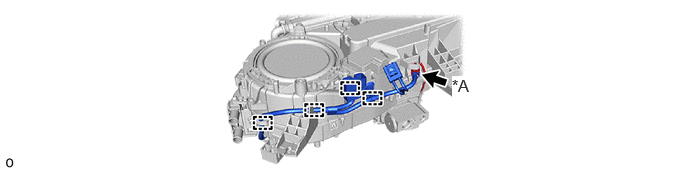
| *A | w/ Magnet Valve | - | - |
88515B 9.REMOVE REAR COOLING UNIT EXPANSION VALVE
w/ Magnet Valve:

Detach the clamp.
Using a 4 mm hexagon socket wrench, remove the 2 hexagon bolts and rear cooling unit expansion valve.
- NOTICE:
-
Seal the openings of the disconnected parts using vinyl tape to prevent the entry of moisture and foreign matter.
w/o Magnet Valve:
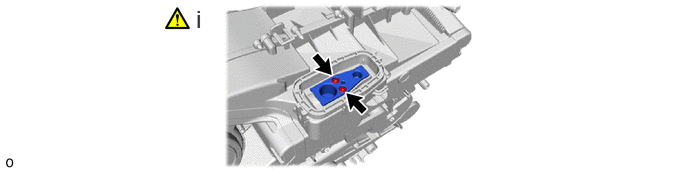
Using a 4 mm hexagon socket wrench, remove the 2 hexagon bolts and rear cooling unit expansion valve.
- NOTICE:
-
Seal the openings of the disconnected parts using vinyl tape to prevent the entry of moisture and foreign matter.
87106W 10.REMOVE REAR AIRMIX DAMPER SERVO SUB-ASSEMBLY
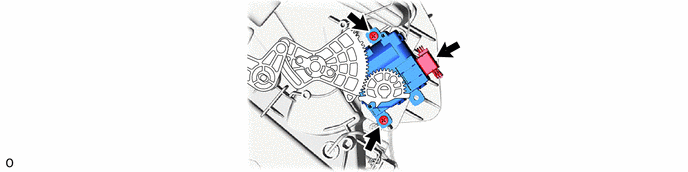
87106V 11.REMOVE NO. 2 AIRMIX DAMPER SERVO SUB-ASSEMBLY
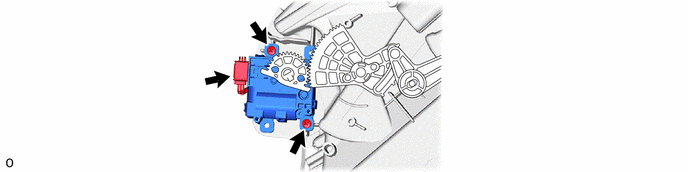
87106X 12.REMOVE REAR MODE DAMPER SERVO SUB-ASSEMBLY
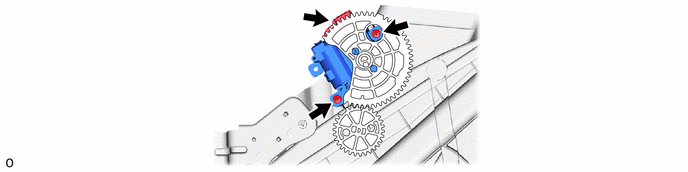
88F88G 13.REMOVE REAR NO. 1 AIR CONDITIONING UNIT BRACKET
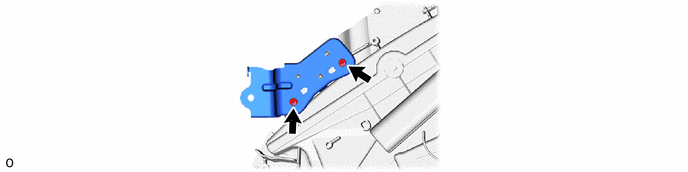
87107B 14.REMOVE HEATER RADIATOR UNIT SUB-ASSEMBLY
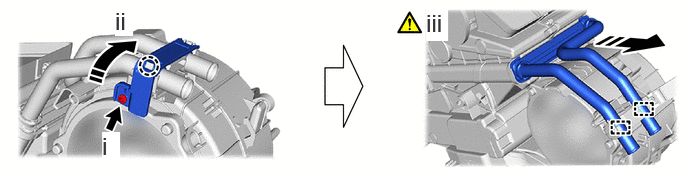

|
Remove in this Direction | - | - |
Remove the screw.
Detach the claw and roll up the heater clamp enough so that the heater radiator unit sub-assembly can be removed.
Detach the clamp and remove the heater radiator unit sub-assembly as shown in the illustration.
15.REMOVE HEATER CLAMP
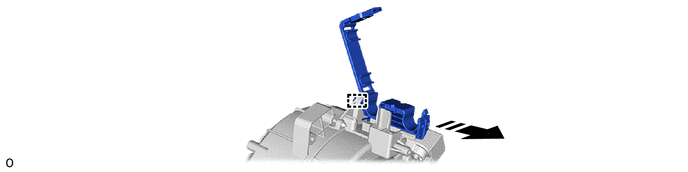
|
|
Remove in this Direction | - | - |
88501R 16.REMOVE EVAPORATOR SUB-ASSEMBLY (REAR)
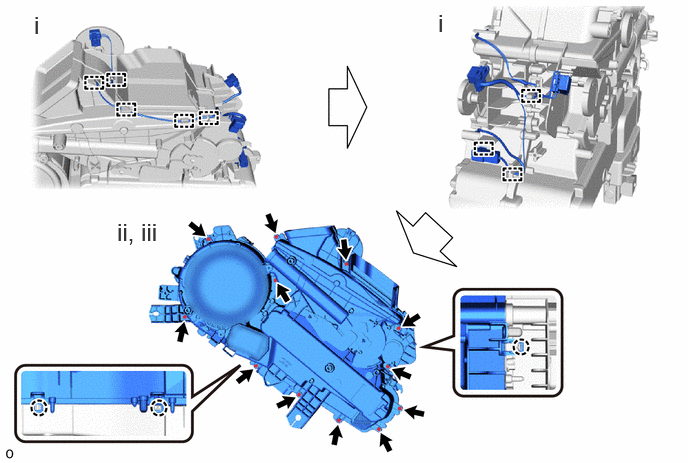
Detach the clamp.
Remove the 12 screws.
Detach the claw and remove the cooling unit case LH.
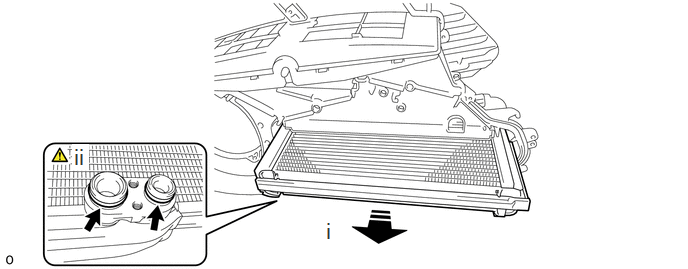
|
|
Remove in this Direction | - | - |
Remove the evaporator sub-assembly (rear) as shown in the illustration.
Remove the 2 O-rings from the evaporator sub-assembly (rear).
- NOTICE:
-
Seal the openings of the disconnected parts using vinyl tape to prevent the entry of moisture and foreign matter.
88605C 17.REMOVE NO. 2 COOLER WIRING HARNESS SUB-ASSEMBLY