SEAT REAR NO. 1 SEAT ASSEMBLY(for 60/40 Split Seat Type RH Side) REMOVAL
CAUTION / NOTICE / HINT
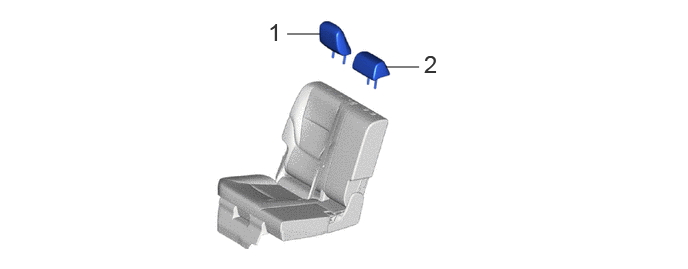
| Procedure | Part Name Code |

|

|

|
|
|---|---|---|---|---|---|
| 1 | NO. 1 SEAT HEADREST ASSEMBLY RH | 71940F | - | - | - |
| 2 | REAR CENTER NO. 1 SEAT HEADREST ASSEMBLY | 71960G | - | - | - |
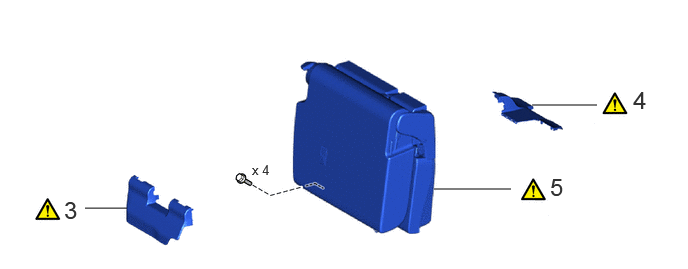
| Procedure | Part Name Code |
|
|
|
|
|---|---|---|---|---|---|
| 3 | REAR NO. 1 SEAT CUSHION HINGE COVER | 71691W | ( ) |
- | - |
| 4 | REAR NO. 3 SEAT CUSHION HINGE COVER | 71692N | () |
- | - |
| 5 | REAR NO. 1 SEAT ASSEMBLY RH | - | () |
- | - |
PROCEDURE

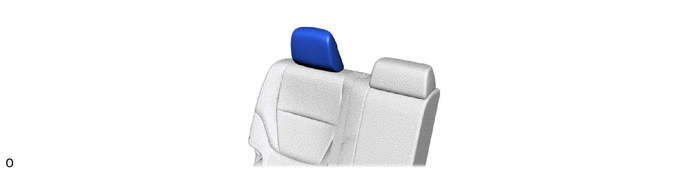
 71940F 1.REMOVE NO. 1 SEAT HEADREST ASSEMBLY RH
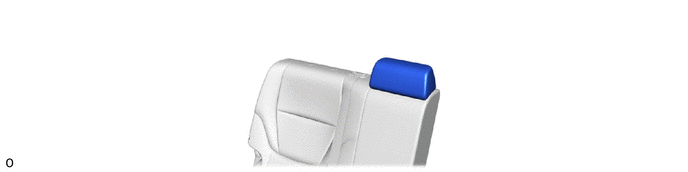
71960G 2.REMOVE REAR CENTER NO. 1 SEAT HEADREST ASSEMBLY
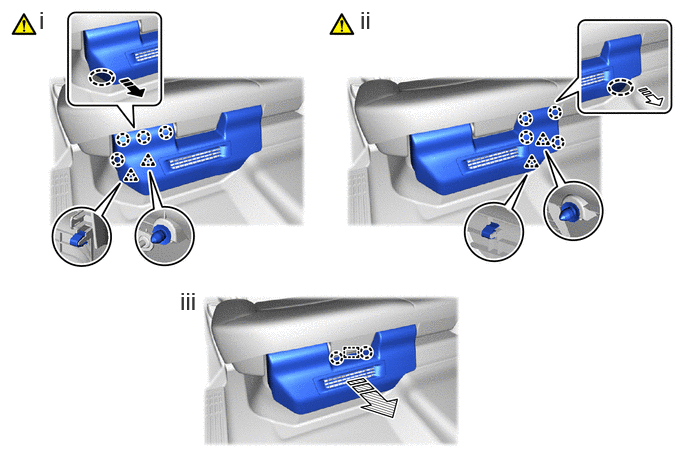
71691W 3.REMOVE REAR NO. 1 SEAT CUSHION HINGE COVER

|
Place Hand Here |

|
Remove in this Direction (1) |

|
Remove in this Direction (2) |

|
Remove in this Direction (3) |
Place your hand at the position shown in the illustration and pull in the removal direction (1) to detach the clip and claw.
Place your hand at the position shown in the illustration and pull in the removal direction (2) to detach the clip and claw.
Pull in the removal direction (3) to detach the claw and guide to remove the rear No. 1 seat cushion hinge cover as shown in the illustration.
71692N 4.REMOVE REAR NO. 3 SEAT CUSHION HINGE COVER
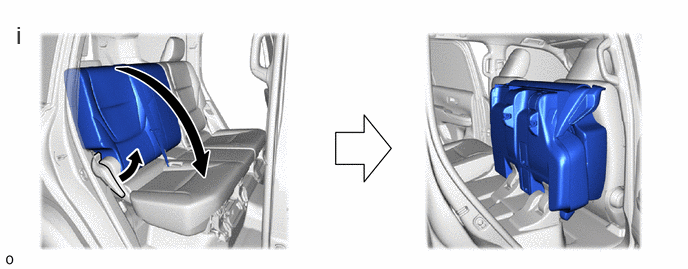
Operate the reclining adjuster release handle RH and fold down the rear No. 1 seat assembly RH.
|
|
Place Hand Here |
|
Remove in this Direction (1) |
|
|
Remove in this Direction (2) | - | - |
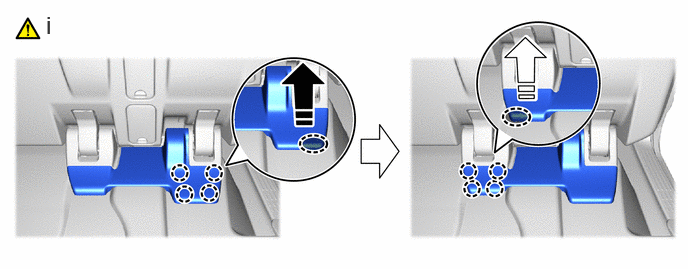
Follow the procedure below to detach the claw.
1. Place your hand at the position shown in the illustration and pull in the removal direction (1) to detach the claw.
2. Place your hand at the position shown in the illustration and pull in the removal direction (2) to detach the claw.
|
|
Place Hand Here |
|
Remove in this Direction (1) |
|
|
Remove in this Direction (2) | - | - |
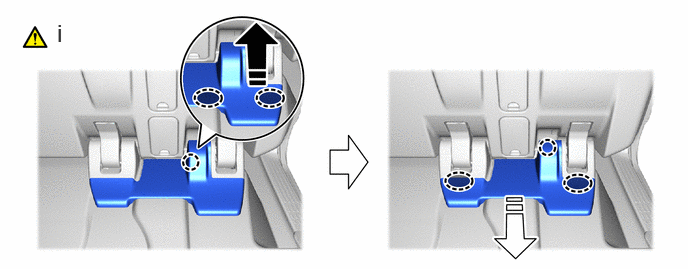
Follow the procedure below to remove the rear No. 4 seat cushion hinge cover.
1. Place your hand at the position shown in the illustration and pull in the removal direction (1) to detach the claw.
2. Place your hand at the position shown in the illustration and pull in the removal direction (2) to detach the claw and remove the rear No. 3 seat cushion hinge cover.
5.REMOVE REAR NO. 1 SEAT ASSEMBLY RH

|
Connector |

|
Bolt |
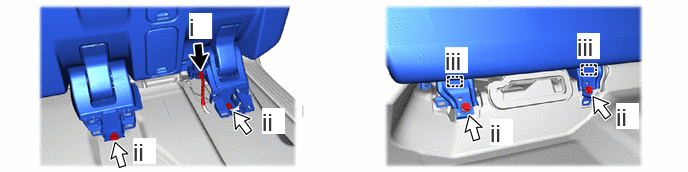
Disconnect the connector.
Remove the 4 bolts.
Pull out the 2 location pins of the rear No. 1 seat assembly RH.
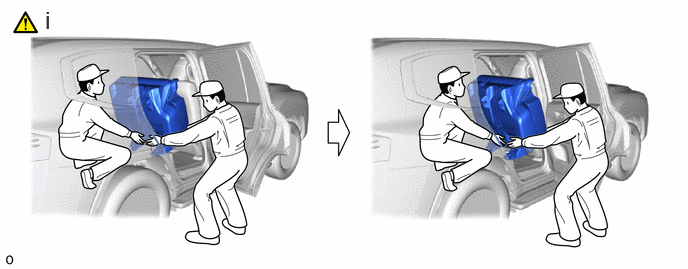
Remove and carry the rear No. 1 seat assembly RH out of the vehicle.
- NOTICE:
-
·
Protect the rear No. 1 seat legs.
·Carrying the rear No. 1 seat assembly RH from the vehicle must be performed by multiple people.
·Do not damage the rear No. 1 seat assembly RH, body exterior or interior parts.