AJA0F AUTOMATIC TRANSMISSION / TRANSAXLE TRANSMISSION CONTROL CABLE INSTALLATION
CAUTION / NOTICE / HINT
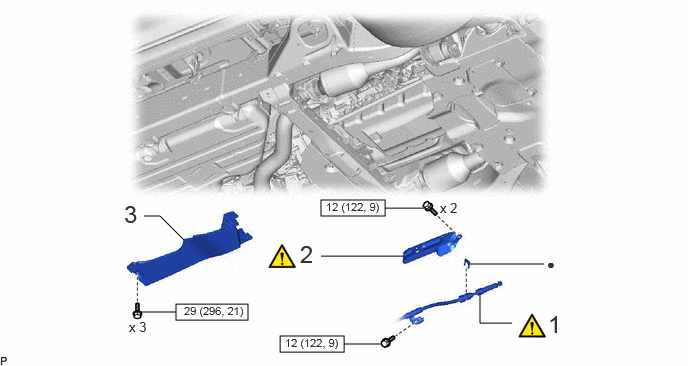
| Procedure | Part Name Code |

|

|

|
|
|---|---|---|---|---|---|
| 1 | INSTALL TRANSMISSION CONTROL CABLE ASSEMBLY | 33820B | ( ) |
- | - |
| 2 | TRANSMISSION CONTROL CABLE INSULATOR | 33825 | () |
- | - |
| 3 | FRAME UNDER COVER ASSEMBLY RH | 51430A | - | - | - |

|
N*m (kgf*cm, ft.*lbf): Specified torque | ● | Non-reusable part |
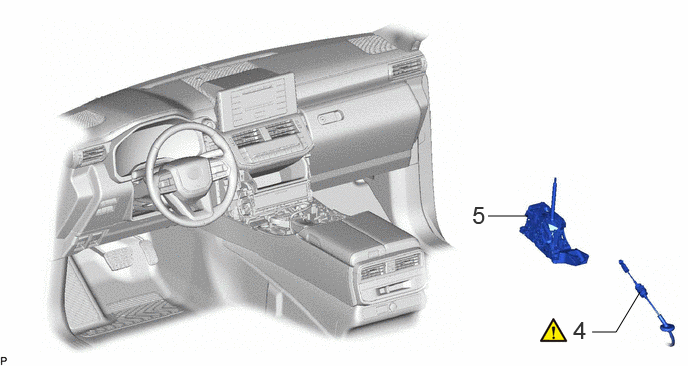
| Procedure | Part Name Code |
|
|
|
|
|---|---|---|---|---|---|
| 4 | CONNECT TRANSMISSION CONTROL CABLE ASSEMBLY | 33820B | () |
- | - |
| 5 | FLOOR SHIFT LEVER ASSEMBLY | - | - | - | - |
CAUTION / NOTICE / HINT
- HINT:
-
·
Use the same procedure for RHD and LHD vehicles.
·The procedure listed below is for LHD vehicles.
PROCEDURE

 33820B 1.INSTALL TRANSMISSION CONTROL CABLE ASSEMBLY

- Torque:
- 12 N*m (122 kgf*cm, 9 ft.*lbf)
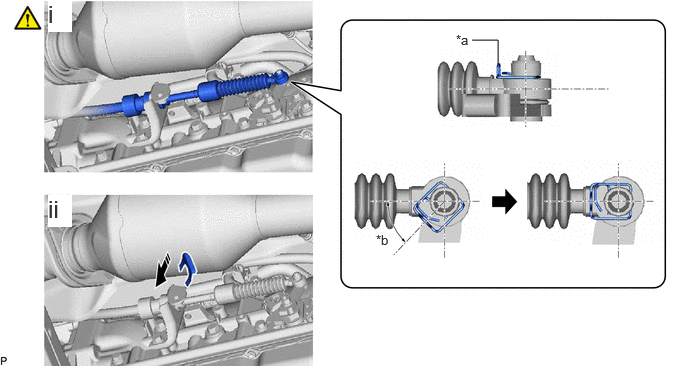
| *a | Clip | *b | 45° to 60° |

|
Install in this Direction | - | - |
Connect the transmission control cable assembly to the transmission control shaft lever RH as shown in the illustration.
- NOTICE:
-
Before installing the transmission control cable assembly, check that the park/neutral position switch assembly and shift lever are in N.
Install a new clip to the No. 1 transmission control cable bracket.
33825 2.INSTALL TRANSMISSION CONTROL CABLE INSULATOR
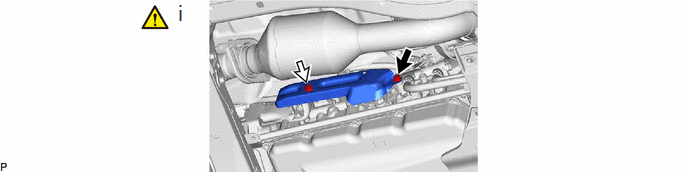

|
Bolt A |

|
Bolt B |
Install the transmission control cable insulator to the automatic transmission assembly with the 2 bolts.
- Torque:
- 12 N*m (122 kgf*cm, 9 ft.*lbf)
- HINT:
-
Tightening order: Temporarily install bolt A and bolt B → Tighten bolt A → Tighten bolt B
51430A 3.INSTALL FRAME UNDER COVER ASSEMBLY RH
33820B 4.CONNECT TRANSMISSION CONTROL CABLE ASSEMBLY
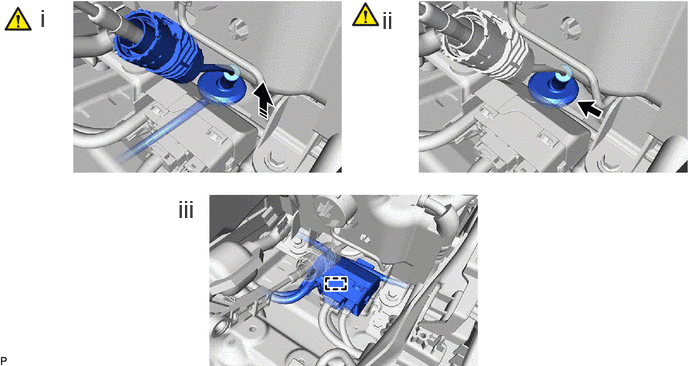
|
|
Install in this Direction | - | - |
Insert the transmission control cable assembly in the floor hole.
Attach the grommet into the floor hole.
- NOTICE:
-
·
The grommet seal should not be caught or lifted.
·Do not twist the transmission control cable assembly too much.
Attach the clamp and connect the wire harness connector holder.
5.INSTALL FLOOR SHIFT LEVER ASSEMBLY