WIPER / WASHER REAR WIPER MOTOR INSTALLATION
CAUTION / NOTICE / HINT
- HINT:
-
A bolt without a torque specification is shown in the standard bolt chart.
-
Click hereGeneral>SPECIFICATIONS>STANDARD BOLT>SPECIFIED TORQUE FOR STANDARD BOLTS
PROCEDURE

 85110R 1.INSTALL REAR WIPER MOTOR ASSEMBLY
Install the rear wiper motor assembly with the 3 bolts.
Attach the clamp.
Connect the connector.
67847 2.INSTALL BACK DOOR SERVICE HOLE COVER RH
64780C 3.INSTALL BACK DOOR TRIM PANEL ASSEMBLY RH
86151 4.INSTALL SPEAKER BOX (w/ Back Door Speaker)
86160B 5.INSTALL REAR SPEAKER ASSEMBLY (w/ Back Door Speaker)
86264B 6.INSTALL REAR SPEAKER GRILLE (w/ Back Door Speaker)
86262B 7.INSTALL REAR SPEAKER COVER (w/ Back Door Speaker)
85169R 8.INSTALL NO. 1 REAR WIPER LINK PIVOT WASHER
Install the No. 1 rear wiper link pivot washer.
85168R 9.INSTALL NO. 1 REAR WIPER LINK PIVOT NUT
Install the No. 1 rear wiper link pivot nut.
10.INSTALL REAR WIPER ARM AND BLADE ASSEMBLY
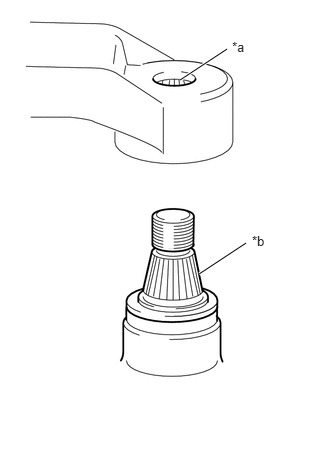
| *a | Rear Wiper Arm Serrations |
| *b | Rear Wiper Motor assembly Pivot Serrations |
When reinstalling:
Clean the rear wiper arm serrations.
- NOTICE:
-
Do not grind the rear wiper arm serrations.
Clean the rear wiper motor assembly pivot serrations.
- NOTICE:
-
Do not grind the rear wiper motor serrations.
Operate the rear wiper motor assembly and stop at the automatic stop (park) position.
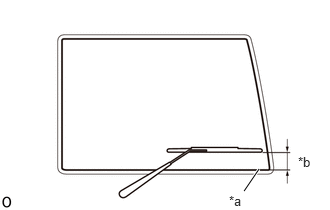
| *a | Back Door Glass Edge |
| *b | 60 to 80 mm (2.3622 to 3.1496 in.) |
Install the rear wiper arm and blade assembly with the nut to the position shown in the illustration.
- Torque:
- 9.0 N*m (92 kgf*cm, 80 in.*lbf)
- HINT:
-
Hold the arm hinge by hand when tightening the nut.
Operate the rear wiper motor assembly while spraying washer fluid on the glass. Make sure that the rear wipers function properly and the wipers do not come into contact with the vehicle body.
Raise the rear wiper arm 2 times and check that the tip of the rear wiper blade is within the range shown in the illustration.
85192R 11.INSTALL REAR WIPER ARM COVER
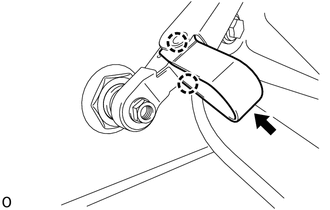
Attach the 2 claws and install the rear wiper arm cover.
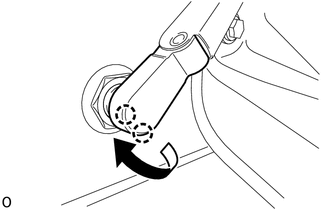
Attach the 2 claws and close the rear wiper arm cover as shown in the illustration.
42652A 12.INSTALL SPARE TIRE (w/ Back Door Tire Carrier)