Q710 HYBRID TRANSMISSION / TRANSAXLE OIL PUMP(for Mechanical Type) ON-VEHICLE INSPECTION
CAUTION / NOTICE / HINT
- CAUTION:
- ·
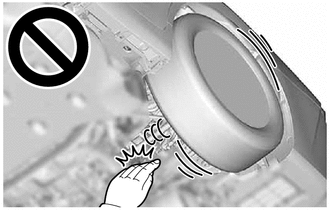
During the procedure, do not touch rotating parts such as the tires or drive shaft.
Touching rotating parts may cause serious injuries.
·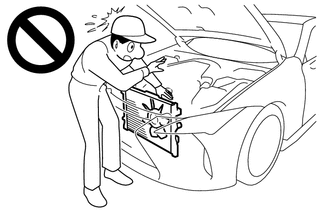
To prevent injury due to contact with an operating cooling fan, keep your hands and clothing away from the cooling fans when working in the FC stuck compartment with the ignition switch ON.
PROCEDURE

 1.INSPECT TRANSAXLE FLUID PRESSURE
Pre-procedure1
Keep the vehicle level and lift it up.
Remove the No. 1 differential support protector.
- HINT:
-
Click hereGeneral>MAINTENANCE>Q710 HYBRID TRANSAXLE FLUID>REPLACEMENT
Remove the No. 2 differential support protector.
- HINT:
-
Click hereGeneral>MAINTENANCE>Q710 HYBRID TRANSAXLE FLUID>REPLACEMENT
Remove the rear suspension brace cover.
- HINT:
-
Click hereGeneral>MAINTENANCE>Q710 HYBRID TRANSAXLE FLUID>REPLACEMENT
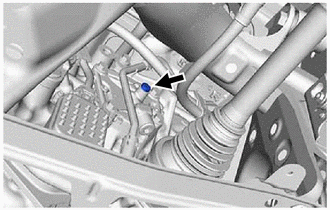
Remove the transmission oil pump cover plug from the transmission oil pump cover sub-assembly.
Remove the O-ring from the transmission oil pump cover plug.
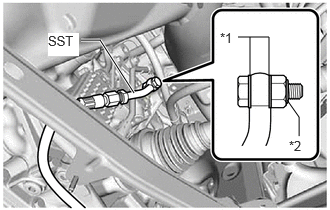
| *1 | Gasket |
| *2 | O-ring |
Install SST to the FCV with motor transaxle assembly.
- SST
- 09993-19015 (09993-00020, 09993-00040)
- NOTICE:
- ·
To prevent interference with rotating parts such as the tire and drive shaft assembly, install SST to the FCV with motor transaxle assembly.
·Interference with rotating parts could damage or destroy SST.
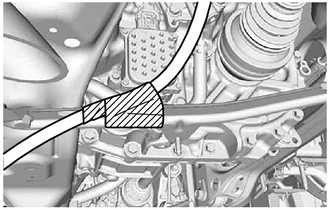
Secure SST to the rear suspension member brace LH with protective tape as shown in the illustration.
- NOTICE:
-
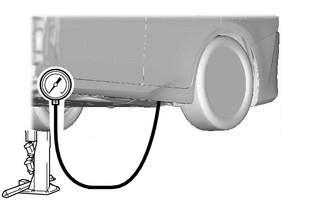
-
Stay as far away as possible from rotating parts such as the tire and drive shaft assembly when performing the work.
Put the motor in Inspection Mode (Maintenance Mode).
Start the motor.
- Powertrain > EV > Data List
-
Tester Display Transaxle Oil Temperature Motor Revolution - 50003 397 322,120
Procedure1
Measure the hybrid transaxle fluid pressure.
- Standard Pressure:
Condition Condition Specified Condition Motor Revolution Transaxle Oil Temperature Specified Condition 3000 to 3200 rpm 20 to 50°C (68 to 122°F) 4.0 kPa or higher
0.04 kgf/cm2 or higher
0.6 psi or higher
- NOTICE:
-
Be sure to cancel inspection mode immediately after the hybrid transaxle fluid pressure check is completed.
- HINT:
- ·
If the pressure is less than the standard, replace the transaxle oil pump drive rotor and transmission oil pump driven rotor.
·Always perform this operation check procedure after replacing or servicing the transaxle oil pump drive rotor and transmission oil pump driven rotor.
Post-procedure1
Remove the protective tape from the rear suspension member brace LH.
Remove SST from the FCV with motor transaxle assembly.
Coat a new O-ring with Toyota Genuine ATF WS and install it to transmission oil pump cover plug.
Install the transmission oil pump cover plug to the transmission oil pump cover sub-assembly.
- Torque:
- 7.4 N*m (75 kgf*cm, 65 in.*lbf)
Install the rear suspension brace cover.
- HINT:
-
Click hereGeneral>MAINTENANCE>Q710 HYBRID TRANSAXLE FLUID>REPLACEMENT
Install the No. 2 differential support protector.
- HINT:
-
Click hereGeneral>MAINTENANCE>Q710 HYBRID TRANSAXLE FLUID>REPLACEMENT
Install the No. 1 differential support protector.
- HINT:
-
Click hereGeneral>MAINTENANCE>Q710 HYBRID TRANSAXLE FLUID>REPLACEMENT
Lower the vehicle.