FC CONTROL FC STACK DISASSEMBLY
CAUTION / NOTICE / HINT
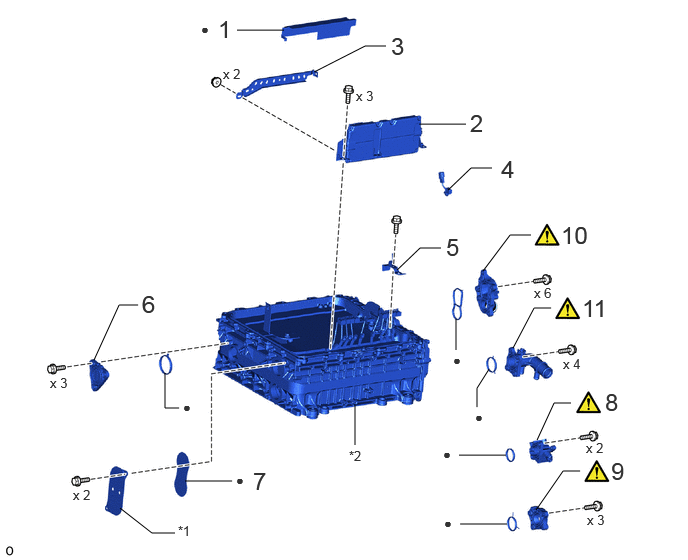
| Procedure | Part Name Code | 
|

|

|
|
|---|---|---|---|---|---|
| 1 | FC CONVERTER SHEET | G9A51 | - | - | - |
| 2 | FC STACK VOLTAGE SENSOR | 1A671 | - | - | - |
| 3 | FC STACK WIRING HARNESS PROTECTOR | 1A647 | - | - | - |
| 4 | FC STACK MONITOR WIRE | 1A631 | - | - | - |
| 5 | FC STACK MONITOR WIRE BRACKET | 1A654 | - | - | - |
| 6 | FC STACK VENTILATION COVER | 1A191 | - | - | - |
| 7 | NO. 2 FC STACK CASE PLUG | 1A19AA | - | - | - |
| 8 | FC STACK HYDROGEN INLET | 1A461 | ( ) |
- | - |
| 9 | FC STACK AIR OUTLET | 1A4A2 | ()
|
- | - |
| 10 | FC STACK AIR AND WATER INLET | 1A4A1 | ()
|
- | - |
| 11 | FC STACK WATER OUTLET | 1A456 | ()
|
- | - |
| *1 | FC STACK CASE PLUG COVER | *2 | FC STACK CASE |
| ● | Non-reusable part | - | - |
CAUTION / NOTICE / HINT
- NOTICE:
-
If any part is removed other than as described in the repair manual procedures, the FC stack assembly must be replaced. Be careful when performing work.
PROCEDURE

 G9A51
1.REMOVE FC CONVERTER SHEET
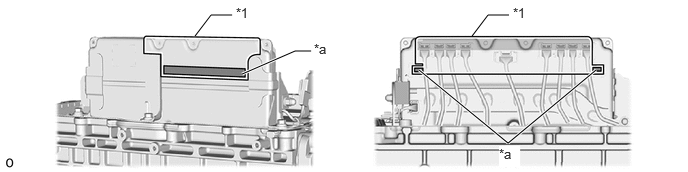
| *1 | FC Converter Sheet | - | - |
| *a | Double-sided Tape | - | - |
1A671
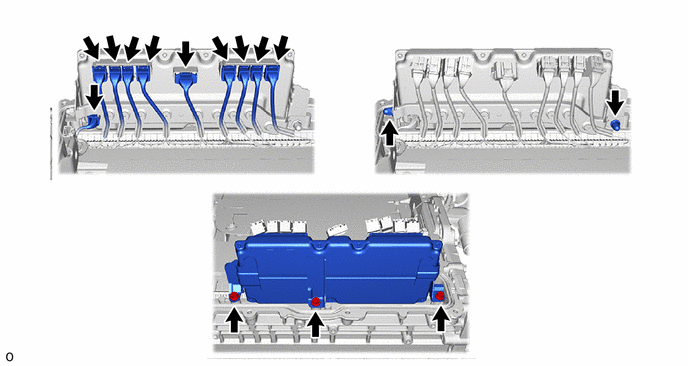
2.REMOVE FC STACK VOLTAGE SENSOR
1A647
3.REMOVE FC STACK WIRING HARNESS PROTECTOR

1A631
4.REMOVE FC STACK MONITOR WIRE

1A654
5.REMOVE FC STACK MONITOR WIRE BRACKET

1A191
6.REMOVE FC STACK VENTILATION COVER
1A19AA
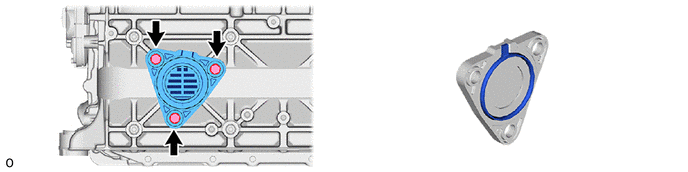
7.REMOVE NO. 2 FC STACK CASE PLUG
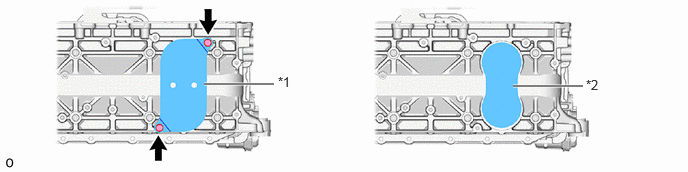
| *1 | FC Stack Case Plug Cover | *2 | No. 2 FC Stack Case Plug |
1A461
8.REMOVE FC STACK HYDROGEN INLET
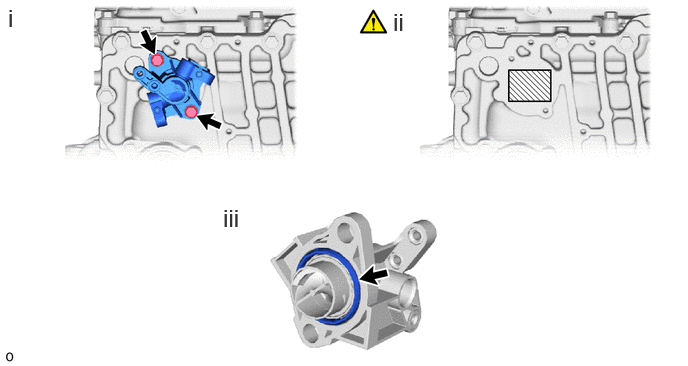
Remove the 2 bolts and FC stack hydrogen inlet.
Protect the openings of the FC stack assembly with protective tape (non-residue type) toprevent the entry of foreign matter or water.
Remove the gasket from the FC stack hydrogen inlet.
1A4A2
9.REMOVE FC STACK AIR OUTLET
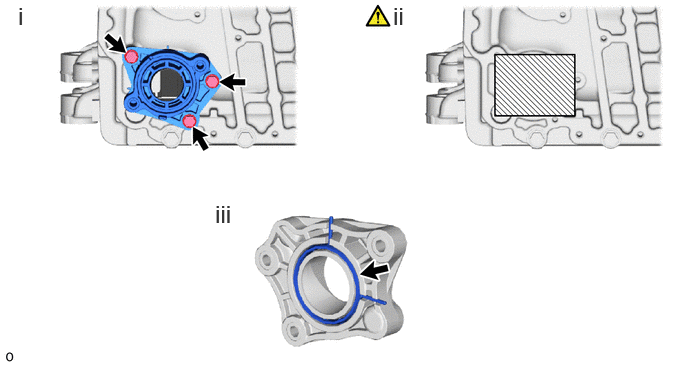
Remove the 3 bolts and FC stack air outlet.
Protect the openings of the FC stack assembly with protective tape (non-residue type) toprevent the entry of foreign matter or water.
Remove the gasket from the FC stack air outlet.
1A4A1
10.REMOVE FC STACK AIR AND WATER INLET
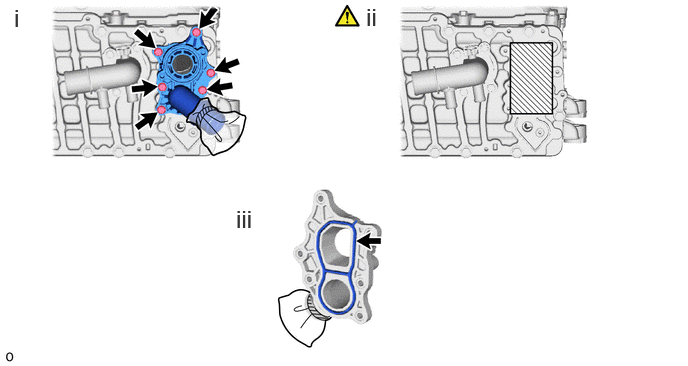
Remove the 6 bolts and FC stack air and water inlet.
Protect the openings of the FC stack assembly with protective tape (non-residue type) toprevent the entry of foreign matter or water.
Remove the gasket from the FC stack air and water inlet.
1A456
11.REMOVE FC STACK WATER OUTLET
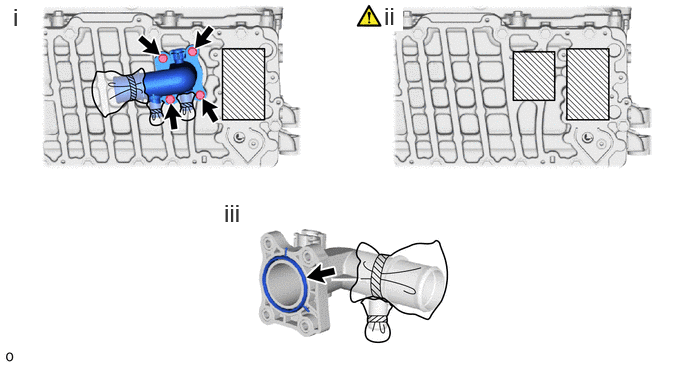
Remove the 4 bolts and FC stack water outlet.
Protect the openings of the FC stack assembly with protective tape (non-residue type) toprevent the entry of foreign matter or water.
Remove the gasket from the FC stack water outlet.