CYLINDER HEAD > INSPECTION |
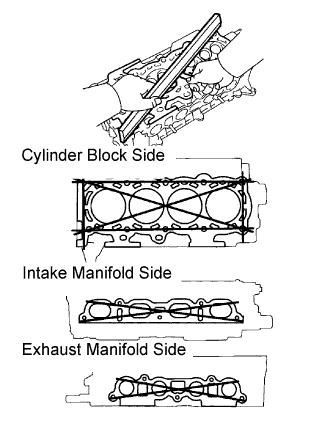
| 1. INSPECT CYLINDER HEAD FOR FLATNESS |
![]() |
Using a precision straightedge and feeler gauge, measure the warpage of the contact surfaces of the cylinder head and cylinder block, and cylinder head and manifolds.
| Surface | Specified Condition |
| Cylinder block side | 0.05 mm (0.0020 in.) |
| Intake manifold side | 0.10 mm (0.0039 in.) |
| Exhaust manifold side | 0.10 mm (0.0039 in.) |
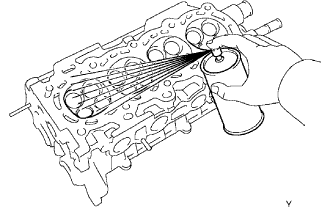
| 2. INSPECT CYLINDER HEAD FOR CRACKS |
![]() |
Using a dye penetrant, check the combustion chamber, intake ports, exhaust ports and cylinder block surface for cracks.
If cracked, replace the cylinder head.
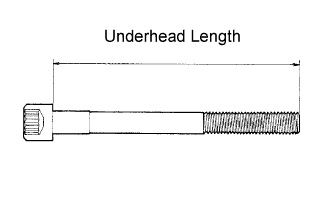
| 3. INSPECT CYLINDER HEAD SET BOLT |
![]() |
Using a vernier caliper, measure the length of the head bolts from the seat to the end.
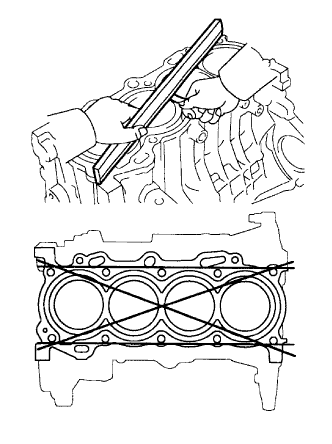
| 4. INSPECT CYLINDER BLOCK FOR FLATNESS |
![]() |
Using a precision straightedge and feeler gauge, measure the surface that is in contact with the cylinder head gasket for warpage.
| 5. INSPECT INTAKE VALVE |
![]() |
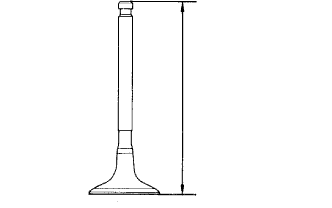
Check the overall valve length.
![]() |
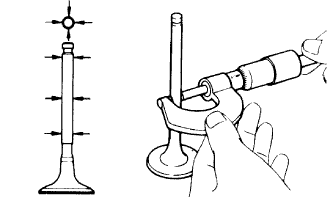
Using a micrometer, measure the diameter of the valve stem.
![]() |
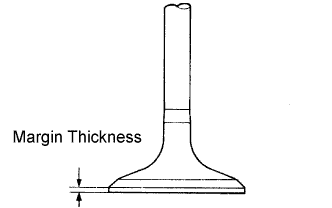
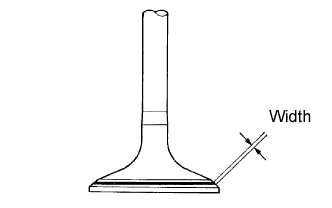
Check the valve head margin thickness.
| 6. INSPECT EXHAUST VALVE |
Check the overall valve length.
Using a micrometer, measure the diameter of the valve stem.
Check the valve head margin thickness.
| 7. INSPECT VALVE SPRING |
![]() |
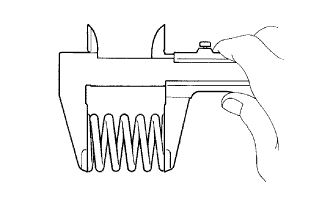
Using a vernier caliper, measure the free length of the valve spring.
![]() |
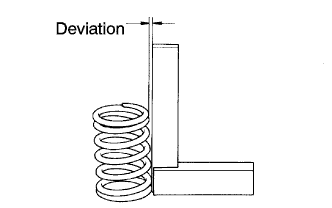
Using a steel square, measure the deviation of the valve spring.
![]() |
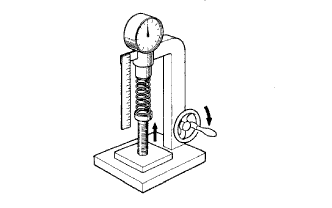
Using a spring tester, measure the tension of the valve spring at the specified installed length.
| 8. INSPECT VALVE GUIDE BUSH OIL CLEARANCE |
![]() |
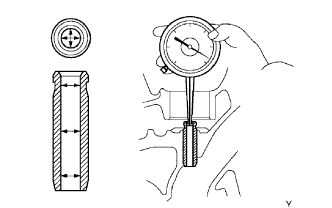
Using a caliper gauge, measure the inside diameter of the guide bush.
Subtract the valve stem diameter measurement from the guide bush inside diameter measurement.
| Guide Bush | Specified Condition |
| Intake | 0.025 to 0.060 mm (0.0010 to 0.0024 in.) |
| Exhaust | 0.030 to 0.065 mm (0.0012 to 0.0026 in.) |
| Guide Bush | Specified Condition |
| Intake | 0.08 mm (0.0032 in.) |
| Exhaust | 0.10 mm (0.0039 in.) |
| 9. INSPECT INTAKE AND EXHAUST VALVE SEAT |
Apply a light coat of Prussian blue to the valve face.
Lightly press the valve against the seat.
![]() |
Check the valve face and seat according to the following procedure.
If blue appears 360° around the face, the valve is concentric. If not, replace the valve.
If blue appears 360° around the valve seat, the guide and face are concentric. If not, resurface the seat.
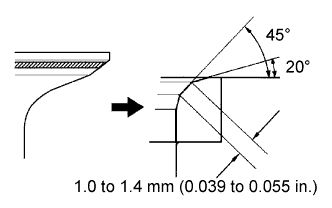
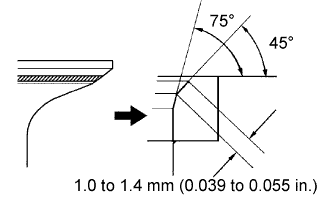
Check that the seat contact is in the middle of the valve face with the width between 1.0 to 1.4 mm (0.039 to 0.055 in.).
| 10. REPAIR INTAKE VALVE SEAT |
![]() |
If the seating is too high on the valve face, use 20° and 45° cutters to correct the seat.
![]() |
If the seating is too low on the valve face, use 75° and 45° cutters to correct the seat.
Hand-lap the valve and valve seat with an abrasive compound.
Recheck the valve seating position.
| 11. REPAIR EXHAUST VALVE SEAT |
![]() |
If the seating is too high on the valve face, use 20° and 45° cutters to correct the seat.
![]() |
If the seating is too low on the valve face, use 75° and 45° cutters to correct the seat.
Hand-lap the valve and valve seat with an abrasive compound.
Recheck the valve seating position.
| 12. INSPECT VALVE LIFTER |
![]() |
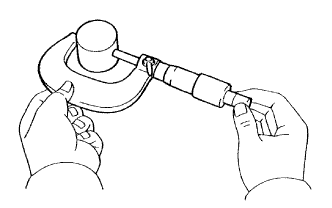
Using a micrometer, measure the lifter diameter.
| 13. INSPECT VALVE LIFTER OIL CLEARANCE |
![]() |
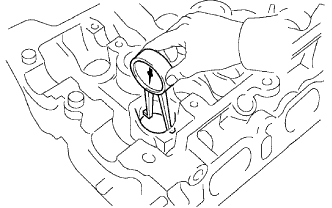
Using a caliper gauge, measure the lifter bore diameter of the cylinder head.
Subtract the lifter diameter measurement from the lifter bore diameter measurement.
| 14. INSPECT CAMSHAFT TIMING GEAR OPERATION |
Check the lock of the camshaft timing gear.
Clamp the camshaft in a vise, and check that the camshaft timing gear is locked.
![]() |
Release the lock pin.
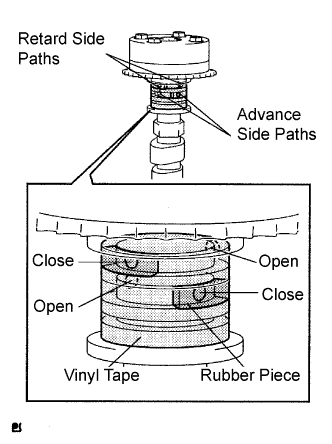
Cover the 4 oil paths of the cam journal with tape as shown in the illustration.
Puncture the tape for the advance oil path and for the retard oil path on the opposite side from the advance oil path.
![]() |
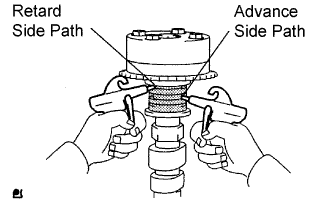
Apply about 150 kPa (1.5 kgf/cm2, 22 psi) of air pressure into the 2 broken tape paths (the advance side path and retard side path).
![]() |
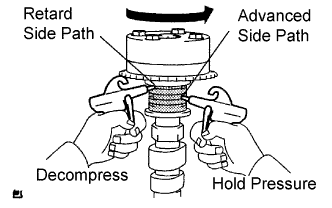
Confirm that the camshaft timing gear assembly revolves in the timing advance direction when reducing the air pressure of the timing retard path.
When the camshaft timing gear reaches the most advanced position, release the air pressure from the timing retard side path, and then release the air pressure from the timing advance side path.
Check the smooth movable range.
Rotate the camshaft timing gear within its movable range several times, but do not turn it to the most retarded position. Check that the gear rotates smoothly.
Check the lock in the most retarded position.
Confirm that the camshaft timing gear assembly is locked at the most retarded position.
| 15. INSPECT CAMSHAFT TIMING GEAR |
![]() |
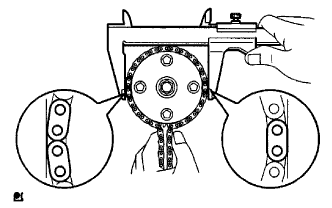
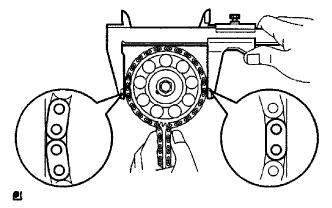
Wrap the chain around the timing sprocket.
Using a vernier caliper, measure the diameter of the timing gear with the chain.
| 16. INSPECT CAMSHAFT TIMING SPROCKET |
![]() |
Wrap the chain around the timing sprocket.
Using a vernier caliper, measure the diameter of the timing gear with the chain.
| 17. INSPECT CAMSHAFT |
![]() |
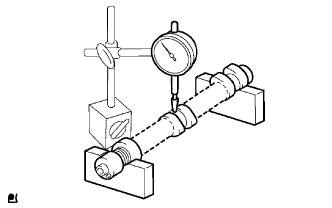
Inspect the camshaft for runout.
Place the camshaft on V-blocks.
Using a dial indicator, measure the circle runout at the center journal.
![]() |
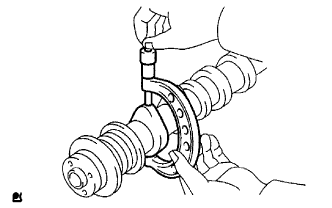
Inspect the cam lobes.
Using a micrometer, measure the cam lobe height.
![]() |
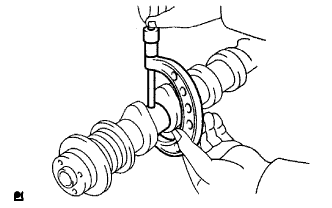
Inspect the camshaft journals.
Using a micrometer, measure the journal diameter.
| Journal | Specified Condition |
| No. 1 journal | 34.449 to 34.465 mm (1.3563 to 1.3569 in.) |
| Other journals | 22.949 to 22.965 mm (0.9035 to 0.9041 in.) |
| 18. INSPECT NO. 2 CAMSHAFT |
Inspect the camshaft for runout.
Place the camshaft on V-blocks.
Using a dial indicator, measure the circle runout at the center journal.
Inspect the cam lobes.
Using a micrometer, measure the cam lobe height.
Inspect the camshaft journals.
Using a micrometer, measure the journal diameter.
| Journal | Specified Condition |
| No. 1 journal | 34.449 to 34.465 mm (1.3563 to 1.3569 in.) |
| Other journals | 22.949 to 22.965 mm (0.9035 to 0.9041 in.) |
| 19. INSPECT CAMSHAFT THRUST CLEARANCE |
Install the camshafts.
![]() |
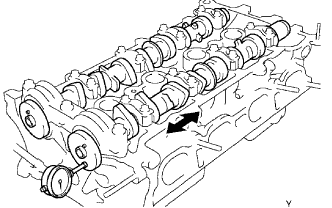
Using a dial indicator, measure the thrust clearance while moving the camshaft back and forth.
| 20. INSPECT CAMSHAFT OIL CLEARANCE |
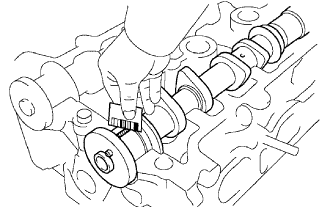
Clean the bearing caps and the camshaft journals.
Place the camshafts on the cylinder head.
![]() |
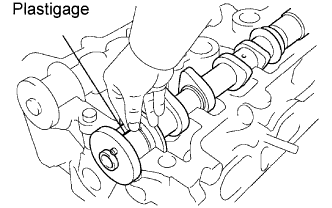
Lay a strip of Plastigage across each of the camshaft journals.
Install the bearing caps.
Remove the bearing caps.
![]() |
Measure the Plastigage at its widest point.