SIDE AIRBAG SENSOR > INSTALLATION |
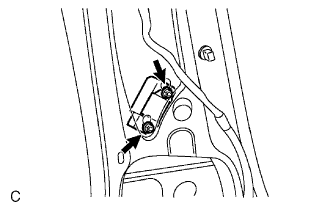
| 1. INSTALL SIDE AIRBAG SENSOR ASSEMBLY LH |
|
Install the sensor with the 2 nuts.
Check that there is no looseness in the installation parts of the sensor.
Connect the connector.
| 2. INSTALL FRONT SEAT OUTER BELT ASSEMBLY LH |
Install the outer belt to the center pillar with the 2 bolts.
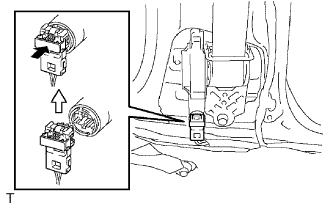 |
Connect the pretensioner connector as shown in the illustration.
Install the outer belt with the bolt on the shoulder anchor side.
Install the shoulder anchor cover.
Install the outer belt with the bolt on the floor anchor side.
Install the center pillar garnish RH .
Install the center pillar lower garnish RH .
Install the floor anchor to the floor panel with the bolt.
Install the front door scuff plate RH .
Install the rear door scuff plate RH .
Install the front door opening trim weatherstrip RH .
Install the rear door opening trim weatherstrip RH .
Check if the ELR locks.
With the belt installed, check that the belt locks when it is pulled out quickly.
If the operation is not as specified, replace the outer belt assembly.
| 3. INSTALL CENTER PILLAR GARNISH LOWER LH |
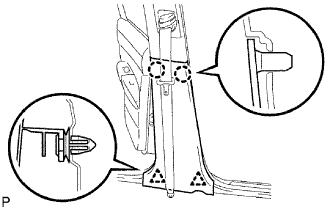 |
Attach the 2 claws and 2 clips to the lower garnish.
| 4. INSTALL REAR DOOR OPENING TRIM WEATHERSTRIP LH |
| 5. INSTALL FRONT DOOR OPENING TRIM WEATHERSTRIP LH |
| 6. INSTALL REAR DOOR SCUFF PLATE LH |
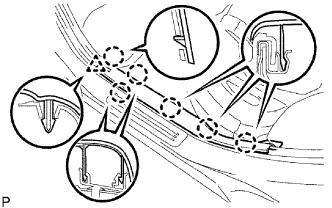 |
Attach the 6 claws and clip to install the scuff plate.
| 7. INSTALL FRONT DOOR SCUFF PLATE LH |
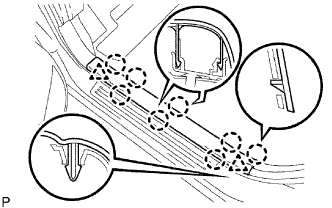 |
Attach the 8 claws and 2 clips to install the scuff plate.
| 8. CONNECT CABLE TO NEGATIVE BATTERY TERMINAL |
| 9. PERFORM INITIALIZATION |
Perform initialization (Click here).
| 10. CHECK SRS WARNING LIGHT |
Check the SRS warning light (Click here).