 |
Unlock the 2 washer tank cover knobs, and then remove the rear floor board.
WATER PUMP WITH MOTOR > REMOVAL |
| 1. REMOVE REAR NO. 2 FLOOR BOARD |
|
Unlock the 2 washer tank cover knobs, and then remove the rear floor board.
| 2. REMOVE REAR DECK FLOOR BOX |
 |
Remove the rear deck floor box from the vehicle.
| 3. REMOVE REAR NO. 3 FLOOR BOARD |
 |
Detach the 4 claws, and then remove the floor board.
| 4. DISCONNECT CABLE FROM NEGATIVE BATTERY TERMINAL |
| 5. DISCONNECT FRONT FENDER LINER LH |
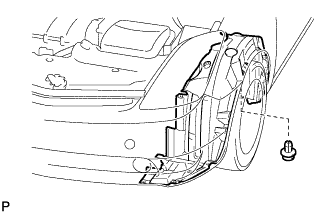 |
Using a clip remover, remove the clip.
Partially remove the fender liner.
| 6. DISCONNECT FRONT FENDER LINER RH |
| 7. REMOVE CENTER NO. 4 ENGINE UNDER COVER |
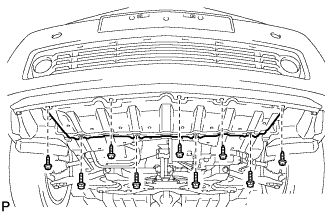 |
Remove the 5 screws, 4 bolts and under cover.
| 8. REMOVE FRONT SPOILER COVER |
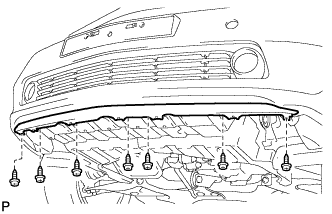 |
Remove the 7 screws and spoiler cover.
| 9. REMOVE FRONT BUMPER COVER |
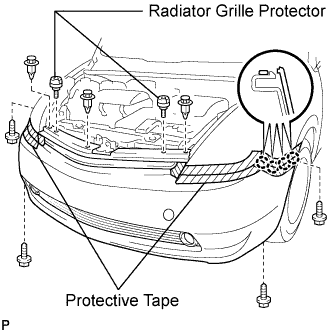 |
Put protective tape under the front fender.
Using a clip remover, remove the 3 clips.
Remove the 2 radiator grille protectors and 4 screws.
Detach the 8 claws.
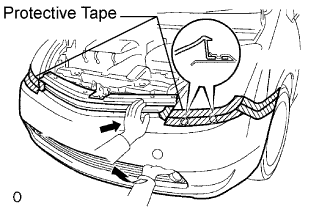 |
Detach the 4 claws and remove the bumper cover.
Hold the front bumper cover on its upper and lower parts with your hands as shown in the illustration.
Pull up the front bumper cover's lower part while holding its upper part securely.
w/ Fog light:
Disconnect the 2 fog light connectors.
| 10. REMOVE FRONT BUMPER ENERGY ABSORBER |
| 11. REMOVE HEADLIGHT ASSEMBLY LH |
Remove the headlight LH from the vehicle (Click here).
| 12. DRAIN COOLANT (for Inverter) |
Remove the transaxle-side reserve tank cap.
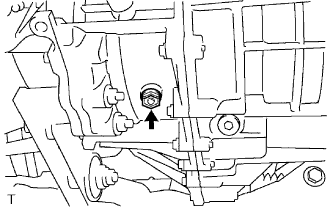 |
Remove the plug shown in the illustration and drain the coolant into a container.
Install the plug with a new gasket.
| 13. DISCONNECT WATER VALVE WITH BRACKET ASSEMBLY |
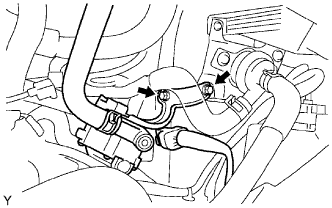 |
Remove the bolt and nut, then disconnect the water valve.
| 14. REMOVE WATER PUMP WITH MOTOR ASSEMBLY |
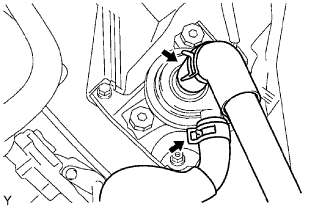 |
Disconnect the 2 inverter cooling hoses shown in the illustration.
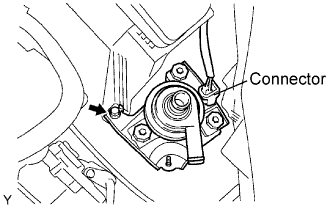 |
Remove the bolt, then disconnect the water pump with motor assembly from the vehicle.
Disconnect the connector and remove the water pump with motor assembly.