 |
Unlock the 2 washer tank cover knobs, and then remove the rear floor board.
MAIN BATTERY CABLE > REMOVAL |
| 1. PRECAUTION |
| 2. REMOVE REAR NO. 2 FLOOR BOARD |
|
Unlock the 2 washer tank cover knobs, and then remove the rear floor board.
| 3. REMOVE REAR DECK FLOOR BOX |
 |
Remove the rear deck floor box from the vehicle.
| 4. REMOVE REAR NO. 3 FLOOR BOARD |
 |
Detach the 4 claws, and then remove the floor board.
| 5. DISCONNECT CABLE FROM NEGATIVE BATTERY TERMINAL |
| 6. REMOVE SERVICE PLUG GRIP |
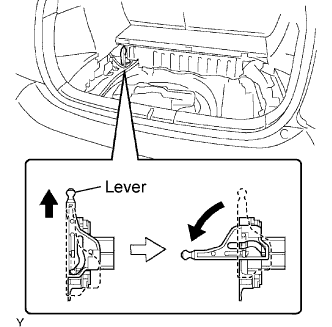 |
Slide up the lever of the service plug grip. Remove the service plug grip while turning the lever to the left.
Insulate the service plug with insulating tape.
| 7. REMOVE HV BATTERY ASSEMBLY |
Remove the HV battery from the vehicle (Click here).
| 8. REMOVE BATTERY COVER |
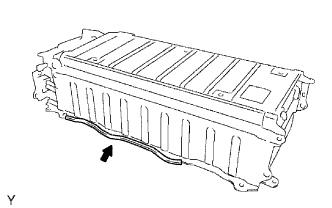 |
Remove the protector shown in the illustration.
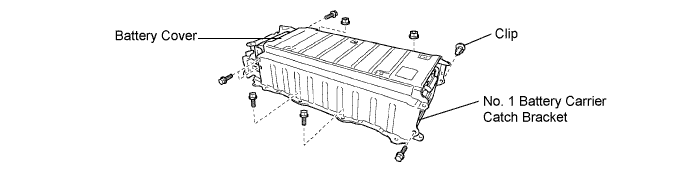
Remove the 6 bolts, 2 nuts, clip, battery cover and battery carrier catch bracket.
| 9. REMOVE NO. 1 WIRE HARNESS PROTECTOR COVER |
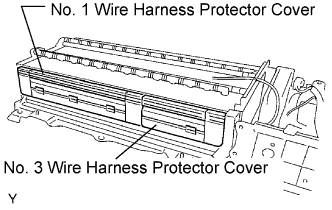 |
| 10. REMOVE NO. 3 WIRE HARNESS PROTECTOR COVER |
| 11. REMOVE NO. 3 BATTERY CARRIER CUSHION |
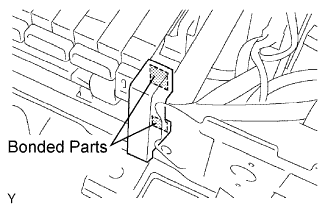 |
Peel off the bonded parts, then remove the battery carrier cushion.
| 12. REMOVE MAIN BATTERY CABLE |
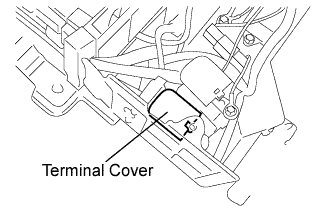 |
Remove the terminal cover shown in the illustration.
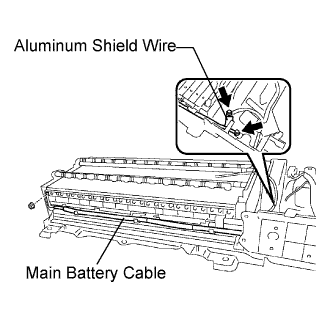 |
Remove the nut, then disconnect the aluminum shield wire.
Remove the nut, then disconnect the main battery cable from the No. 3 system main relay.
Remove the nut, then disconnect the main battery cable from the No. 2 frame wire.
Remove the main battery cable from the HV battery.
| 13. REMOVE NO. 2 MAIN BATTERY CABLE |
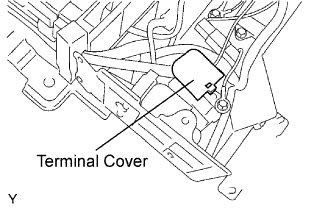 |
Remove the terminal cover shown in the illustration.
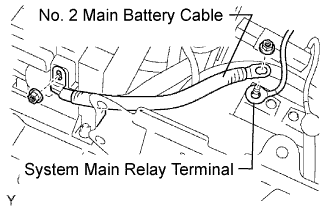 |
Remove the nut, then disconnect the system main relay terminal and No. 2 main battery cable from the No. 2 system main relay.
Remove the nut, then disconnect the No. 2 main battery cable from the frame wire.
Remove the No. 2 main battery cable from the HV battery.