KNOCK SENSOR > INSTALLATION |
| 1. INSTALL KNOCK SENSOR |
|
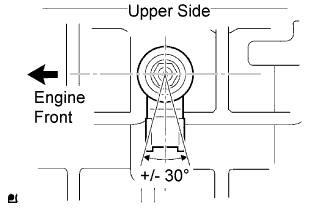
Install the knock sensor with the nut.
Connect the knock sensor connector.
| 2. INSTALL INTAKE MANIFOLD |
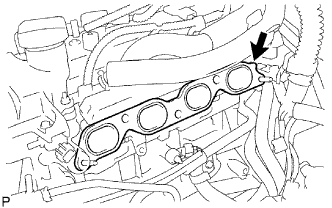 |
Install a new gasket to the cylinder head.
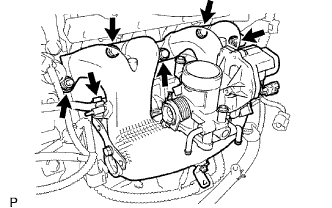 |
Install the intake manifold with the 3 bolts and 2 nuts.
Install the No. 1 fuel vapor feed hose to the hose clamp.
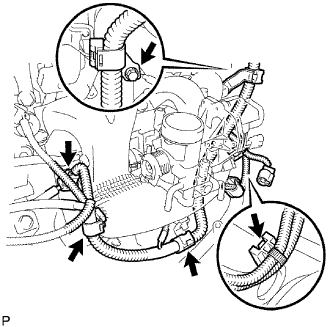 |
Install the harness clamp bracket with the bolt.
Install the connector clamp.
Install the 3 wire harness clamps.
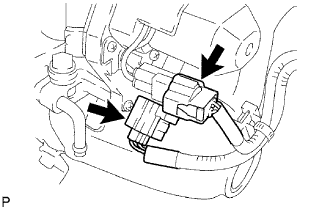 |
Connect the throttle position sensor connector.
Connect the throttle control motor connector.
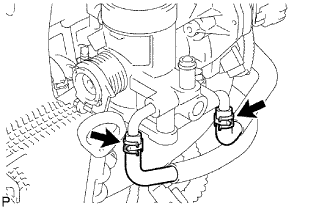 |
Connect the No. 2 water by-pass hose.
Connect the water by-pass hose.
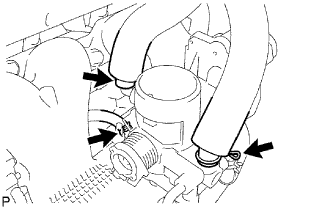 |
Connect the No. 1 fuel vapor feed hose.
Connect the No. 2 ventilation hose.
Connect the ventilation hose.
| 3. INSTALL OIL DIPSTICK GUIDE |
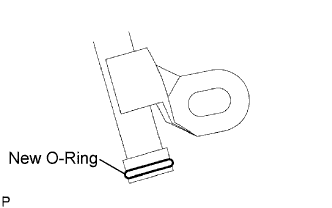 |
Apply a light coat of engine oil to a new O-ring and install it to the dipstick guide.
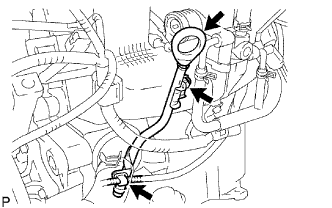 |
Install the dipstick guide with the bolt.
Connect the wire harness clamp.
Install the dipstick.
| 4. INSTALL AIR CLEANER ASSEMBLY |
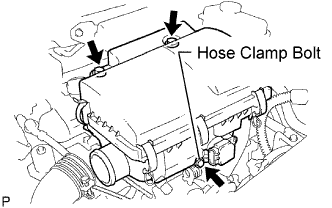 |
Install the air cleaner with the 2 bolts.
Tighten the hose clamp bolt.
Connect the No. 1 air cleaner inlet, and tighten the hose clamp bolt.
Connect the MAF meter connector.
| 5. CONNECT CABLE TO NEGATIVE BATTERY TERMINAL |
| 6. ADD ENGINE COOLANT |
Tighten the drain cock plug of the coolant heat storage tank, then disconnect the vinyl hose.
Tighten the drain cock plug of the engine, then disconnect the vinyl hose.
Tighten the drain cock plug of the radiator, then disconnect the vinyl hose.
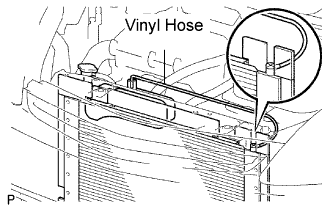 |
Connect a vinyl hose to the bleeder plug of the radiator assembly and the radiator reservoir.
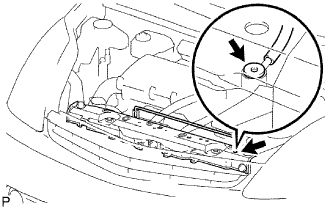 |
Using a 6 mm socket hexagon wrench, loosen the radiator bleeder plug from the radiator support service hole.
Fill the radiator with coolant up to the fill port.
Using a 6 mm socket hexagon wrench, tighten the radiator bleeder plug.
Install the radiator cop.
Fill the radiator reservoir tank with coolant to the full level.
Connect the coolant heat storage water pump connector.
Connect the Techstream to the DLC3.
Turn the power switch ON (IG).
Select the item:
Powertrain / Engine and ECT / Data List/Activate the Water Pump
|
Using a 6 mm socket hexagon wrench, loosen the radiator bleeder plug from the radiator support service hole.
Remove the radiator cap, then fill the radiator with coolant up to the fill port.
Using a 6 mm socket hexagon wrench, tighten the radiator bleeder plug.
Install the radiator cap.
Slowly pour coolant into the radiator reservoir until it reaches the full line.
Disconnect the vinyl hose between the bleeder plug of the radiator assembly and the radiator reservoir tank.
Set the vehicle to inspection mode (Click here).
Warm up the engine until the thermostat is open.
Stop the engine, then wait until the coolant becomes cold. Remove the radiator cap and check the coolant level.
When the coolant level stops going down, add coolant to the radiator reservoir tank up to the full level.
| 7. INSPECT FOR COOLANT LEAK (for Engine) |
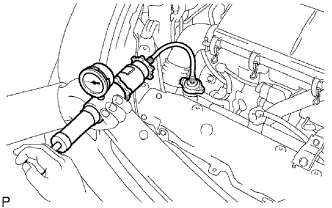 |
Fill the radiator with coolant and attach a radiator cap tester.
Warm up the engine.
Using the radiator cap tester, increase the pressure inside the radiator to 177 kPa (1.8 kgf/cm2, 25.6 psi), and check that the pressure does not drop.
If the pressure drops, check the hoses, radiator and water pump for leaks. If no external leaks are found, check the cylinder block and head.
| 8. INSTALL ENGINE UNDER COVER LH |
| 9. INSTALL RADIATOR SUPPORT OPENING COVER |
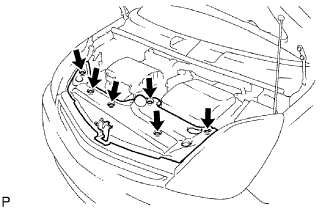 |
Install the cover with the 6 clips.
| 10. PERFORM INITIALIZATION |
Perform initialization (Click here).