LOWER INSTRUMENT PANEL > REMOVAL |
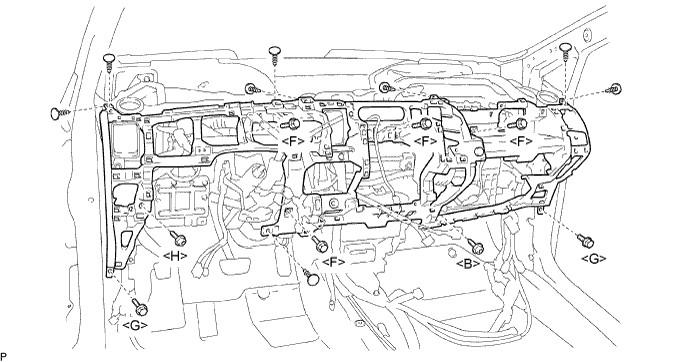
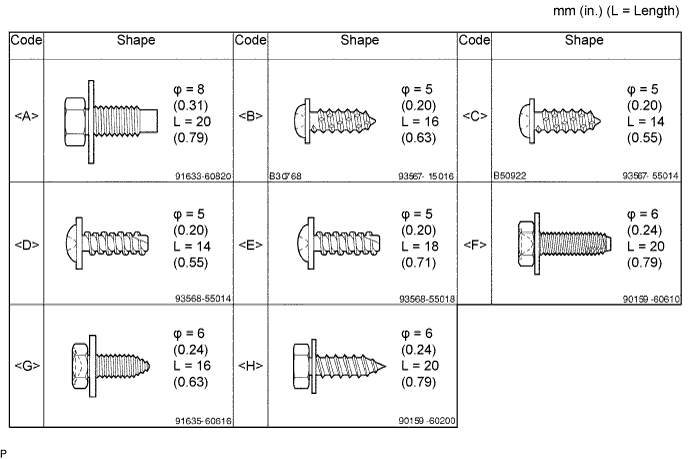
| 1. TABLE OF BOLT, SCREW AND NUT |
| 2. DISCONNECT CABLE FROM NEGATIVE BATTERY TERMINAL |
| 3. REMOVE INSTRUMENT PANEL SAFETY PAD |
Remove the instrument panel (Click here).
| 4. REMOVE NO. 2 STEERING WHEEL COVER LOWER |
| 5. REMOVE NO. 3 STEERING WHEEL COVER LOWER |
| 6. REMOVE STEERING PAD ASSEMBLY |
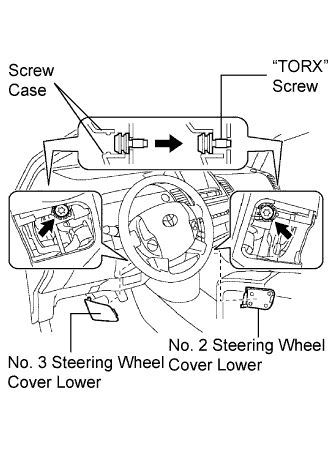 |
Straighten the front wheels.
Using a T30 "TORX" socket, loosen the 2 screws until the groove along each screw circumference catches on the screw case.
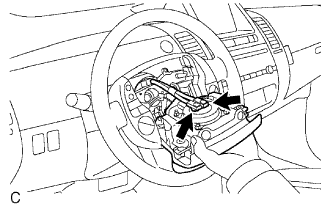 |
Pull out the steering pad from the steering wheel and support the steering pad with one hand as shown in the illustration.
Using a screwdriver, disconnect the 2 airbag connectors.
Disconnect the horn connector and remove the steering pad.
| 7. REMOVE STEERING WHEEL ASSEMBLY |
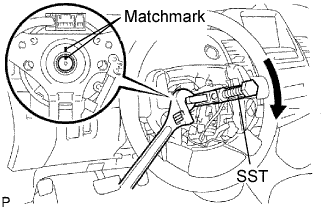 |
Remove the nut and put matchmarks on the steering wheel and steering main shaft.
Using SST, remove the steering wheel.
| 8. REMOVE TILT LEVER BRACKET |
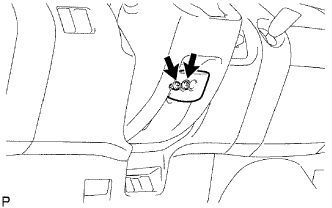 |
Remove the 2 screws and tilt lever bracket.
| 9. REMOVE STEERING COLUMN COVER |
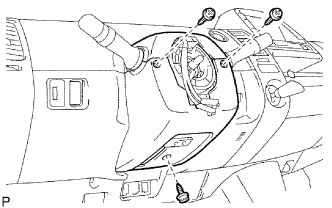 |
Detach the 4 claws and remove the 3 screws. Then remove the steering column lower cover and the steering column upper cover.
| 10. REMOVE SPIRAL CABLE SUB-ASSEMBLY |
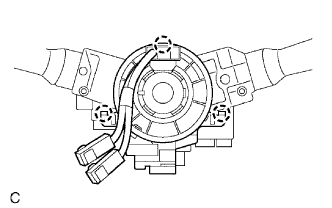 |
Disconnect the airbag connector.
Detach the 3 claws and remove the spiral cable.
| 11. REMOVE FRONT DOOR SCUFF PLATE LH |
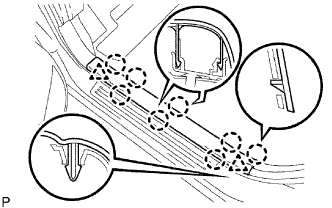 |
Using a screwdriver, detach the 8 claws and 2 clips, and remove the scuff plate.
| 12. REMOVE FRONT DOOR SCUFF PLATE RH |
| 13. REMOVE COWL SIDE TRIM BOARD LH |
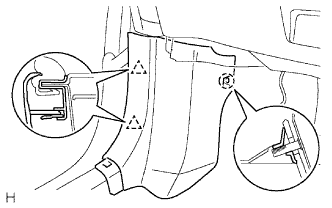 |
Using a screwdriver, detach the claw and 2 clips, and remove the trim board.
| 14. REMOVE COWL SIDE TRIM BOARD RH |
| 15. REMOVE INSTRUMENT CLUSTER FINISH PANEL ASSEMBLY CENTER |
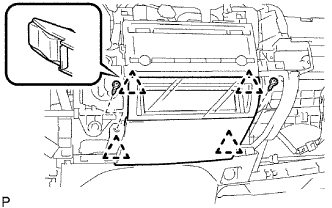 |
Remove the 2 screws.
Detach the 4 clips and remove the instrument cluster finish panel.
| 16. REMOVE NO. 1 CENTER CLUSTER CUSHION |
| 17. REMOVE RADIO RECEIVER |
| 18. REMOVE INSTRUMENT PANEL FINISH PANEL LOWER CENTER |
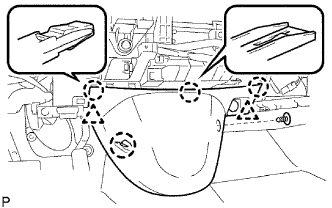 |
Using a clip remover, remove the clip from the instrument panel finish panel lower center.
Detach the 4 claws and 2 clips, and remove the instrument panel finish panel.
| 19. REMOVE GLOVE COMPARTMENT DOOR LOCK COVER |
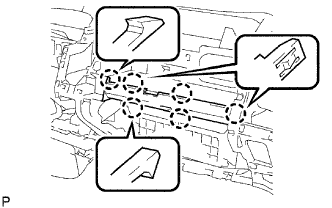 |
Detach the 6 claws and remove the glove compartment door lock cover.
| 20. REMOVE GLOVE COMPARTMENT DOOR LOCK ASSEMBLY |
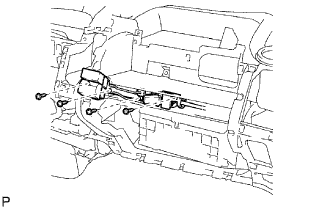 |
Remove the 4 screws and glove compartment door lock.
| 21. REMOVE INSTRUMENT PANEL FINISH PANEL LOWER |
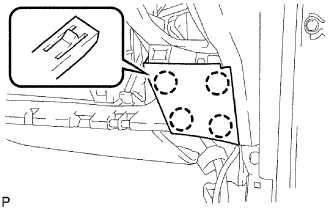 |
Detach the 4 claws and remove the instrument panel finish panel.
| 22. REMOVE NO. 1 INSTRUMENT PANEL UNDER COVER SUB-ASSEMBLY |
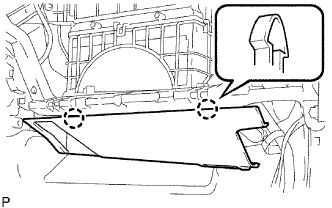 |
Detach the 2 claws and remove the instrument panel under cover.
| 23. REMOVE POWER STEERING ECU |
| 24. REMOVE SHIFT LEVER ASSEMBLY LOWER |
| 25. REMOVE LOWER INSTRUMENT PANEL SUB-ASSEMBLY |
Using a clip remover, remove the 8 clips from the duct and lower instrument panel.
Remove the 6 bolts.
Remove the 2 screws.
Disconnect all connectors, and detach all clamps.
Remove the instrument panel.