 |
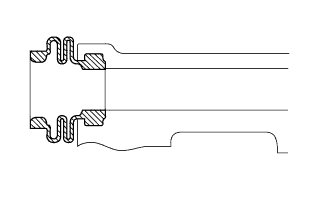
Apply lithium soap base glycol grease to seal surface of 2 new bush dust boots.
FRONT BRAKE > INSTALLATION |
| 1. INSTALL FRONT DISC BRAKE CYLINDER MOUNTING LH |
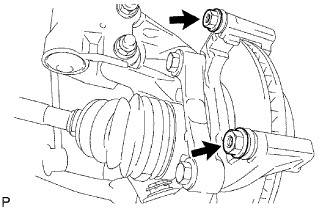
Install the front disc brake cylinder mounting with the 2 bolts.
| 2. INSTALL FRONT DISC BRAKE BUSH DUST BOOT |
|
Apply lithium soap base glycol grease to seal surface of 2 new bush dust boots.
Install the 2 bush dust boots to the front disc brake cylinder mounting.
| 3. INSTALL FRONT DISC BRAKE CYLINDER SLIDE PIN |
 |
Apply lithium soap base glycol grease to the sliding and fitting portion of the front disc brake cylinder slide pin.
Push the front disc brake cylinder slide pin into the disc brake bush dust boot to install it.
| 4. INSTALL NO. 1 FRONT DISC BRAKE PAD SUPPORT PLATE |
Install the No. 1 pad support plate to the front disc brake cylinder mounting.
| 5. INSTALL NO. 2 FRONT DISC BRAKE PAD SUPPORT PLATE |
Install the No. 2 pad support plate to the front disc brake cylinder mounting.
| 6. INSTALL FRONT ANTI-SQUEAL SHIM KIT |
Apply disc brake grease to the area where the No. 1 anti-squeal shim makes contact.
Install the 2 No. 1 anti-squeal shims and 2 No. 2 anti-squeal shims to the front disc brake pads.
| 7. INSTALL FRONT DISC BRAKE PAD KIT (PAD ONLY) |
Install the 2 front disc brake pads to the front disc brake cylinder mounting.
| 8. INSTALL FRONT DISC BRAKE CYLINDER SUB-ASSEMBLY |
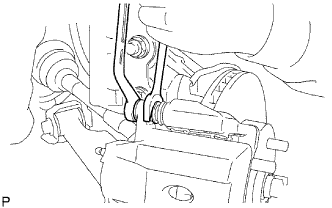 |
Install the front disc brake cylinder with the 2 bolts.
Placing a new gasket inbetween, connect the No. 1 flexible hose to the front disc brake cylinder with the union bolt.
| 9. FILL RESERVOIR WITH BRAKE FLUID |
Add brake fluid into the reservoir.
| 10. BLEED AIR FROM FRONT AND REAR BRAKE SYSTEMS |
Remove the No. 1 and No. 2 motor relays.
Bleed the air out of the FR/FL wheels if the display appears.
Remove the bleeder plug cap.
Connect the vinyl tube to the bleeder plug.
Depress the brake pedal several times, then loosen the bleeder plug with the brake pedal depressed.
When the fluid stops coming out, tighten the bleeder plug, and then release the brake pedal.
Repeat the above steps until all the air in the fluid is completely bled out.
Install the bleeder plug cap.
Repeat the previous procedures to bleed the air out of the brake line for each wheel.
Install the No. 1 and No. 2 motor relays.
Bleed the air out of the RL wheel if the display appears.
Remove the bleeder plug cap of RL wheel.
Connect the vinyl tube to the bleeder plug of RL wheel.
Depress the brake pedal and loosen the bleeder plug of RL wheel until all the air in the fluid is completely bled out.
Tighten the bleeder plug if the air is completely bled out.
Bleed the air out of the RR wheel if the display appears.
Remove the bleeder plug cap of RR wheel.
Connect the vinyl tube to the bleeder plug of RR wheel.
Depress the brake pedal and loosen the bleeder plug of RR wheel until all the air in the fluid is completely bled out.
The air bleeding of the front and rear brake system finishes if the display appears.
| 11. INSPECT FOR BRAKE FLUID LEAK |
| 12. CHECK FLUID LEVEL IN RESERVOIR |
| 13. INSTALL FRONT WHEEL |
| 14. CHECK AND CLEAR DTC |
Check and clear the DTC (Click here).