 |
Temporarily install 2 hub nuts.
REAR DRUM BRAKE > INSTALLATION |
| 1. INSTALL REAR BRAKE DRUM SUB-ASSEMBLY |
Aligning the matchmarks, install the rear brake drum.
| 2. ADJUST REAR DRUM BRAKE SHOE CLEARANCE |
|
Temporarily install 2 hub nuts.
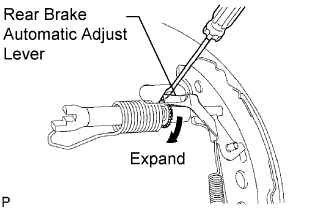
Remove the hole plug, and turn the adjuster to expand the shoe until the drum locks.
Rotate the adjuster by 8 notches.
Install the hole plug.
Remove the 2 hub nuts.
| 3. FILL RESERVOIR WITH BRAKE FLUID |
Add brake fluid into the reservoir.
| 4. BLEED AIR FROM FRONT AND REAR BRAKE SYSTEMS |
Remove the No. 1 and No. 2 motor relays.
Bleed the air out of the FR/FL wheels if the display appears.
Remove the bleeder plug cap.
Connect the vinyl tube to the bleeder plug.
Depress the brake pedal several times, then loosen the bleeder plug with the brake pedal depressed.
When the fluid stops coming out, tighten the bleeder plug, and then release the brake pedal.
Repeat the above steps until all the air in the fluid is completely bled out.
Install the bleeder plug cap.
Repeat the previous procedures to bleed the air out of the brake line for each wheel.
Install the No. 1 and No. 2 motor relays.
Bleed the air out of the RL wheel if the display appears.
Remove the bleeder plug cap of RL wheel.
Connect the vinyl tube to the bleeder plug of RL wheel.
Depress the brake pedal and loosen the bleeder plug of RL wheel until all the air in the fluid is completely bled out.
Tighten the bleeder plug if the air is completely bled out.
Bleed the air out of the RR wheel if the display appears.
Remove the bleeder plug cap of RR wheel.
Connect the vinyl tube to the bleeder plug of RR wheel.
Depress the brake pedal and loosen the bleeder plug of RR wheel until all the air in the fluid is completely bled out.
The air bleeding of the front and rear brake system finishes if the display appears.
| 5. INSPECT FOR BRAKE FLUID LEAK |
| 6. CHECK FLUID LEVEL IN RESERVOIR |
| 7. INSTALL REAR WHEEL |
| 8. CHECK PARKING BRAKE PEDAL TRAVEL |
Firmly depress the parking brake pedal.
Release the parking brake.
Slowly depress the parking brake pedal all the way again and count the number of clicks.
| 9. ADJUST PARKING BRAKE PEDAL TRAVEL |
Remove the rear console box (Click here).
Remove the front floor footrest .
Remove the 8 bolts and front floor crossmember reinforcement LH.
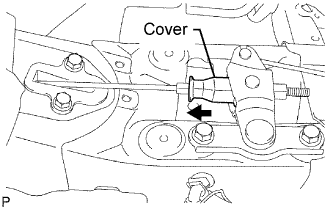 |
Slide the cover to the rear of the vehicle as shown in the illustration.
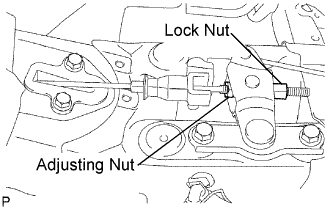 |
Depress the parking brake pedal 5 clicks. Hold the adjusting nut using a wrench and loosen the lock nut.
Release the parking brake.
Turn the lock nut and adjusting nut until parking brake travel is within the specified range.
Count the number of clicks after depressing and releasing the parking brake pedal 3 to 4 times.
Check whether the parking brake drags or not.
When operating the parking brake pedal, check that the parking brake pedal indicator light comes on.
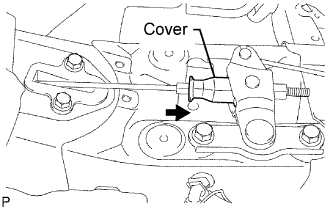 |
Return the cover to the original position as shown in the illustration.
Install the front floor crossmember reinforcement LH with the 8 bolts.
Install the front floor footrest .
Install the rear console box (Click here).
| 10. CHECK AND CLEAR DTC |
Check and clear the DTC (Click here).