CLOCK > INSTALLATION |
| 1. INSTALL CLOCK ASSEMBLY |
|
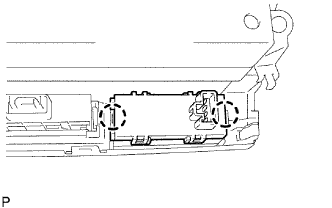
Attach the 2 claws to install the clock.
| 2. INSTALL MULTI-DISPLAY ASSEMBLY |
| 3. INSTALL NO. 4 INSTRUMENT PANEL REGISTER ASSEMBLY |
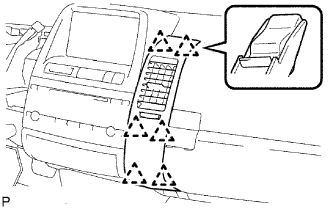 |
Attach the 6 clips to install the instrument panel register.
| 4. INSTALL UPPER INSTRUMENT PANEL FINISH PANEL SUB-ASSEMBLY |
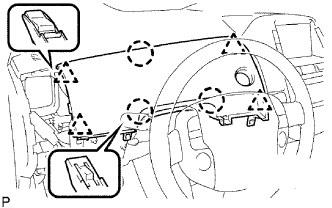 |
Connect the connector.
Attach the 3 claws and 4 clips to install the instrument panel finish panel.
| 5. INSTALL LOWER INSTRUMENT PANEL FINISH PANEL SUB-ASSEMBLY |
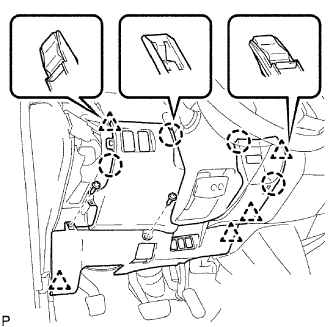 |
Connect the connectors.
Attach the 4 claws and 5 clips to install the instrument panel finish panel.
Connect the hood lock control cable.
Install the 2 screws.
| 6. INSTALL NO. 3 INSTRUMENT PANEL REGISTER ASSEMBLY |
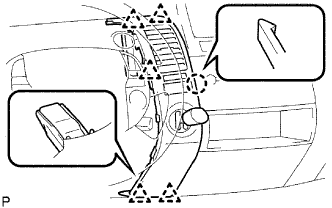 |
Connect the connector.
Attach the claw and 5 clips to install the instrument panel register.
| 7. INSTALL NO. 1 INSTRUMENT PANEL REGISTER ASSEMBLY |
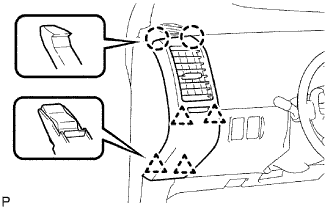 |
Attach the 2 claws and 4 clips to install the instrument panel register.
| 8. CONNECT CABLE TO NEGATIVE BATTERY TERMINAL |
| 9. PERFORM INITIALIZATION |
Perform initialization (Click here).
| 10. CHECK SRS WARNING LIGHT |
Check the SRS warning light (Click here).