 |
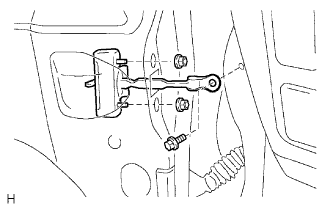
Apply MP grease to the sliding areas of the door check.
REAR DOOR > REASSEMBLY |
| 1. INSTALL REAR DOOR WEATHERSTRIP LH |
Install the weatherstrip and attach the clips.
| 2. INSTALL REAR DOOR CHECK ASSEMBLY LH |
|
Apply MP grease to the sliding areas of the door check.
Install the door check to the door panel with the 2 nuts.
Apply adhesive to the bolt.
Install the door check to the body panel with the bolt.
| 3. INSTALL REAR DOOR OUTSIDE HANDLE FRAME SUB-ASSEMBLY LH |
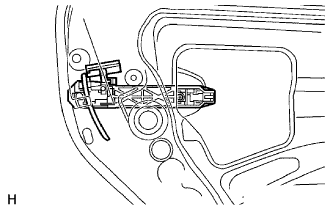 |
Using a T30 "torx" wrench, install the handle frame with the screw.
| 4. INSTALL REAR DOOR OUTSIDE HANDLE ASSEMBLY LH |
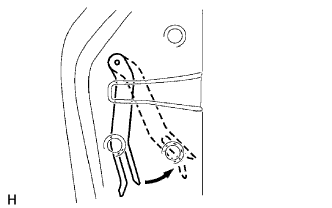 |
Install the outside handle pad front and rear.
Pull and hold the release plate of the outside handle frame, as shown in the illustration.
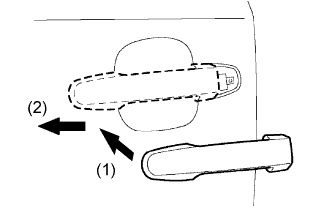 |
Install the handle by pushing it in the direction of the arrow marks in the illustration.
| 5. INSTALL REAR DOOR OUTSIDE HANDLE COVER RH |
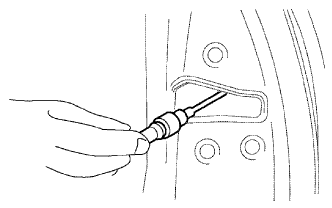 |
Using a T30 "torx" wrench, install the outside handle handle cover with the screw.
| 6. INSTALL REAR DOOR LOCK ASSEMBLY LH |
Apply MP grease to the sliding and rotating areas of the door lock.
Install new door lock wire harness packing.
Engage the lock with the release plate of the outside handle, and then set it to the door panel.
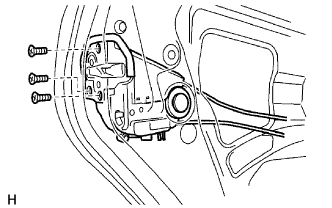 |
Apply adhesive to the 3 screws.
Using a T30 "torx" wrench, install the door lock with the 3 screws.
Connect the door lock connector.
| 7. INSTALL POWER WINDOW REGULATOR MOTOR ASSEMBLY |
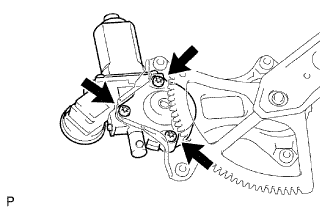 |
Using a T25 "torx" driver, install the motor with the 3 screws.
| 8. INSTALL REAR DOOR WINDOW REGULATOR SUB-ASSEMBLY LH |
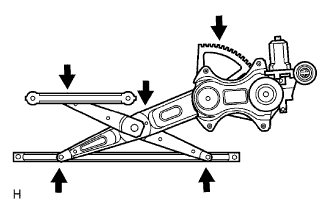 |
Apply MP grease to the sliding and rotating areas of the window regulator.
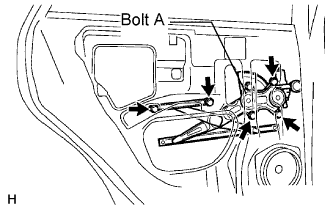 |
Loosely install the bolt labeled A onto the window regulator.
Insert the window regulator into the door panel. Use the bolt labeled A to hang the window regulator on the door panel.
Install the window regulator with the 5 bolts and tighten the bolt labeled A.
Connect the window regulator connector.
| 9. INSTALL REAR DOOR GLASS SUB-ASSEMBLY LH |
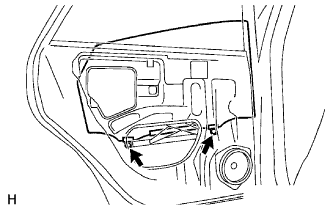 |
Install the glass run.
Install the door glass to the window regulator with the 2 bolts.
| 10. INSTALL REAR DOOR WINDOW REAR GUIDE SUB-ASSEMBLY LH |
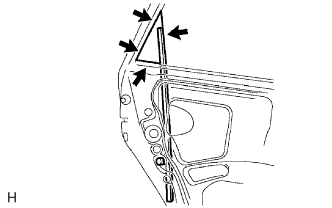 |
Install the window guide rear together with the rear door guide seal.
| 11. INSTALL REAR DOOR SERVICE HOLE COVER LH |
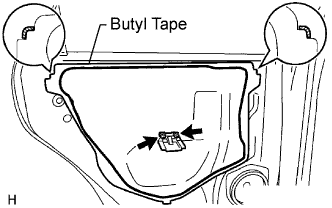 |
Apply butyl tape to the door as shown in the illustration.
Install a new service hole cover.
Install the trim bracket with the 2 screws.
| 12. INSTALL DOOR FRAME GARNISH LH |
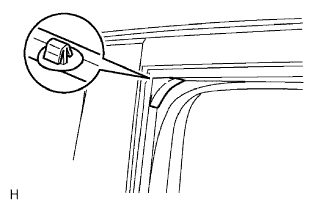 |
Attach the claw to install the garnish.
| 13. INSTALL REAR DOOR WINDOW FRAME FRONT MOULDING LH |
Clean the vehicle body surface.
Using a heat light, heat the vehicle body.
Remove the double-sided tape from the vehicle body.
Wipe off any tape adhesive residue with white gasoline.
If reusing the moulding:
Clean the moulding and install new double-sided tape.
Using a heat light, heat the moulding.
Remove the double-sided tape from the moulding.
Wipe off any tape adhesive residue with white gasoline.
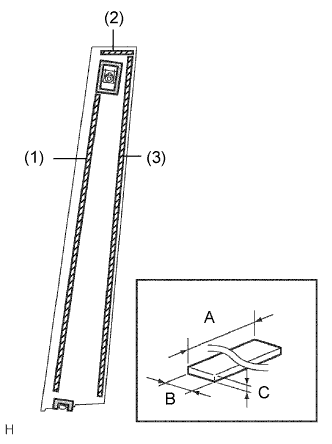 |
Install new double-sided tape to the moulding.
| Area | Specified Condition |
| A | (1) 360.0 mm (14.173 in.) (2) 37.0 mm (1.457 in.) (3) 440.0 mm (17.322 in.) |
| B | 5.0 mm (0.197 in.) |
| C | (1) 1.2 mm (0.047 in.) (2) 0.8 mm (0.032 in.) (3) 0.8 mm (0.032 in.) |
Install the moulding.
Using a heat light, heat the vehicle body and moulding.
Remove the peeling paper from the face of the moulding.
Install the moulding with the screw.
| 14. INSTALL REAR DOOR BELT MOULDING ASSEMBLY LH |
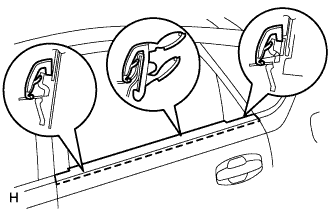 |
Attach the claws to install the moulding.
| 15. INSTALL REAR SPEAKER ASSEMBLY |
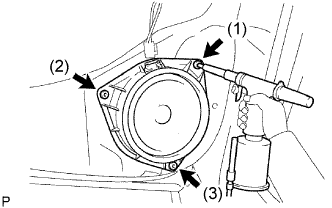 |
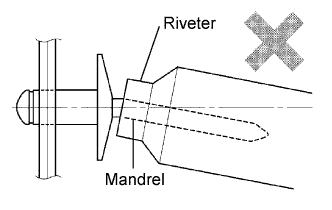
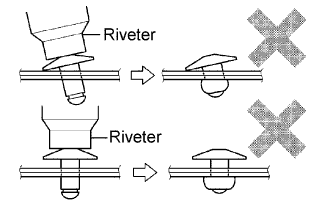
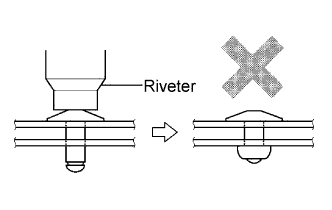
Using an air riveter or hand riveter, install the speaker with 3 new rivets.
 |
 |
 |
Connect the connector.
| 16. INSTALL REAR DOOR INSIDE HANDLE SUB-ASSEMBLY LH |
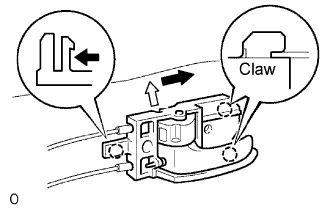 |
Connect the 2 cables from the inside handle.
Move the inside handle in the direction indicated by the arrow in the illustration to install the inside handle.
| 17. INSTALL REAR DOOR TRIM BOARD SUB-ASSEMBLY LH |
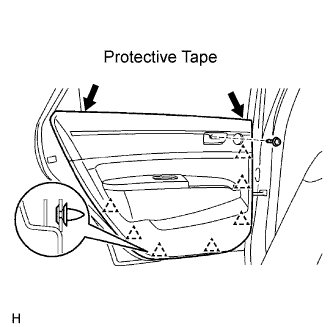 |
Attach the 7 clips and install the trim board.
Install the screw.
| 18. INSTALL REAR DOOR ARMREST UPPER BASE PANEL LH |
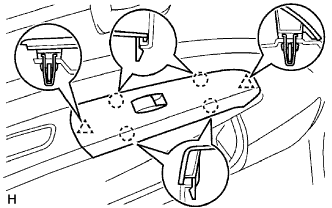 |
| 19. INSTALL DOOR PULL HANDLE |
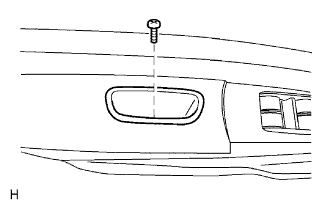 |
Install the pull handle with the screw.
| 20. INSTALL REAR DOOR INSIDE HANDLE BEZEL LH |
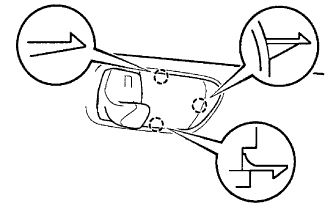 |
Attach the 3 claws to install the bezel.
| 21. CONNECT CABLE TO BATTERY NEGATIVE TERMINAL |
| 22. INSTALL NO. 3 REAR FLOOR BOARD ASSEMBLY |
| 23. INSTALL REAR DECK FLOOR BOX |
| 24. INSTALL NO. 2 REAR FLOOR BOARD |
| 25. INSPECT SRS WARNING LIGHT |
Inspect the SRS warning light (Click here).
| 26. PERFORM INITIALIZATION |
Perform initialization (Click here).