STEERING CONTROL ECU > REMOVAL |
| 1. PRECAUTION |
| 2. REMOVE NO. 2 REAR FLOOR BOARD |
| 3. REMOVE REAR DECK FLOOR BOX |
| 4. REMOVE NO. 3 REAR FLOOR BOARD ASSEMBLY |
| 5. DISCONNECT BATTERY NEGATIVE TERMINAL |
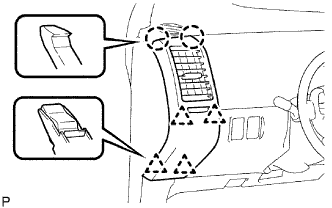
| 6. REMOVE NO. 1 INSTRUMENT PANEL REGISTER ASSEMBLY |
|
Detach the 2 claws and 4 clips, and remove the instrument panel register.
| 7. REMOVE INSTRUMENT PANEL FINISH LOWER PANEL SUB-ASSEMBLY |
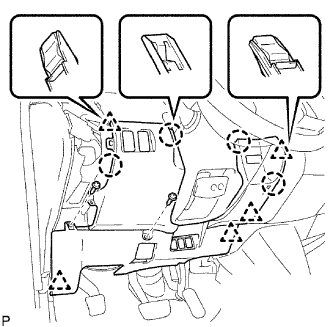 |
Remove the 2 screws.
Disconnect the hood lock control cable.
Detach the 4 claws and 5 clips.
Disconnect all connectors and remove the instrument panel finish panel.
| 8. REMOVE INSTRUMENT PANEL FINISH UPPER PANEL SUB-ASSEMBLY |
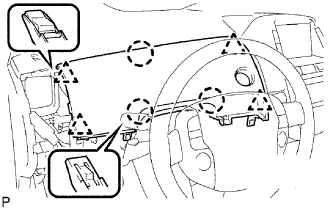 |
Detach the 3 claws and 4 clips.
Disconnect the connector and remove the instrument panel finish panel.
| 9. REMOVE NO. 3 INSTRUMENT PANEL REGISTER ASSEMBLY |
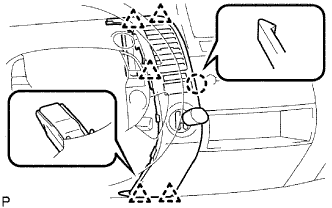 |
Detach the claw and 5 clips.
Disconnect the connector and remove the instrument panel register.
| 10. REMOVE NO. 4 INSTRUMENT PANEL REGISTER ASSEMBLY |
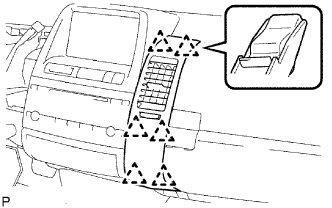 |
Detach the 6 clips and remove the instrument panel register.
| 11. REMOVE NO. 2 INSTRUMENT PANEL REGISTER ASSEMBLY |
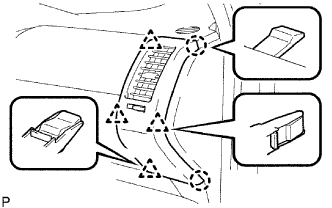 |
Detach the 2 claws and 4 clips, and remove the instrument panel register.
| 12. REMOVE MULTI-DISPLAY ASSEMBLY |
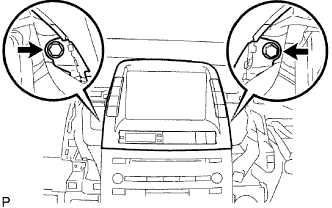 |
Remove the 2 bolts.
Disconnect the connector and remove the multi-display.
| 13. REMOVE GLOVE COMPARTMENT DOOR STOPPER SUB-ASSEMBLY |
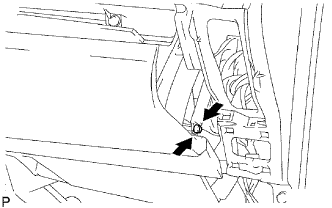 |
Holding the part indicated in the illustration, remove the glove compartment door stopper from the glove compartment door.
| 14. REMOVE GLOVE COMPARTMENT DOOR ASSEMBLY |
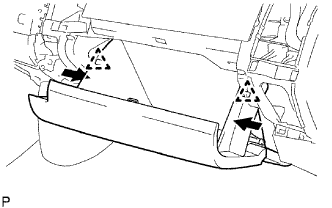 |
While pushing in the sides of the glove compartment door as indicated by the arrows in the illustration, open the door to release it from the 2 stoppers.
Open the door until it is horizontal.
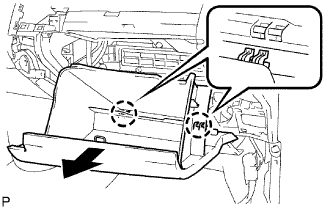 |
Pull the glove compartment door toward the rear of the vehicle to detach the 2 hinges and remove the glove compartment door.
| 15. REMOVE GLOVE COMPARTMENT DOOR |
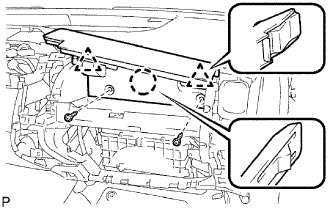 |
Remove the 2 screws.
Detach the claw and 2 clips, and remove the glove compartment door.
| 16. REMOVE INSTRUMENT PANEL NO. 1 SPEAKER PANEL SUB-ASSEMBLY (JBL Sound System) |
| 17. REMOVE FRONT PILLAR GARNISH CORNER PIECE LH |
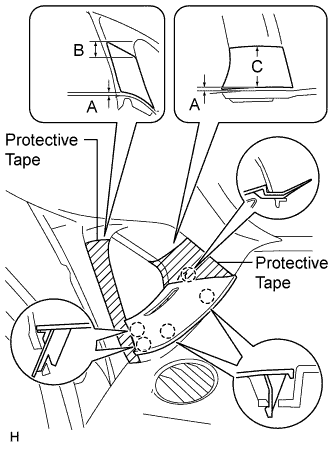 |
Put protective tape as shown in the illustration.
| Area | Specified Condition |
| A | 2.0 mm (0.079 in.) |
| B | 10.0 mm (0.394 in.) |
| C | 50.0 mm (1.969 in.) |
Attach the 5 claws to install the corner piece.
| 18. REMOVE FRONT PILLAR GARNISH CORNER PIECE RH |
| 19. REMOVE FRONT PILLAR GARNISH LH |
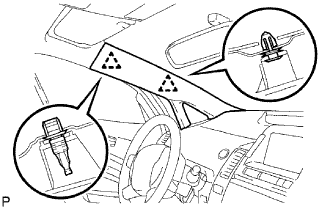 |
w/o Curtain Shield Airbag:
Using a screwdriver, detach the 2 clips and remove the pillar garnish.
w/ Curtain Shield Airbag:
Remove the pillar garnish.
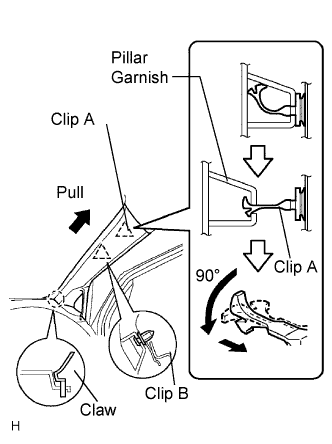 |
Pull the pillar garnish so that clip B detaches, the base of clip A detaches, and the tip of clip A locks in the pillar garnish's hole.
Using needle-nose pliers, rotate clip A 90°. Then pull the pillar garnish to release the tip of clip A from the pillar garnish.
Pull the pillar garnish in the direction indicated by the arrow in the illustration to detach the claw.
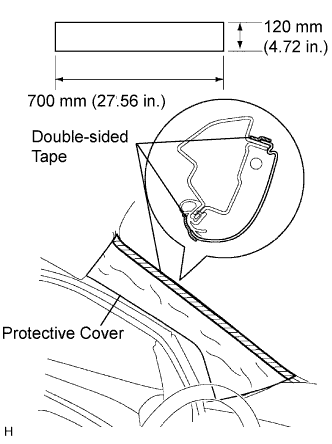 |
w/ Curtain Shield Airbag:
Protect the curtain shield airbag LH.
Thoroughly cover the airbag with cloth or nylon that is approximately 700 mm (27.56 in.) x 120 mm (4.72 in.) and fix the ends of the cover with double-sided tape, as shown in the illustration.
| 20. REMOVE FRONT PILLAR GARNISH RH |
| 21. REMOVE PASSENGER AIRBAG CONNECTOR |
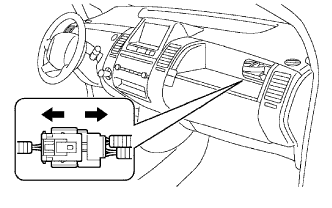 |
Disconnect the front passenger airbag connector.
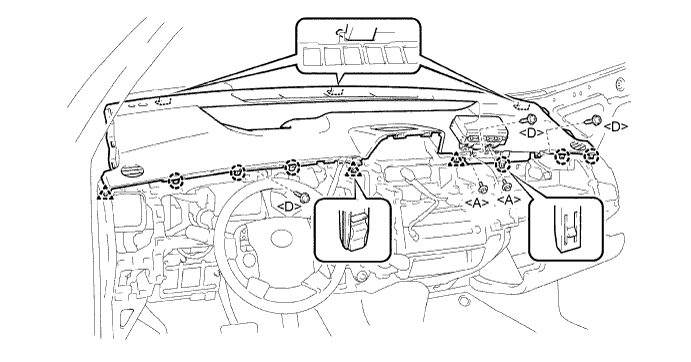
| 22. REMOVE INSTRUMENT PANEL SAFETY PAD ASSEMBLY |
Remove the 3 screws.
Remove the 2 bolts.
Pull up the instrument panel to detach the 6 claws and 3 clips.
Remove the instrument panel.
| 23. REMOVE POWER STEERING ECU |
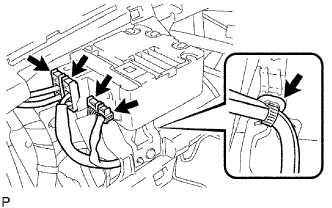 |
Separate the torque sensor wire harness clamp from the ECU.
Disconnect the 4 ECU connectors.
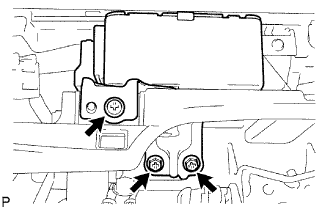 |
Remove the 3 screws and ECU.