HYBRID / BATTERY CONTROL HV RELAY ASSEMBLY REMOVAL
PROCEDURE

 1. PRECAUTION
G3834
2.REMOVE SERVICE PLUG GRIP
3.REMOVE REAR SEAT CUSHION ASSEMBLY (for Separate Type Seatback)
4.REMOVE REAR SEAT CUSHION ASSEMBLY (for Bench Type Seatback)
71033
5.REMOVE REAR SEAT CUSHION LEG SUB-ASSEMBLY
G9223
6.REMOVE INVERTER TERMINAL COVER
G9221
7.REMOVE INVERTER COVER
8.CHECK TERMINAL VOLTAGE
G9221
9.INSTALL INVERTER COVER
G9223
10.INSTALL INVERTER TERMINAL COVER
899A0B
11.REMOVE NO. 3 INDOOR ELECTRICAL KEY ANTENNA ASSEMBLY
G92F1
12.REMOVE NO. 1 HYBRID BATTERY EXHAUST DUCT
G92N1A
13.REMOVE NO. 1 HYBRID VEHICLE BATTERY COVER PANEL LH
- CAUTION:
-
Wear insulated gloves.
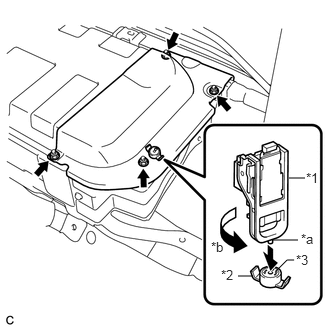
Using the service plug grip, remove the battery cover lock striker.
| *1 | Service Plug Grip |
| *2 | Battery Cover Lock Striker |
| *3 | Button |
| *a | Projection |
| *b | Turn |
- HINT:
-
Insert the projection part of the service plug grip, and turn the button of the battery cover lock striker counterclockwise, and release the lock.
Remove the 4 nuts and No. 1 hybrid vehicle battery cover panel LH.
82164
14.DISCONNECT FRAME WIRE
- CAUTION:
-
Wear insulated gloves.
- NOTICE:
-
Insulate the disconnected connectors with insulating tape.
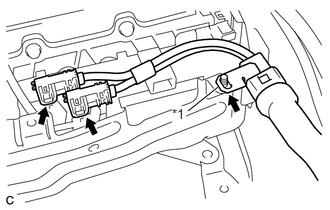
Disconnect the 2 connectors shown in the illustration.
| *1 | Shielded Wire Ground |
Disconnect the shielded wire ground and frame wire.
G920R
15.REMOVE NO. 2 HYBRID BATTERY SHIELD SUB-ASSEMBLY
- CAUTION:
-
Wear insulated gloves.
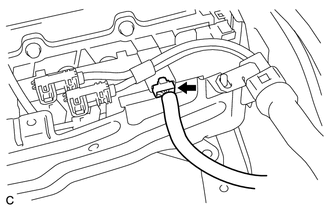
Disconnect the connector.
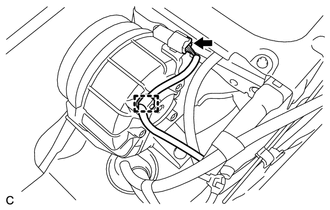
Disconnect the connector and clamp.
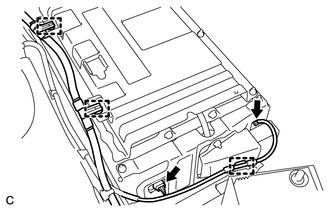
Disconnect the 2 connectors and 3 clamps.
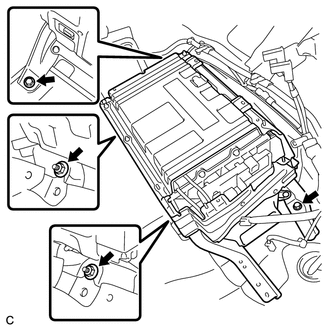
Remove the 2 bolts and 2 nuts.
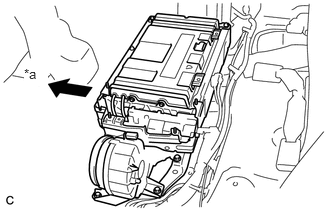
Move the HV battery toward the front of the vehicle.
| *a | Front of Vehicle |
- HINT:
-
Move the HV battery to a position where both the No. 2 hybrid battery shield sub-assembly and the hybrid battery junction block assembly can be removed.
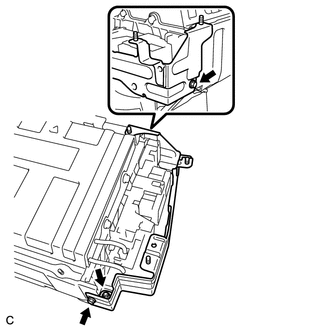
Remove the 2 bolts, nut and No. 2 hybrid battery shield sub-assembly.
G92Z0
16.REMOVE HYBRID BATTERY JUNCTION BLOCK ASSEMBLY
- CAUTION:
-
Wear insulated gloves.
- NOTICE:
-
Insulate the disconnected terminals with insulating tape.
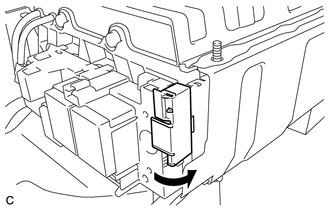
Open the terminal cover.
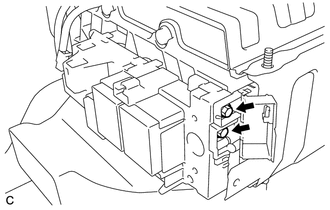
Using an insulated tool, remove the 2 bolts.
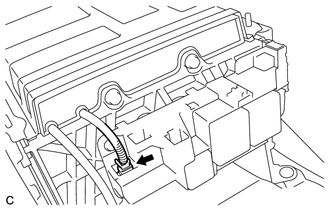
Disconnect the connector.
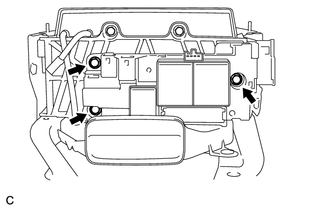
Remove the 3 bolts and hybrid battery junction block assembly.