POWER DISTRIBUTION MAIN BODY ECU REMOVAL
PROCEDURE

 1.REMOVE LOWER INSTRUMENT PANEL SUB-ASSEMBLY
82141
2.REMOVE INSTRUMENT PANEL WIRE
Remove the bolt.
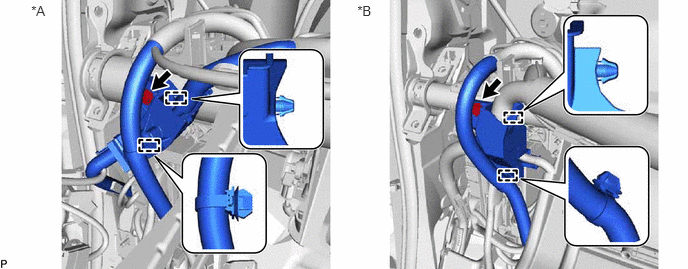
| *A | for LHD: | *B | for RHD: |
Disengage the 2 clamps and disconnect the instrument panel wire.
3.REMOVE INSTRUMENT PANEL JUNCTION BLOCK ASSEMBLY (for LHD)
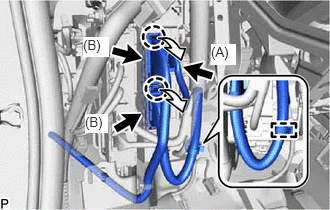
Disengage the clamp.
Disconnect the connector (A).
Disengage the 2 claws and disconnect the 2 connectors (B).
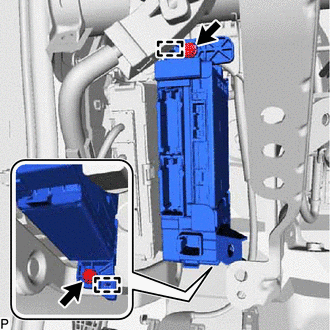
Remove the 2 bolts.
Disengage the 2 clamps and pull out the instrument panel junction block assembly.
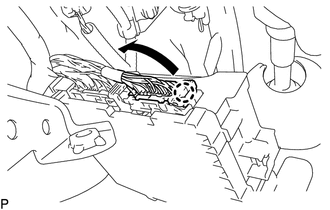
Disengage the claw and disconnect the connector as shown in the illustration.
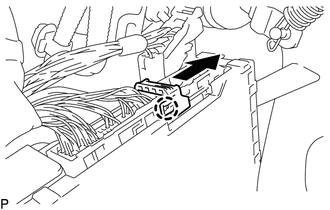
Disengage the claw and release the connector lock as shown in the illustration.
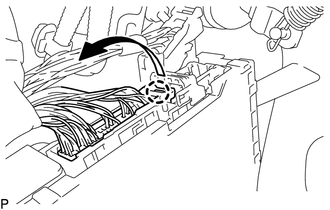
Disengage the claw and disconnect the connector as shown in the illustration to remove the instrument panel junction block assembly.
4.REMOVE INSTRUMENT PANEL JUNCTION BLOCK ASSEMBLY (for RHD)
for Halogen Headlight:
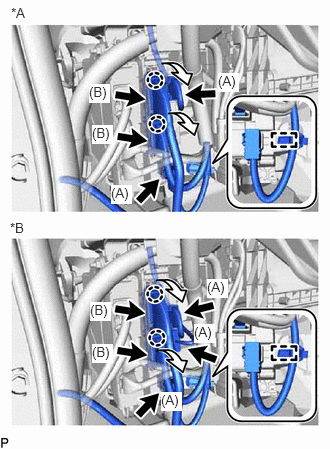
Disconnect the 2 connectors (A).
| *A | for Halogen Headlight: |
| *B | for LED Headlight: |
for LED Headlight:
Disconnect the 3 connectors (A).
Disengage the 2 claws and disconnect the 2 connectors (B).
Disengage the clamp.
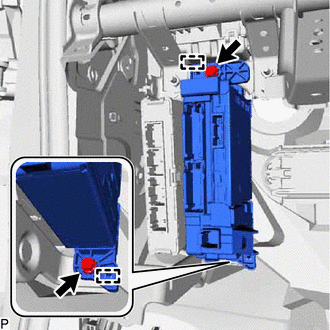
Remove the 2 bolts.
Disengage the 2 clamps and pull out the instrument panel junction block assembly.
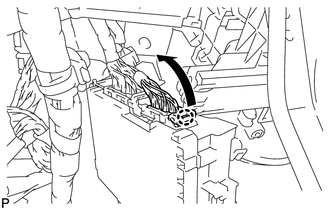
Disengage the claw and disconnect the connector as shown in the illustration.
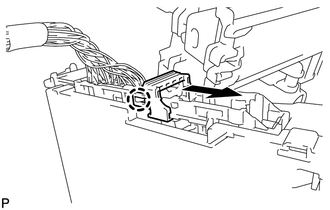
Disengage the claw and release the connector lock as shown in the illustration.
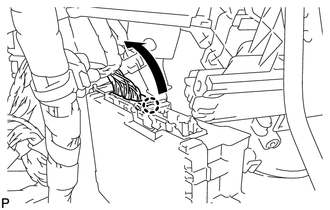
Disengage the claw and disconnect the connector as shown in the illustration to remove the instrument panel junction block assembly.
89221
5.REMOVE MAIN BODY ECU (MULTIPLEX NETWORK BODY ECU)
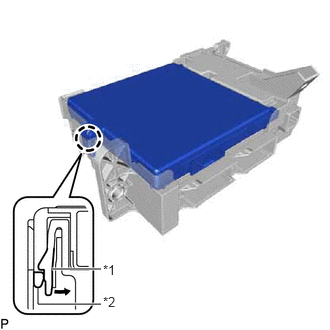
Press the claw of the junction block as shown in the illustration to release the lock.
| *1 | Instrument Panel Junction Block |
| *2 | Main Body ECU (Multiplex Network Body ECU) |
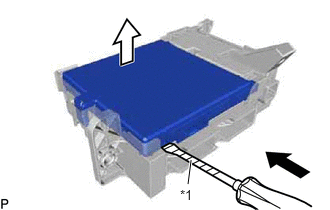
With the junction block lock released, insert a screwdriver with its tip wrapped with protective tape horizontally between the main body ECU (multiplex network body ECU) and junction block.
| *1 | Protective Tape |
- NOTICE:
- ·
Use a screwdriver with a diameter of between 5.0 mm (0.197 in.) and 6.3 mm (0.248 in.) and a length of approximately 90 mm (3.54 in.)
·Do not insert the screwdriver under the connector socket of the main body ECU (multiplex network body ECU).
Using the screwdriver, carefully raise the main body ECU (multiplex network body ECU) up to the position where the connector becomes disengaged.
- NOTICE:
-
Do not twist the screwdriver to raise the main body ECU (multiplex network body ECU).
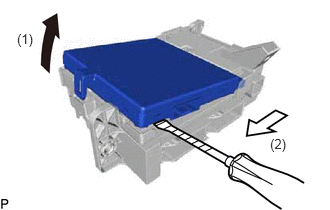
Raise the main body ECU (multiplex network body ECU) as shown by the arrow (1), and then pull it out as shown by the arrow (2) in the illustration.
- NOTICE:
-
Do not touch the ECU connector.