LIGHTING (EXT) REAR COMBINATION LIGHT ASSEMBLY REMOVAL
CAUTION / NOTICE / HINT
- HINT:
- ·
Use the same procedure for the RH side and LH side.
·The following procedure is for the LH side.
PROCEDURE

 81560
1.REMOVE REAR COMBINATION LIGHT ASSEMBLY
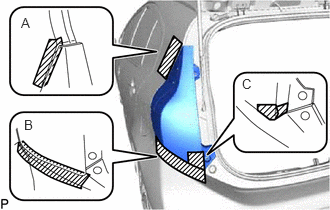
Apply protective tape, as shown in the illustration.

|
Protective Tape |
- HINT:
- ·
As shown in illustration A, while inserting protective tape into the gap between the body and the rear combination light assembly, adhere the tape to the body side.
·As shown in illustration B, while inserting protective tape into the gap between the rear bumper assembly and the rear combination light assembly, adhere the tape to the upper surface of the rear bumper assembly.
·As shown in illustration C, while inserting protective tape into the gap between the rear bumper assembly and the rear combination light assembly, adhere the tape to the rear combination light assembly to cover the area from the tip to the far part of the inner side.
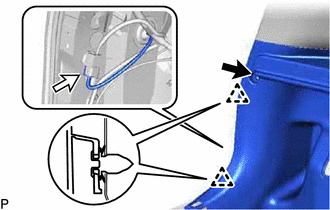
Remove the bolt.
Disengage the 2 clips.
Pull the deck trim side panel assembly until the connector of the rear combination light assembly can be seen.
Disconnect the connector.
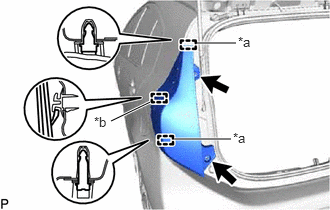
Remove the 2 bolts.
| *a | Pin |
| *b | Guide |
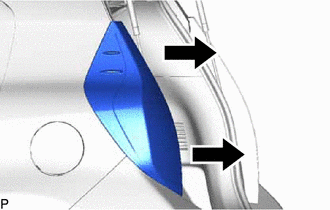
Pull the upper surface of the rear combination light assembly towards the rear of the vehicle and disengage the pin on the upper side.
- HINT:
-
If the pin cannot be easily disengaged, insert a clip remover wrapped in protective tape into the gap between the upper surface of the rear combination light assembly and the body, and disengage the pin.
Pull the lower surface of the rear combination light assembly towards the rear of the vehicle and disengage the pin on the lower side and the guide.
- NOTICE:
-
To prevent the rear combination light assembly from springing out and falling when it is disengaged, place your hand on top of the rear combination light assembly and press down gently.
- HINT:
-
If the pin cannot be easily disengaged, place your hand against the side of the rear combination light assembly, press it outward towards the rear of the vehicle and disengage the pin.
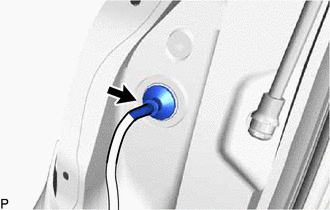
Disengage the grommet and remove the rear combination light assembly.