EXTERIOR PANELS / TRIM REAR BUMPER(w/ Wheel Opening Moulding) REMOVAL
PROCEDURE

 52592
1.REMOVE REAR BUMPER SIDE SEAL LH

Using a clip remover, remove the 4 clips and rear bumper side seal LH.
52591
2.REMOVE REAR BUMPER SIDE SEAL RH
- HINT:
-
Use the same procedure as for the LH side.
75606B
3.DISCONNECT QUARTER OUTSIDE MOULDING SUB-ASSEMBLY LH


|
Protective Tape |
Apply protective tape around the quarter outside moulding sub-assembly LH as shown in the illustration.

Remove the screw.

Disengage the 4 claws by pushing the area indicated by arrow in the illustration with a finger.
- NOTICE:
-
To avoid damaging the claws, do not forcibly pull the quarter outside moulding sub-assembly LH.
Disengage the 2 clips to disconnect the quarter outside moulding sub-assembly LH from the rear bumper assembly.
75605B
4.DISCONNECT QUARTER OUTSIDE MOULDING SUB-ASSEMBLY RH
- HINT:
-
Use the same procedure as for the LH side.
58398J
5.REMOVE NO. 1 FLOOR UNDER COVER
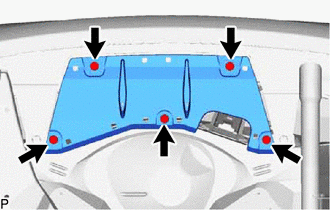
Using a clip remover, remove the 5 clips from the No. 1 floor under cover.
52461D
6.REMOVE REAR BUMPER CUSHION

Using a T30 "TORX" socket wrench, remove the 2 rear bumper cushions.
7.REMOVE REAR BUMPER ASSEMBLY

|
|
Protective Tape |
Apply protective tape around the rear bumper assembly as shown in the illustration.
- HINT:
- ·
As shown in illustration (A), while inserting protective tape into the gap between the rear bumper assembly and the rear combination light assembly, adhere the tape to the upper surface of the rear bumper assembly.
·As shown in illustration (B), while inserting protective tape into the gap between the rear bumper assembly and the rear combination light assembly, adhere the tape to the rear combination light assembly to cover the area from the tip to the far part of the inner side.

Using a clip remover, remove the 4 clips.

Disengage the 5 claws as shown in the illustration.
- HINT:
-
Use the same procedure for the RH side and LH side.

Disengage the 2 claws to remove the rear bumper assembly as shown in the illustration.