HYBRID / BATTERY CONTROL INVERTER WITH CONVERTER REMOVAL
PROCEDURE

 1. PRECAUTION
G3834
2.REMOVE SERVICE PLUG GRIP
51441
3.REMOVE NO. 1 ENGINE UNDER COVER
4.DRAIN COOLANT (for Inverter)
53289A
5.REMOVE RADIATOR SUPPORT OPENING COVER
G9214
6.REMOVE NO. 1 INVERTER BRACKET
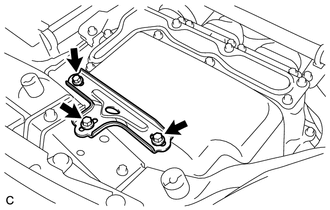
Remove the 3 bolts and No. 1 inverter bracket.
82111
7.DISCONNECT ENGINE ROOM MAIN WIRE
- NOTICE:
- ·
Insulate the disconnected terminals with insulating tape.
·Cover the hole where the cable was connected with tape or equivalent (non-residue type) to prevent entry of foreign matter.
·To prevent damage due to static electricity, do not touch the terminals of the disconnected connectors.
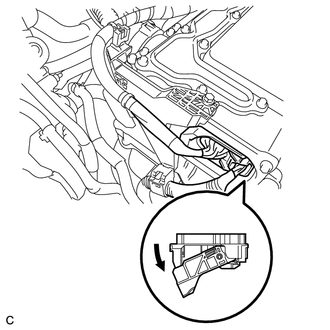
Raise the lock lever and disconnect the inverter with converter connector.
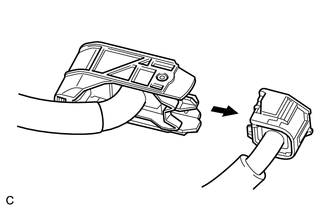
Disconnect the engine wire from the engine room main wire.
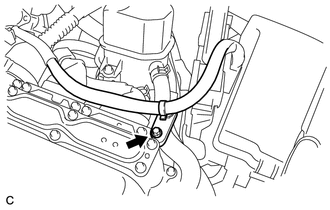
Remove the bolt.
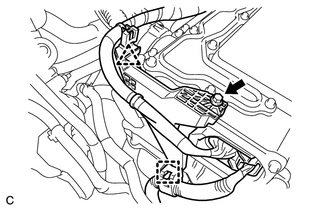
Remove the bolt from the engine room main wire.
Disconnect the clamp and clip, and separate the engine room main wire.
G9221
8.REMOVE INVERTER COVER
- CAUTION:
-
Wear insulated gloves.
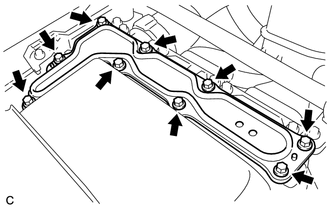
Remove the 9 bolts and inverter cover.
- NOTICE:
-
Make sure to pull the inverter cover straight up, as a connector is connected to the bottom of the cover.
9.CHECK TERMINAL VOLTAGE
- CAUTION:
-
Wear insulated gloves.
- NOTICE:
-
Do not allow any foreign matter or water to enter the inverter with converter assembly.
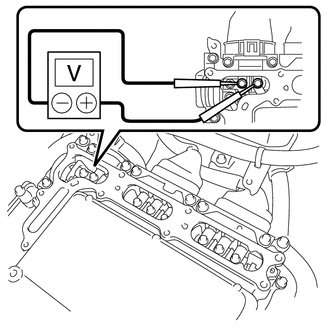
Using a voltmeter, measure the voltage between the terminals of the 2 phase connectors.
- Standard voltage:
0 V
- HINT:
-
Use measuring range of DC 750 V or more on the voltmeter.
82164
10.DISCONNECT FRAME WIRE
- CAUTION:
-
Wear insulated gloves.
- NOTICE:
- ·
Insulate the disconnected terminals with insulating tape.
·Cover the hole where the cable was connected with tape or equivalent (non-residue type) to prevent entry of foreign matter.
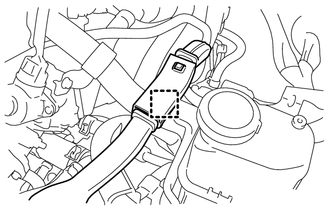
Disconnect the harness clamp.
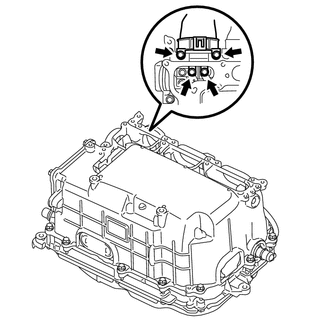
Remove the 4 bolts, and disconnect the frame wire (high voltage cables of the hybrid battery) from the inverter with converter assembly.
G2148
11.DISCONNECT GENERATOR CABLE
- CAUTION:
-
Wear insulated gloves.
- NOTICE:
- ·
Insulate the disconnected terminals with insulating tape.
·Cover the hole where the cable was connected with tape or equivalent (non-residue type) to prevent entry of foreign matter.
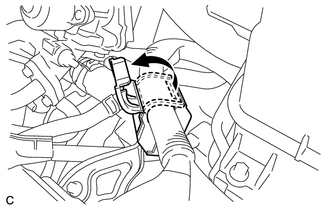
Turn back the wire harness cover and release the generator cable.
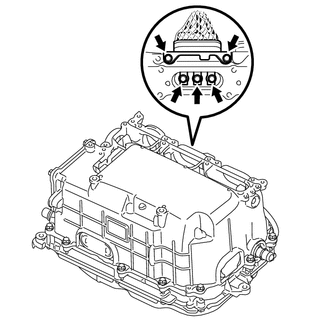
Remove the 5 bolts, and disconnect the high voltage cables of the generator cable (MG1) from the inverter with converter assembly.
G1148
12.DISCONNECT MOTOR CABLE
- CAUTION:
-
Wear insulated gloves.
- NOTICE:
- ·
Insulate the disconnected terminals with insulating tape.
·Cover the hole where the cable was connected with tape or equivalent (non-residue type) to prevent entry of foreign matter.
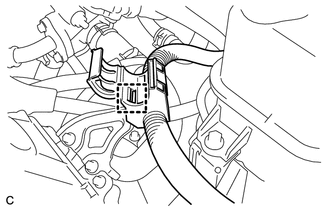
Disconnect the harness clamp.
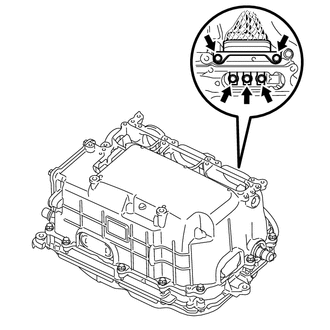
Remove the 5 bolts, and disconnect the high voltage cables of the motor cable (MG2) from the inverter with converter assembly.
82122
13.DISCONNECT NO. 2 ENGINE WIRE
- CAUTION:
-
Wear insulated gloves.
- NOTICE:
- ·
Insulate the disconnected terminals with insulating tape.
·Cover the hole where the cable was connected with tape or equivalent (non-residue type) to prevent entry of foreign matter.
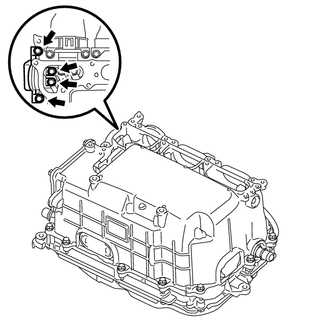
Remove the 4 bolts, and disconnect the No. 2 engine wire (high voltage cables for the air conditioning compressor) from the inverter with converter assembly.
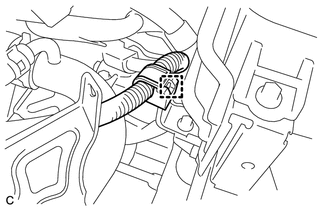
Disconnect the harness clamp.
G9221
14.INSTALL INVERTER COVER
- CAUTION:
-
Wear insulated gloves.
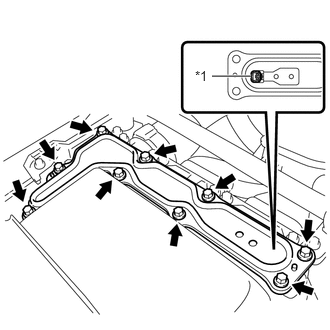
Temporarily install the inverter cover with the 9 bolts to prevent any foreign or water from entering the inverter with converter assembly.
| *1 | Interlock |
- NOTICE:
- ·
Make sure that the interlock is fully engaged.
·Do not allow any foreign or water to enter the inverter with converter assembly.
82112
15.DISCONNECT NO. 2 ENGINE ROOM WIRE
Remove the relay block cover.
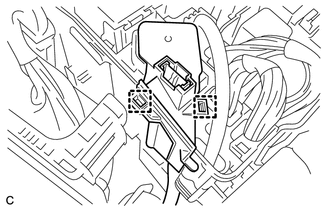
Release the 2 clamps, and remove the No. 1 relay block cover.
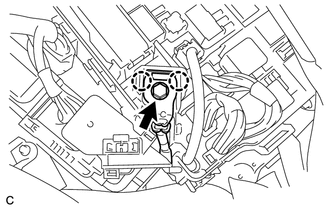
Remove the bolt from the No. 2 engine room wire.
Release the 2 claws, and disconnect the No. 2 engine room wire.
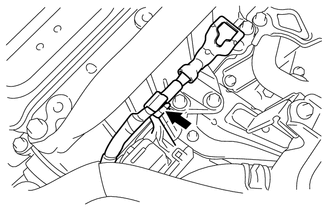
Connect the No. 2 engine room wire to the protector.
16.DISCONNECT WATER HOSE
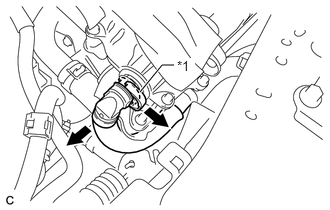
Release the retainer and disconnect the water hose from the inverter with converter assembly.
| *1 | Retainer |
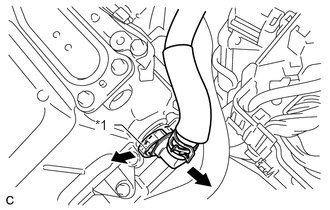
Release the retainer and disconnect the water hose from the inverter with converter assembly.
| *1 | Retainer |
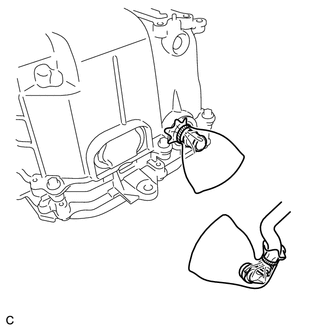
Put pieces of cloth into the pipes and in the disconnected hoses, or cover the pipes and hoses with plastic bags as shown in the illustration to prevent foreign matter from entering the cooling system and to prevent coolant from spilling near the inverter with converter assembly.
G9200
17.REMOVE INVERTER WITH CONVERTER ASSEMBLY
- CAUTION:
-
Wear insulated gloves.
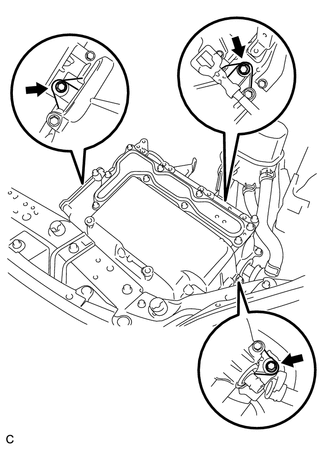
Remove the 3 bolts and inverter with converter assembly.
- NOTICE:
- ·
Since the inverter with converter assembly is very heavy, 2 people are needed to remove the inverter with converter assembly. When removing the inverter with converter assembly, do not damage the parts around it.
·To prevent damage, do not hold the inverter with converter assembly by the connectors.
·To prevent damage due to static electricity, do not touch the terminals of the disconnected connectors.
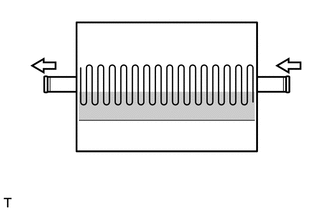
Even after the coolant is drained, coolant remains in the inverter due to its internal structure. Therefore, seal or cover the pipes when removing the inverter so that coolant does not spill out.
G1143
18.REMOVE MOTOR CABLE BRACKET
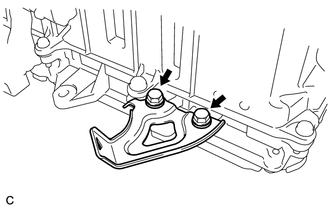
Remove the 2 bolts and motor cable bracket.
19.REMOVE HIGH VOLTAGE FUSE
- CAUTION:
-
Wear insulated gloves.
- HINT:
-
Perform this procedure only when replacement of the high voltage fuse is necessary.
Remove the 9 bolts and inverter cover.
- NOTICE:
-
Make sure to pull the inverter cover straight up, as a connector is connected to the bottom of the cover.
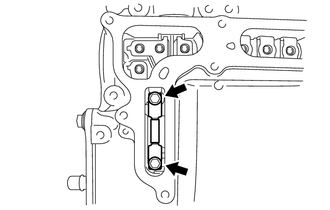
Remove the 2 bolts and high voltage fuse from the inverter with converter assembly.
- NOTICE:
-
Do not allow any foreign or water to enter the inverter with converter assembly.
Temporarily install the inverter cover with the 9 bolts to prevent any foreign or water from entering the inverter with converter assembly.
| *1 | Interlock |
- NOTICE:
- ·
Make sure that the interlock is fully engaged.
·Do not allow any foreign or water to enter the inverter with converter assembly.
82112
20.REMOVE NO. 2 ENGINE ROOM WIRE
- HINT:
-
Perform this procedure only when replacement of the No. 2 engine room wire is necessary.
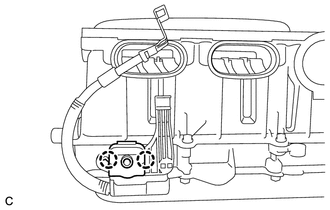
Disengage the 2 claws and open the terminal cover.
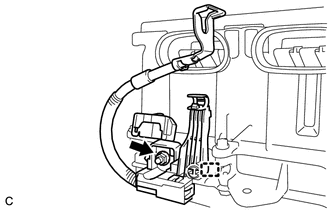
Remove the nut from the No. 2 engine room wire.
Disengage the clamp and remove the No. 2 engine room wire from the inverter with converter assembly.